Have you ever wanted to showcase a truly SWEET design on your nails, but were never sure how to pull it off? Well now you can with this EASY Cupcake Nail Design you can do yourself.

How to create a Cupcake Nail Design
Create this Deliciously SWEET Cupcake Nail Design easily following my step by step tutorial.

Creating a Cupcake Nail Design like I did in the photo above is so easy to do. Yes they may make you crave the sweetness of a Cupcake every time you look at them, but at least they have no calories - lol.
You can create your Cupcake Nails in any colors you would like that is what makes creating these so much fun - Once you have the technique down you can change them up often or do a different cupcake on every nail.
This Cupcake Nail Design was done in 10 EASY steps and I am going to share those with you right here.
What you will need to create your Cupcake Nail Designs
To create your Cupcake Nail design you will need the following:
**I will share what I used, but again you can change up the colors to your likes**
- Pink Nail Polish - This is what I used for the background of my nails. When choosing your color make sure it will be lighter than the colors you choose for your cupcake wrapper so that stands out.
- Purple Nail Polish - My favorite color is purple so I decided I would do a purple cupcake wrapper for my cupcakes - it was the obvious choice for me !!
- Lavender Art Deco Nail Polish - To create the thin lines on your cupcake wrapper you will want a color lighter than the base. I chose a lavender to contrast with my darker purple. I used the Art Deco Nail Polish which has a very thin brush that allows you to create lines and other fine nail designs easy.
- White Nail Polish - I used White Nail Polish for my cupcake frosting, but of course you can use any color you wish - maybe you like chocolate frosting or Strawberry frosting - if that is your thing then have fun and change it up.
- Rainbow Colored Nail Polishes - For my sprinkles (you gotta have sprinkles) I chose to use bright colors such as; Blue, Orange, Yellow, Green and Hot Pink. Again the choice is yours !!
- Red Nail Polish - You cannot have a cupcake without a Cherry on top right? Well at least I can't so I used some Red Nail Polish to create my cherry.
- Nail Dotting Tools - These are what I used to create my cupcake frosting, sprinkles and cherry on my cupcakes. You will need these - they really help with the entire process to get a great looking cupcake design.
- Clear Top Coat - It is important to finish off your cupcake nails with a clear top coat top not only protect your design, but to make it shine !!
- Nail Polish Remover and Q-Tips for edge clean up
What I love about this Cupcake Nail Design is that you can be so creative with the colors. So have fun with it and get creative. This was my first time doing this design and I have so many fun ideas in my head for when I do it the next time to change things up.


10 EASY steps to create a Cupcake Nail Design
Step 1: Polish your Nails with your Base Nail Polish (mine is pink) - usually 2 coats is best. Let dry.
Step 2: Take your cupcake wrapper color (mine is purple) and create a "V" as shown in photo 2. This is the start of your cupcake wrapper.
Step 3: Fill in that "V" shape as shown in photo 3. You can go over it with a 2nd coat if needed. Let dry.
Step 4: Using the Art Deco Nail Polish with the thin brush (mine is lavender) create strips on your cupcake wrapper. I did about 4 on each of mine and I thought that was plenty. Let dry.
Step 5: Time to frost our cupcake !! Using your Nail Dotting Tools pick one out with a larger end. I pour some of my white nail polish in small amounts on a paper plate to dip it into. Then dip the round end in and add 3 large dots as you see in photo 5.
Step 6: Using that same doting tool add 2 more dots to connect it all and fill in as shown in photo 6. It will be thick, but once the top coat goes on later it will smooth it all out. Let dry - which may take a bit of time due to the thickness of the frosting.
Step 7: Add some sprinkles. I used one of the very small dotting tools to create my sprinkles. You can do just dots or make longer sprinkles like I did. I just dipped my dotting tool into one color nail polish at a time and created the sprinkles. So basically if I am doing orange - I will dip and create a sprinkle on all the nails and then move to the next color.
Step 8: Add a Cherry on top !! Take your Red Nail Polish and a larger Nail Dotting Tool and dip into your polish and add a cherry to each of your cupcakes.
Step 9: Add some detail to your cherry to make it look like it is shiny. I just tool a very small Nail Dotting Tool and made a very thin white line of the side of my cherry. If you mess up and make it too think just go back with some red to touch it up.
Step 10: Once your nails are dry add your Clear Top Coat to shine them up and protect your cute cupcakes !!
WoW is that easier than you thought or what? and so darn cute too.
Of course you can glitz them up with some glitter polish if you like - I did not add any to mine just yet, but I may next time !!
So what do you think? Do you see Cupcakes on your nails in the near future?
Clean up those edges !!
There is nothing worse than spending all this time creating a great nail design and then having nail polish all over your fingers - it happens. Don't make you hard work look icky - clean up around those edges to showcase your design not your mess.
When I clean up around my nails I loves these Nail Tees Q-Tips which are just like Q-Tips, but they have a pointed tip to make getting around the nails so much easier and you have to worry less about removing half your nail design.
Another item I love is the Nail Polish Remover Pump Dispensers which allow you to dispense your nail polish remover in small amounts and is less wasteful.


So the day I did my Cupcake Nail Design my 11 year old daughter came home from school and was in awe. She loved them and wanted me to do some on her.
So I did just that, but it was not easy - she bites her nails and I did not have much room to work with, but I did it. I changed up the colors to what she wanted and I think they came out equally adorable.
❤ I love the side by side photo - Baby Cakes & Momma Cakes ❤
Take a look at my other Nail Art Pages for even more FUN !!


Updated: 04/26/2012, ThePartyAnimal
You might also like
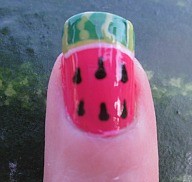
How to create a Watermelon Nail DesignCreate this SWEET Watermelon Nail Design by following my easy step by step tu...
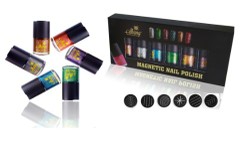
Magnetic Nail Polish - The New Rage in Nail PolishThe hot new trend in nail polish is magnetic nail polish with actual metal fl...
Disclosure: This page generates income for authors based on affiliate relationships with our partners, including Amazon, Google and others.


 How to create a Mike and Sully Nail Designon 06/20/2013
 How to create a Ladybug Nail Designon 03/27/2012
Cupcake Nail Talk right here!!
You're killin' me with cuteness today! These are ADORABLE!
@katiem2 Thank you so much - gotta do some more - stay tuned....
I love all your amazing nail designs, my daughters love your nail pages and tutorials, they are fantastic. Thanks so much for the added cupcake nail design. I have got to take the time to pin and tweet, doing so now :)
Amazing cupcake nails! Love them. You must have some patience there. I'm not into make-up but I do love painting my nails. Very cool.