How To Create And Tile An Image With GIMP For Beginners

by Paul

Perhaps you need a large, tiled image for a background? With GIMP, it's very easy to design and create your own!

Sometimes it's difficult finding that specific pattern you need for whatever it is you may be doing. Hours of searching through public domain images may result in being fruitless - why not create the pattern you desire yourself?

It sounds daunting, especially if you've never created anything before, but with only a basic understanding of GIMP, you can quickly create and tile an image.

If you're unsure about any of the basics of GIMP, you can find out about them here.

Before We Start

Just as a quick side note, as you may be aware, GIMP stands for GNU Image Manipulation Program which means that technically it's not built to "create" designs per se. It's possible, but might be more work. 

I'll illustrate how to create a pattern that can be tiled, but bear in mind that it may be easier to craft it in a program designed for image creation and then tile it in GIMP rather than do it all in GIMP.

My Tile

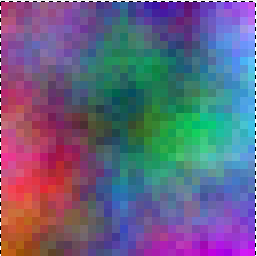
The tile I'm going to be creating is 32x32 pixels. I've chosen a rather small size purely for the sake of being able to show it effectively within the space of this article. Any shape will do just fine. I tend to find that squares are the most effective, but there's no harm in playing around!

I've also purposefully opted to choose a pattern that won't perfectly tile without some help, so you may find yourself skipping a few steps - especially if your image doesn't reach the edge of the tile.

Tile

The above image is what I'm starting with. You'll perhaps notice that there's absolutely no chance of it tiling effectively. You'd be correct. If you're unaware as to why, the top and bottom need to align as well as the left and right sides. Obviously this pattern isn't going to work, so let's manipulate it so it does.

If you're wanting to know how I created the image, I simply generated plasma. This can be done by going to Filters -> Render -> Clouds -> Plasma... this will then give you a dialogue box - just click "Ok".

Fixing A Pattern So It Tiles Effectively

There's many ways to do this, but the most fool-proof I've found (especially when using randomly generated patterns like I am) I'll explain below. There certainly are quicker ways, but they're only for specific types of pattern and won't cover all cases whereas this method does.

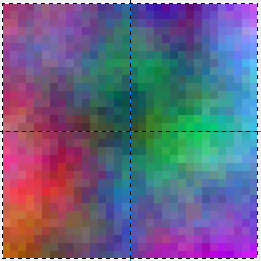
First, drag a guideline down the middle of your image both horizontally and vertically. This is done by clicking and dragging the tape measures above and to the left of your canvas.

Tape measure

The good thing about these guidelines is that your tools will snap onto them. This means it's much easier when trying to only work with a certain, specific part of an image. Once you've dragged your guidelines across your image, it should look akin to the following.

Guidelines in place

Use the Rectangle Select Tool (R) to select one of the four quarters. I chose the bottom left as it seems as if it will create a more interesting tile pattern. If you're not happy with either of them, you can re-apply plasma and it will generate differently.

Once you've done this, copy and paste that selection. While you still have the new, copied quarter selected, use the Flip Tool (Shift + F) to flip the selection so that the same corner is facing the centre of the image.

You're going to need to change the Flip Tool's settings so that you can flip the selection both vertically and horizontally. This is done underneath the tools in the toolbox (CTRL+B if you've accidentally closed it). You can also hold CTRL and click.

Use the Move Tool (M) to align the newly flipped quarter with the rest of the image. This should be easy to do - especially with the guidelines.

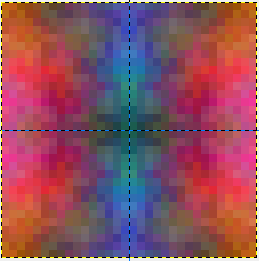
Repeat this for the remaining parts of the pattern, though you shouldn't need to re-select the quarter and copy and paste it again as it should still be present in your clipboard. Hopefully, your image should look similar to the one below.

Tile complete

As you can see, the top and bottom match up as well as the left and right sides. If you're at this stage and it still doesn't seem like it's going to match up, you can attempt the previous step again or just continue and see how it turns out - who said asymmetry was bad?

Time To Tile

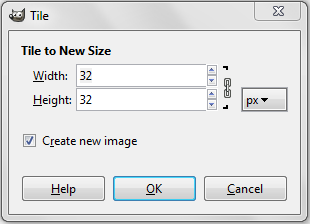
Tiling surprisingly is the easy part - GIMP has inbuilt features that make this effortless. All you have to do is go to Filters -> Map -> Tile... which will then open a dialogue box looking very similar to the one below.

Tile Dialogue

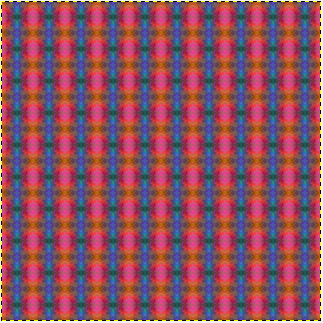
It's vital to make sure that the numbers you enter are a multiple of the original size. For example, I chose to make my final tiled pattern 320x320 pixels which is 32 multiplied by 10. If you don't make it an exact multiple, the pattern will be cut off half way through the end tiles.

I tend to keep the tick-box checked as this opens the resulting tiled pattern in a totally new GIMP window meaning that I can keep the tile file open as well as the final pattern making it easier should I want to tile it to a different size.

Final Tiled Pattern

And there we go! Okay, yes, I agree, the final tiled pattern does sort of look like it's part of a '60s wallpaper, but that's not the point. The point is how easy it was to create that '60s looking wallpaper!

Anyone could do it!

If you'd like a guide on anything, please ask below!

GIMP is a free image manipulation program which can be intimidating at first, but is an excellent and free alternative to other software such as Adobe Photoshop.
Along with making something transparent, cutting an element out of an image and placing it on another is one of the most frequently required tasks.
There's many reasons for creating your own brushes. It can seem a daunting task, but it's actually quite the opposite!
Updated: 02/09/2013, Paul
 
Thank you! Would you like to post a comment now?
9

Comments

Only logged-in users are allowed to comment. Login
Nick on 02/24/2015

Thanks man. Clear, concise, cool!

Paul on 02/02/2013

I'm glad you found it of use, 2uesday :)

Paul on 01/30/2013

Thanks Katie! It's well worth spending a while getting used to it :)

katiem2 on 01/29/2013

Great information. I will be utilizing this helpful guide create and tile images. Gimp is such a useful thing to grasp. Thanks for the knowledge. :)K

Paul on 01/25/2013

I'm glad it's working for you Hollie! You know where to come if you need to know something! :)

HollieT on 01/25/2013

Paul, I have been using your tutorials over the past couple of days to familiarise myself with GIMP, and they have been more than helpful. Now I'm going to have at bash at this. Thank you, you are slowly but surely dragging me out of the 1980's. :)


You might also like

How To Use Basic Functions In GIMP For Beginners

GIMP is a free image manipulation program which can be intimidating at first,...

How To Cut Out Parts Of A Picture In GIMP For Beginners

Along with making something transparent, cutting an element out of an image a...


Disclosure: This page generates income for authors based on affiliate relationships with our partners, including Amazon, Google and others.
Loading ...
Error!