How To Make A Dalek

by pkmcr

Thinking about Making a Dalek for one of your kids? Maybe a model for them to ride around in or even a Dalek Costume for them to go to the fancy dress party? Let's Make a Dalek!

With their chilling "Exterminate! Exterminate!" the Daleks first came to our attention in 1963 in what is now the immensely popular science fiction based television series Doctor. Who.

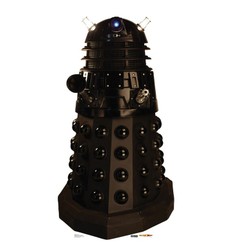
They were the mutant species of the Kaleds who we now only ever see as blobs of a green colored substance. These mutants generally do not show themselves, but rather stay protected in their Dalek casing. When most people think of a Dalek, it is the robot that comes to mind as opposed to the green mutants.

When inside their casing, the Daleks can move about and use their laser weapons which are incredibly powerful and destructive.

With the 50th anniversary anniversary of Doctor Who in full swing, many of the monsters from the program the Daleks are very much to the fore again!

Children love to imagine themselves as a Dalek, but where can you find one that they can climb inside and move around? The answer is to make a Dalek casing for them yourself! Yes, you really can make a Dalek. Kids will love getting inside the Dalek for play or for use as a Halloween costume.

So let's take a look at what's involved in creating your own do-it-yourself Dalek with items commonly found around the home or at a local craft store.

What Materials Will You Need To Make a Dalek?

Essential Supplies for Making A Model Dalek or Dalek Costume

Since this will be used by a child, you need to make a Dalek that is fairly sturdy, yet at the same time lightweight.

For this project you will need:

  • a large cardboard box,
  • several foam balls of the same size,
  • several blocks of craft foam a few inches thick.

You will also need something to make the dome, perhaps an inexpensive plastic mixing bowl, or some other round object, and a plastic laundry basket for the middle section.

Take a look at some of the images of Daleks that you can find online to use for reference while building.

It might be helpful to print several pictures taken from several angles to make yours look authentic. You should be aiming to build the Dalek just slightly shorter than your child, so that they can walk underneath it.

Other craft supplies you will need when it comes to making a Dalek include craft glue, box cutter or exacto knife, spray paint, toothpicks, foil,construction paper, empty toilet paper tubes, dowel rods, battery operated light, and non-toxic caulk.

Keep in mind that several aspects of this project can be completed with the help of the child, however, using some of the cutting tools, spray paints, and certain adhesives should be left to the adults for safety reasons.

Not Sure What A Dalek Is?

Watch The Daleks At The Albert Hall in Symphony Of The Daleks

Need Inspiration for Making Your Own Dalek?

If like me you sometimes need a little inspiration for your crafting or perhaps like to have a model of what you are building what do you do when it comes to making a Dalek?

Unfortunately it might be a bad idea to have a Dalek in your workshop!  But there are some brilliant life size cut-outs which can be a really be an inspiration when you are making sure that your own model is just right.

Doctor Who Life-size Stand-up Cutout- Dalek Caan

Dalek Caan comes alive in this full-scale cardboard cutout! This Doctor Who character stand-up is designed to decorate any room or party.

View on Amazon

Building The Main Body

First you need to find enough cardboard to get you started! Try to locate a very large box, or two fairly large ones. You may have some luck asking a grocery store or other retailer for one of these if you don't have one big enough at home.

Most Dalek images appear to have twelve to fourteen panels on their bottom section. You can minimize the number of sections that need to be made individually by folding one double wide section of cardboard in half, giving it the authentic crease.

Make sure all the panels are uniform and arrange them in such a way as to give your Dalek the correct shape. You will need to use duct tape to secure panels together. Make sure to tape from the inside only if possible as this will ultimately look neater and make things easier.

Creating the Base Section of The Dalek

Now it is time to construct the base which will help to stabilize the body of the Dalek. For this you will use the foam blocks. Construct the base in brick by brick sections that match the size of each individual panel of the body.

Foam brick sections may have to trimmed appropriately in order to fit securely into the next foam brick.

You can use wooden toothpicks to fasten the sides of the bricks to the next brick, and then glue with a clear craft clue and allow to dry.

After the base is constructed and dried, fit the Dalek body into it, carefully matching it up. Glue each section into place, gluing the outside of the Dalek body into the inside of the base. Glue the body to the base in sections and then allow to dry for as long as is needed.

Making The Midsection

After the base and body are together, you are ready for the midsection of the Dalek.

To make a Dalek midsection, find an inexpensive plastic clothes basket that fits snugly around the top of your body section, placing the basket upside down, with the bottom now on top.

Cut the bottom of the laundry basket out and affix it to the Dalek body. Then, line the inside with cardboard, construction paper, or aluminum foil if you want your Dalek to be silver.

You will then paint the interior the color you want your Dalek to be, so that the color shows through the pattern of the laundry basket. Wait to place the inside of this midsection until one of the last steps.

For now just prepare it for later use at this time. Use a non-toxic caulk or craft glue to secure into place and allow to dry.

Constructing The Vented Section

The next part is the trickiest, as it will be where you'll need to leave eye holes for your child to see through, and it is the section that comes between the dome and the midsection.

You can simply use cardboard for this area, and paint it black, later adding the gold or silver paint for the areas that look "vented".

Top it off with the plastic bowl for the dome, and secure into place using glue, caulk, or duct tape or any combination of these.

Painting The Dalek

The hardest part is now over, as the main part of the robot is complete.

Move your Dalek to the outdoors, and spray paint the entire thing from base to dome, which exception of the black "vented" area. You may somehow cover that to keep it from getting sprayed by covering it over with newspaper.

Give it a good two or three coats, allowing the model to air dry between each one. Your child should be able to easily fit inside this partially finished piece at this point, after the paint has dried. So it's probably worth checking that they can!

Making Your Dalek Come To Life

Take your project back inside, and now you can begin applying all of the details. You will now need to slice all of your foam balls in half and take them all outside to spray paint in the color of choice. Allow them to dry, then apply four ball halves to each section of the Dalek body.

For the twelve section body, this means 48 ball halves, for the 14 section body, 56 ball halves. Glue them all securely into place. Now go back to your laundry basket midsection and add the interior lining of foil or construction paper.

Uncover the newspaper or otherwise covered "vented" section, and hand paint in gold or silver the lines that circle around the section.

Remember to leave a section for your child to see out from. This can then be covered with a sheer, see through black fabric such as a small piece of black tulle, to make it less noticeable, but still allow clear vision.

Spray paint two toilet paper roll tubes in gold or silver, and affix to either side of the dome. In the middle, glue a spray painted foam block and attach a spray painted thick dowel rod (several inches long, may require cutting) by sticking it in the middle of the foam.

To this, attach an inexpensive battery powered torch to serve as the eye piece. Using spray painted thinner dowel rods and foam blocks, affix two block where the mechanical "arms" would be, gluing a dowel rod in each. You can then attach a half foam ball painted black to one arm to create the deadly sucker.

Finish up by hand painting details or adding little cutouts made from construction paper for some of the detailing.

After all of this dries and is assembled, you have just done what it takes to make a Dalek that your child can actually stand inside. Your kids will be thrilled and will have loved every minute of creating this great toy or costume.

Your Favorite Doctor Who Monsters

From all the Doctor Who monsters or villains we have encountered through the 50 years there are some that really stand out! From the following which are your favorites?
  Display results
Thanks For Voting in Our Poll
Updated: 12/04/2016, pkmcr
 
Thank you! Would you like to post a comment now?
3

Are You Going To Make A Dalek?

Only logged-in users are allowed to comment. Login
pkmcr on 06/26/2014

LOL WordChazer I love that image

Guest on 06/26/2014

Leave me some room! Then again, I have a photograph of a Dalek from a Collectormania con a few years ago where the plunger was being used to hang a charity collecting tin from. If it were possible for a Dalek to look chastened and enslaved by evil humans, this one was.

pkmcr on 06/26/2014

Thanks Kathleen - yes that cold echoing voice! Let's see who can hide behind the sofa first LOL

KathleenDuffy on 06/26/2014

What a good idea! I can hear them now..." Exterminate, exterminate....."

You might also like

Star Trek Costumes

Are you Star Trek fan in it's many different guises from the original to the ...

Darth Vader Costume

If you want to embrace the dark side this Halloween or for a fancy dress part...


Disclosure: This page generates income for authors based on affiliate relationships with our partners, including Amazon, Google and others.
Loading ...
Error!