
How to Make Dreamcatcher Gourds
by KathyMcGraw
Gourds can be made into a lot of beautiful art pieces. Here are the directions on how to make a Dreamcatcher Gourd.
Dreamcatcher Gourd
Create your own art with these easy to follow directions

The First Steps to Making Dreamcatcher Gourds
Choosing Your Gourd, Washing, Cutting, and Sanding
The first 7 steps are the ones that are the most important.
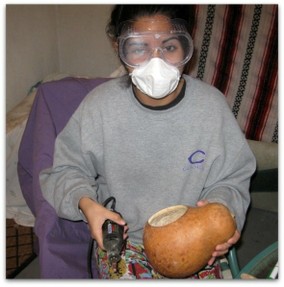 You want to make sure your gourd will sit up straight, then you need to wash the outside. These are hard shell gourds that have dried outside so there might be some mold on them. You can soak them in bleach water (make sure they are submerged, and don't forget the stem). Afterward let it dry....then you are ready to draw the circle, cut it, then clean out the inside, and sand the rim.
NOTE: Gourd Dust can be toxic...wear a mask or a respirator and work outside to alleviate the gourd dust from settling inside the house.
Step by Step Directions for a Dreamcatcher Gourd
This gourd project was made by kids-it's that easy
Gourds are naturally beautiful and you can do just about anything with them. When my grandkids needed a gift for their mother, I looked at the few gourds I had and we decided to make a dreamcatcher gourd for her. Incorporating a dreamcatcher into a gourd is relatively easy, but there are several steps that need to be taken before you can make the dreamcatcher.
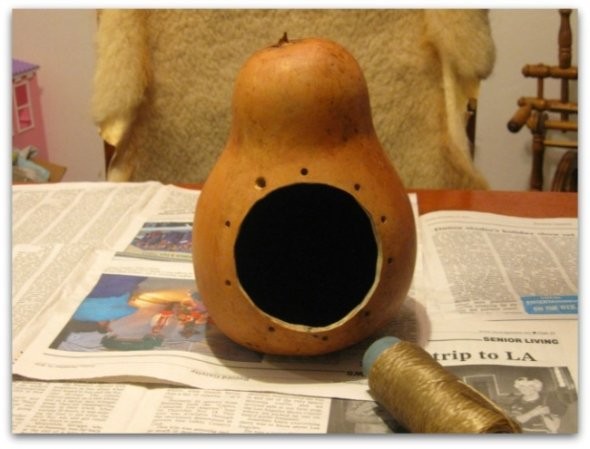
Step 1: Select a gourd that stands up straight- you want the focal point of the dream catcher to be in the middle.
Step 2: Clean the outside of the Gourd, then after it's dry, draw a circle with a pencil.
Step: 3 Using a rotary tool, like the Dremel, or an Xacto knife make a small cut just inside of the line that you will follow around (the hole)
Step: 4: After Step 3 go deeper into the gourd until you have broken through the shell (now you have a small hole. Use the cutting tool and cut out the circle.
Step 5: Take the cut-off part off, and clean the inside of the gourd. Clean everything out as you will paint the inside later
Step 6: After the inside is cleaned out and sanded- take a pair of pliers and cut off the piece of stem on the bottom of the inside if it isn't flat already.
Step 7: Sand the rim of the circle so it's smooth
Step 8: Make the holes for the Dreamcatcher....small holes about 2-3 inches apart...on the penciled circle or just above. Make at least 8 holes the same diameter. The Dremel has a bit that will be perfect for this... just hold the gourd and poke the holes through.
Step 9: Tap any dust out of the inside again...and take a damp cloth to get any residue out.....then paint the inside whatever color you choose.
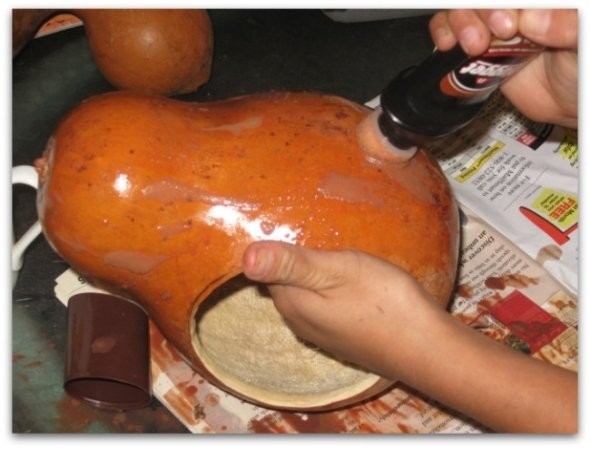
Step 10: This is the time to do the outside ...I use shoe polish to just give a little sheen but keep the natural look of the gourd, but you can design it anyway you want. Don't forget to also paint the rim of the large circle, or if leaving the outside natural you could also leave the rim natural.
Step 11: After everything you want to do has been done it's time to make your Dreamcatcher. The most important thing to remember is to keep your thread tight....here are directions for how to make a dreamcatcher.
Step 1 Choosing Gourds
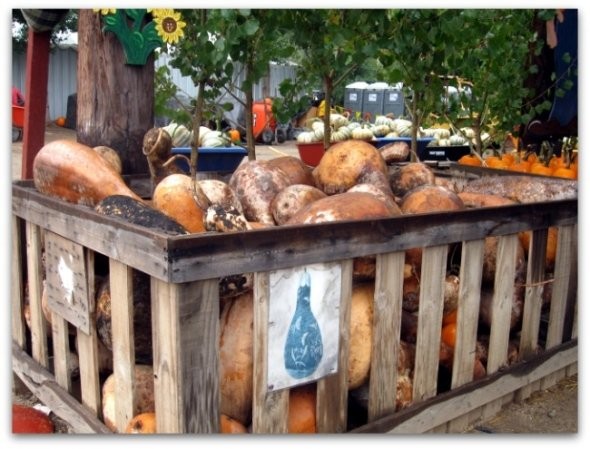
Select a gourd that stands up straight
 Choosing gourds for your art project |
Gourds come in all shapes and sizes
The first step is to choose your Gourd. A Dreamcatcher Gourd should have a big enough surface that is in the middle, and can stand up by itself. Gourd farms are great places to find gourds, but you can also buy them retail.
After Cleaning the Outside
preparing the gourd
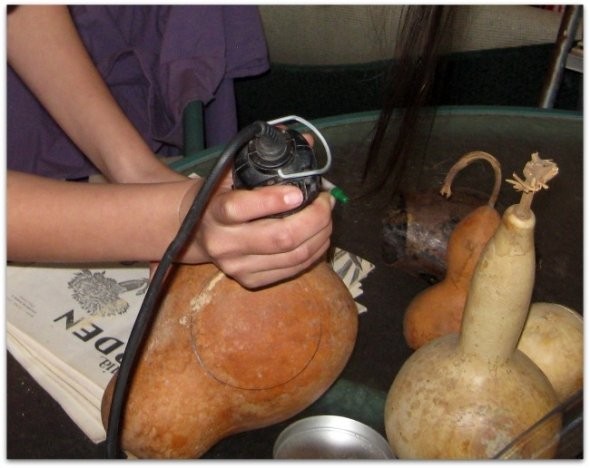
Gourds usually have thin layers of mold and need to be cleaned before design work. After washing the outer part of the gourd you will draw the design then cut the circle.
Most of the gourds are thick, and it's best to use a Dremel Tool (or something similar) to start a hole, the cut around the circle. Go slow and don't worry if you aren't following the line exactly as you can erace the pencil marks, plus you will be sanding the rim of your cut anyway.
Steps 2 -4 Cleaning and cutting
clean your gourd then draw and cut
 Drawing the Dreamcatcher Design |
Steps 5 and 6 Cleaning the inside of the gourd
 Remember when cleaning gourds the gou... |
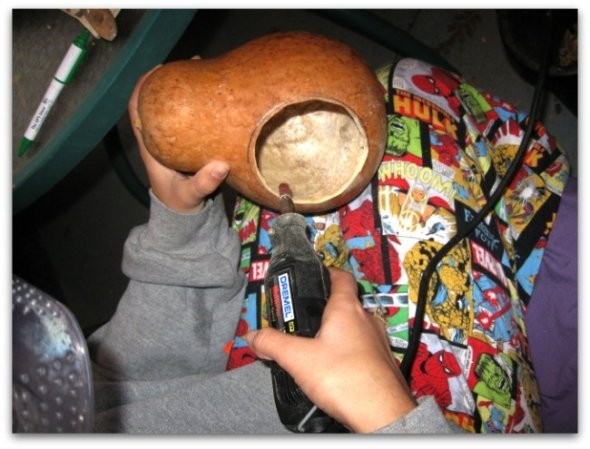
Once you have cut the hole for your Dreamcatcher you need to clean out the inside
Cleaning out the inside of a gourd can be messy. Here you can see how to clean your gourd on my other article that also tells you what a gourd is, and other info.
You can save the seeds for planting, but you can also save them for other craft projects, like making a necklace.
Later you can paint the inside, but first you want to do all your sanding and drill your holes for the dreamcatcher part of your project.
Step 7 Sanding
 Sanding is important for a smooth rim... |
Sanding the Hole for the Dreamcatcher
This is where you will make the circle symetrical
After you cleaned the gourd out it is time to sand the circle. If you cut it a little lopsided you can fix it in this step, just sand it. You can sand by hand, but a dremel tool is so much easier. Make a little lip around the hole..you don't have to, but it helps blend the inside with the out.
Make sure you erace any traces that might be left of the pencil line you drew.
Step 8 Drilling the Holes
 8 symetrical holes evenly spaced |
Time to Drill
Using your dremel drill 8-10 holes evenly placed around the hole. Start at the top and work your way around. It's best to visually "see" the holes and count how many holes you need first as you want to keep them about the same distance apart.
Be careful if you have never worked with gourds, and keep a steady hand. Our gourd had one hole bigger than the others but once my grand daughter figured out how to make the holes the rest were the same diameter. In the end it doesn't really matter, as it is YOUR art piece!
Steps 9 and 10
 Painting and Staining |
Preparing the Inside and Outside
This step can be done before you drill the holes, but I prefer to do it after. When you drilled the holes you will have a little residue dust which you will want to tap out of the gourd, then wipe the inside out again with a damp cloth.
You can paint the inside with a theme or anything you want, or just paint a solid color. The outside can also be painted, or stained. For our project I had the kids stain the outside with shoe polish, then after it was dry they were ready to weave the web of the dreamcatcher.
Step 11 The Dreamcatcher
 Beginning to make a dreamcatcher |
Making a Dreamcatcher
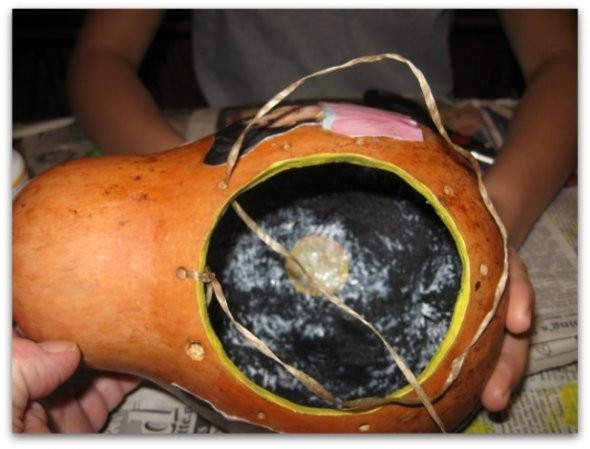
OK, now you're ready for the final step....make your dreamcatcher. Here's the link again, in case you missed it above on how to make a dreamcatcher .
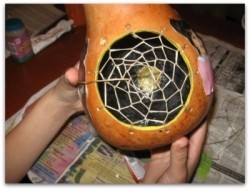
Start with the top hole....then work your way around the circle. You will weave it around as many times as it takes to get a small hole in the middle, then tie a few knots and cut off, or burn any excess beyond a few inches. You want to leave enough of your sinew to attach whatever token you want to put on it ie: a feather, bead, etc.
Your Dreamcatcher Gourd is Now Finished
 Dreamcatcher Gourd |
The Dremel Tool Kit is Perfect for Gourd Art
 |
| Dremel 4300-5/40 High Performance Rot... Dremel |
Gourd Crafts, Carving and Painting Projects
 |  |  |
| The Complete Book Of Gourd Craft: 22 ... Union Square & Co. | Complete Book of Gourd Carving, Revis... Fox Chapel Publishing | Complete Book of Gourd Carving Sterling |
Pictures and content are copyright of Kathy McGraw and may not be used without permission. I would love to know if you have ever done any Gourd Art, or made a dreamcatcher before. Were these instructions helpful?
You might also like
Suzanne Valadon - "The Blue Chamber"Suzanne Valadon was a Fench circus performer, artist's model, waitress and si...
Understanding The Persistence of Memory by Salvador DaliDali's work was prophetic. Scientists still struggle to explain the concept...

 Unicorns Mythical Magical Creatureson 09/21/2011
 What are Old Wives' Tales?on 06/19/2011
 Whitewater CA, Lots and Land for Sale and other Real Estate Informationon 06/23/2011
 How to Cook, Clean, and Eat Artichokeson 05/26/2011


Comments
Wow, beautifully done, Kathy ~ nice step-by-step instructions with photos!
This is wonderful:) That is a great step by step guide and very lovely result!
These are so cool!
What a great idea!
What a wonderfully creative idea! The results are fabulous!
This looks like so much fun! I did woodburning on some gourds once but this is a nice project too.
Glad you liked the tutorial...and for those that want to do it with kids..there is something even the youngest can do, like the shoe polish. We decoupaged all the kids pictures on it, and they had fun finding those too.
I've only heard of using gourds as bird houses. Your tutorial is excellent - I love the pictures- and love the finished product.
Paint it with shoe polish? Now that's something I hadn't thought of & really cool :)
Oh, I wonder where I can get one of these gourds? Carving them looks so much fun and I'm impressed with the results. A beautiful step by step guide, Kathy.