
How To Polish Stones: Tumbling Rocks
by marciag
Knowing how to polish stones, whether you are a rockhound or a jewelry hobbyist, is extremely important. It is what gives a gemstone its final shape, luster and shine.
Polishing Stones In A Rock Tumbler
There are two main reasons why you'd want to use a rock tumbler to polish stones. You're either a rockhound and want to polish your rough rock, or you're a jewelry designer and you want to polish the gemstone jewelry you've just made. I am both, so I use my trusted Lortone tumblers almost every day (I have a small one for jewelry and a double-barrel one for my rock tumbling hobby).
While for both cases you will use a rock tumbler (preferably a good Lortone rock tumbler), polishing rough stones is quite a different procedure and takes a much longer time than polishing your gemstone jewelry.
Not only that, but except the tumbler which is common in both cases, the actual supplies to use will be different.
This article will focus on how to polish stones for rockhounds. This method is also called tumbling rocks.
If you are looking instead on how to polish tarnished silver, click through to read my Tarnished Silver Cleaning article.
Some Of My Rough Stones Ready To Be Polished
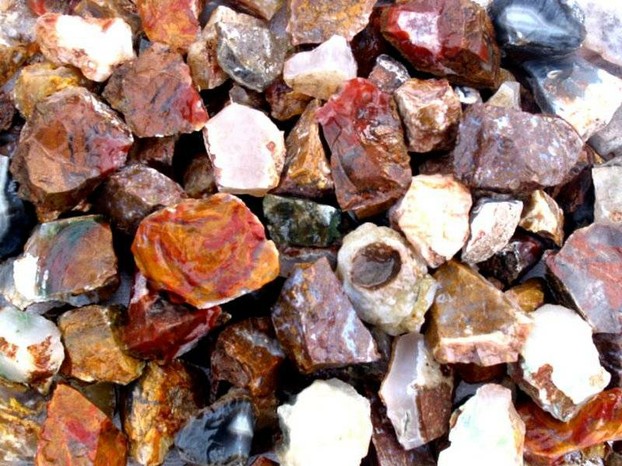 rough stones ready to be polished |
Using A Rotary Or A Vibratory Tumbler?
There are two main types of tumblers that you can get for polishing your rough rocks that will be transformed into beautiful gemstones ready to use for jewelry making: the vibratory tumbler and the rotary tumbler. Which one should you use and why?
Personally I used both tumblers, howver I found that the vibratory tumbler is very noisy. And considering the fact that for tumbling rocks you need days and even weeks of constant tumbling for reallly good results, not many people can handle that annoying noise all the time.
One way to avoid this noise is to place your tumbler on some thick carpet or rug which will catch the noise.
On the other hand, a vibratory tumbler can handle a wider variety of rocks with different hardnesses, something which is not always the case with a rotary tumbler like the Lortone.
Finally, as to how much time it takes you to tumble your rocks, a vibratory tumbler is much faster. While the same batch or rocks might be ready in 2-3 weeks in a rotary tumbler, a vibratory tumbler will finish them within a good week or 10 days.
So which rock tumbler do I like most? I have a soft spot for my 2 Lortone tumblers. I even like listening to the quiet swish noise of the tumbler when the rocks are turning inside. It's almost a meditative feeling working on my jewelry while my Lortone is working in preparing the stones for me just a few feet away.
Rough Rocks In The Tumbler After One Week
 jasper and tiger eye after one week i... |
 rose quartz in the tumbler after one ... |
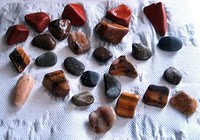
Some Of The Stones I've Polished
 tumbled rocks |
 more tumbled rocks |
Supplies And Tools For Polishing Rocks
There are not many supplies you need to polish rocks, but you do need a couple of things.
First you need a good tumbler. You have to decide whether you want to use a vibratory tumbler or a rotary tumbler.
Depending on the tumbler you use, you will need grit. For example for a vibratory tumbler you will also need ceramic media, whle the rotary tumbler won't need this at all.
You will need grit, which is looking and feeling like sand of different roughness. The very coarse grit is needed for the first stage of tumbling, so that it eats away fast at the rough edges of your stone. I usually use either the 80 grit or the 120-180 grit silicone carbide.
Next you will also need 600 grit silicone carbide for the prepolishing stage.
And finall you will need some polish compound which is as as powdery as it gets. I usually use the CPP polish as I found this works best.
One of the best places I found for grit is Ebay. Many sellers there sell all the grit types in a combo, so you don't have to shop separately for each grit type one by one.
Rock Tumbling Grit For Polishing Stones
How To Polish Stones: Video Tutorials
How To Polish Stones With a Lortone Tumbler
Depending which size Lortone tumbler you got, it will have either one or two barrels. Like I mentioned before, the one barrel tumbler is best for polishing your silver gemstone jewelry, while the big one can be used to tumble rocks.
Here are the steps I use to tumble rocks in the Lortone tumbler.
- Choose the rocks you want to use. Make sure that they are of about the same hardness. If you put soft rocks (like serpentine gemstones) along with hard rocks, the softer ones will be ready much faster and they will get eaten and eroded away by the hard ones (trust me, I know from experience!).
- Put your rocks in the barrel, but don't fill the barrel more than 2/3 to 3/4 full.
- You will have different packs of silicone carbid, some coarser than others. You will first use the roughest one, the 80 grit silicone carbid for the first run. If you don't have this grit and your stones are not extremely hard, you can also start with 120-180 grit. I usually go with this size right from the bat. When it comes to the amount, I use use 2 to 2-1/2 tablespoons for each pound of rock.
- Once you've added your grit over the rocks, take cold water and add it to the barrel until the level is just below the upper level of the rocks in the barrel. The water should not fully cover the rocks.
- Close the barrel but first make sure that your sealings are all clean and they close well.
- Start the tumbler and watch it for a couple of minutes to see that it doesn't leak water anywhere.
- You should stop and open the tumbler barrel every day to check the status. If the liquid (we call it slurry) gets way to thick to turn the rocks smoothly, simply add a bit more water to it.
- After about a week or 10 days, the rough edges of your rocks should start to round up nicely and become much smoother.
- Now it's time to change your grit to softer ones for the next major step. Take out the rocks from the barrel, clean well the stones and the barrels as well (DO NOT throw out the slurry anywhere in the toilet or sink as it will clog up your pipe and cause you loads of troubles!).
- For the second round the steps are the same except you now use the 120 grit silicone carbide.
- The result of this stage should be a nice soft, matte finish to your rocks. You should keep again checking every day or every couple of days, and you should have a satisfactory result at around day 10.
- Now we are ready to prepolish the stones. Use the 600 grit silicone carbide for this step, which is much softer, almost like a powder. You don't want to scratch your stones at this time! I usually prepolish my rocks for about a week before proceeding to the last step.
- Polishing your stones. This is the final step and the one where you really need to take care to not scratch or otherwise damage your rocks. They are almost ready! The powder you use at this stage is called polish compound. I use CPP polish for this step. Again use the same steps as before to clean your barrel (this time clean it extremely well to get rid of any grit residue both from the rocks and the barrel!), fill up the barrel with the rocks, polish compound and the water and leave it to work for about a week.
This is where I usually finish my rumbling rock journey for a batch. But how do you know when the rocks are truly ready to be used in jewelry?
When you take a rock, any beach rock (which in most cases is a semi-precious gem, btw) you see that it's dull and almost colorless. Put it under water and it changes color. It becomes lively and realy beautiful.
You are ready with the rock polishing steps when the stone is the same whether dry or held under water. Once the water dries from the rock, the surface doesn't change anymore, it doesn't become dull or losing color. Then you know your stones are polished.
My Favorite Rock Tumbler - The Lortone Tumbler
 |
| Lortone 3A Lapidary Rock Gem Rotary 3 Lb. Tumbler New Only $259.5 |
 |
| LORTONE 45C Lapidary Rock ROTARY TUMBLER |
Do You Need A Tumbler With Grit?
With this Lortone tumbler kit you have everything you need to get started with rock tumbling. You even get stones to polish!
 |
| LORTONE BIG Rock Tumbling Kit 4 Grits 3lb |
You might also like
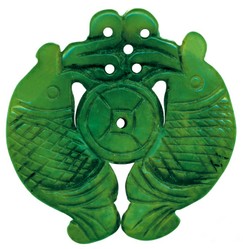
Jade ColorsUnderstanding a little about jade colors and jade origin and deep traditional...
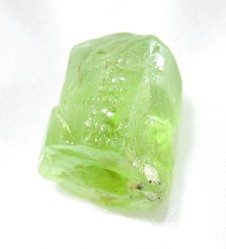
Peridot Gemstone JewelryPeridot gemstone jewelry makes a perfect gift for the August birthday or the ...

 Percy Jackson Books In Orderon 10/15/2014
 Meditation For Pregnancyon 09/25/2013
 New Age Meditationon 09/23/2013
 How To Use Essential Oils With Reikion 09/22/2013
Are You Interested In Learning How To Polish Stones With A Tumbler?
What a fascinating article! So far I bought all my stones already polished but that really tempts me to try out to tumble my own. Oh, and a little cheating trick I use sometimes. If you find some nice stones, rocks, pebbles on the beach or in the river that are already 'nearly' there paint them with colorless nail polish to give them a 'luster'. I know it is cheating, but it is a handy quick fix if you need some nice stones for a decoration quickly ;-)
That's what brought me to polishing stones as well. I got myself a few tumbled rocks from Ebay and I was hooked. I wanted to learn how to get there. Now I can say in many cases that truly all my jewelry is 100% handmade: from the rough rock all the way to the final silver jewelry piece.
I am not ready to start polishing myself, but I love jewellery with polished stones. There is something special in the way the colors are brought out on the surface!