Most Important Technique For Digital Photo Enhancement

by Sheri_Oz

The one feature you should look for on any free or bought photo enhancement software is LEVELS. This improves both color and sharpness. Let me show you how it works.

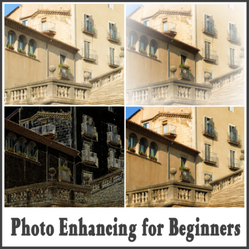
No need to struggle with color saturation, contrast or sharpness tools. These sometimes produce a very artificial appearance that is unattractive and looks amateurish. Using only the 'levels' feature can significantly improve the quality of your photographic image.

Of course, the quality of the original photograph is important, but you already knew that. However, sometimes an excellent photograph lies hidden within the digital image and that is where digital enhancement software plays an important role. I exclusively use paint.net but you will find that on other programs, the levels function works similarly.

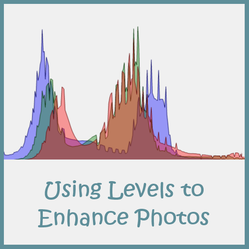
Even if you use nothing else, you should know how to use 'levels'.

Using Levels to Improve the Quality of Your Digital Photos

First I will show you examples of original photos and those retouched using saturation and levels techniques. Then, if you agree that levels is better, I will show you how to work with it.

At the end of this article I will explain what levels are. If you are like me, you want to know what you can do with something before you are interested in understanding the principles behind it.

Original Photo Image
Photographer: Sheri Oz
Enhanced with Saturation Tool
 
Photo Enhanced with Levels

The original photo is dull and there is none of the brilliance that impressed me when I visited this spot in northern Norway.  The saturation tool, where I used both saturation and light adjustments still did not do the photo justice. Everything looks flat.

But when I used the levels tool, the colors seem to "pop" and the whole image looks sharper.

Which image do you prefer?

Now let's look at what happens when we use levels for a close-up (not macro) photo of a lily. The distinct colors of this flower have virtually disappeared (pardon the pun) on the original digital image.

Using the saturation tool did not really improve the photograph as there is still no depth.

However, the levels tool brings out the colors of the flower wonderfully and emphasizes the three-dimensionality of the image.

Original Close-up Photo
Photographer: Sheri Oz
Flowers Enhanced with Saturation Tool
Flowers Enhanced with Levels

I could further improve the quality and usability of this photo if I were to remove the slightly disturbing extraneous new flower bud to the left of the bloom and the withering one to the right, and perhaps the irrigation pipes as well. If you want to see how to do that easily and with great results, see my article on Removing Unwanted Features From Photographs.

Working With Levels

After you have opened the image you think can be much more successful, open the options for "adjustments" on your photo enhancement software. Somewhere on the list you will find "levels" and you click to open. It should give you something like the screenshot below:

Beginning Work With Levels
Screenshot by Sheri Oz

You see two histograms on the levels window. Both of these are currently identical. You will be adjusting either or both by moving the markers on the white-to-black scales to adjust for the amount of light added or removed from the photo.

The top marker adjusts white tones or brightness, the bottom marker adjusts levels of black or contrast and the middle marker adjusts the mid-range tones. Even if you learn basic rules concerning adjusting these levels, no two photograph behave similarly and you can essentially "play around" with both scales until you achieve the results you desire without understanding the science behind it.

The Meaning of "Levels" and Why You Should Care

Levels refers to the range of tonal values present in the image and it is a measure of brightness and contrast. If the photo is too bright then there is detail lost in the whiter areas; similarly, if the photo is too dark, then details are lost in the darker areas. To some extent, this can be corrected by adjusting the tonal levels.

The histogram shows us the values for the colors, or brightness and contrast, present in our photographs. We would expect the histogram to spread across the entire range from 0-255 with a number of peaks and without being overly lopsided on one side or the other. The exception to this would be a night scene that we would expect to tend toward the dark side and a snow scene where we would expect there to be more overall brightness.

As you grow familiar with using this tool on your computer when enhancing your digital photographs from your last shoot, you will gradually gain the confidence to refer to the histogram in your camera while still taking the pictures. Understanding the histogram will lead you to take better exposed photographs that do not lose the important details that make the difference between a good photo and a great one.


Updated: 04/04/2014, Sheri_Oz
 
Thank you! Would you like to post a comment now?
7

Comments

Only logged-in users are allowed to comment. Login
Sheri_Oz on 12/28/2015

Good luck with your photos. It is so exciting when someone buys something that came out of your very own camera. Glad you found this article helpful.

iggy on 12/27/2015

I recently started selling photos and this help out a lot, I am learning to improve images for a better acceptance rate. Thank you

Sheri_Oz on 04/10/2014

I hope you have as much fun with it as I do.

CSMcClellan on 04/09/2014

I'm still learning how to use my photo editing program, so this was very useful. With so many ways to manipulate a photo, it's hard to know where to start. Thanks.

BrendaReeves on 03/26/2014

I don't even notice the background on the flower photo. The flower is clearly the focal point.

teddletonmr on 03/26/2014

Thanks for the tips on adjusting levels in digital pictures. Mike :)

Sheri_Oz on 03/26/2014

That's exactly why I started to write these articles. I discovered the joy of working with the digital image to bring out the best in it. Good luck with your photos.

Thamisgith on 03/26/2014

Thanks for the tips Sheri. I have a fairly decent camera - but am woefully ignorant as to how to get the best results from it. I'll certainly be applying the tips above in the near future.

You might also like

Easiest Way to Watermark a Photo

If I can do it so can you! I couldn't understand all the directions and made ...

Enhance Your Photos: For Beginners

Free downloadable software and easy-to-learn tools can transform your so-so p...


Disclosure: This page generates income for authors based on affiliate relationships with our partners, including Amazon, Google and others.
Loading ...
Error!