This recipe calls for flour by weight and water by volume. It calls for the flour to be roughly divided into five ounce and eleven ounce portions, for a full pound. The pre-ferment requires the smaller measure. I will also call out the rough volume measurement of both in case the reader does not have a scale.

Rustic Boule Bread
by LiamBean
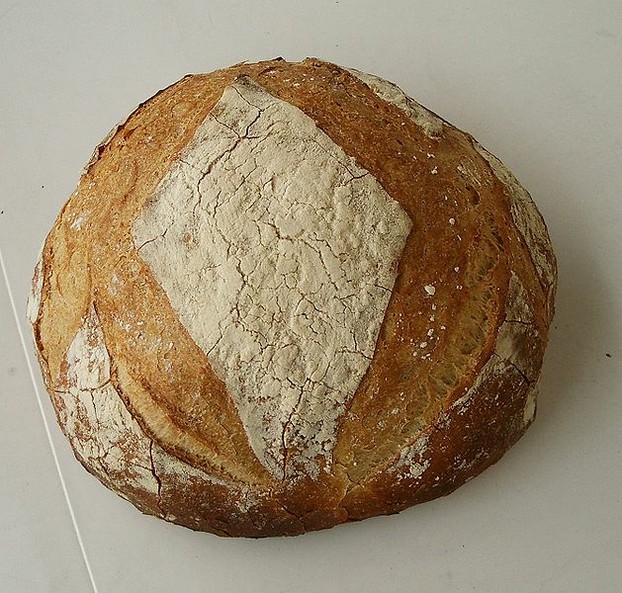
This is a simple recipe for rustic, country style bread. It is called Boule, French for "ball," due to its shape.
A Rundown on Ingredients
This recipe will take sixteen hours to make. Eight to twelve of those hours will be for the pre-fermentation dough to develop in the refrigerator. You can and should use unbleached flour, or barring that, white flour. Unbleached is flour milled from the whole grain; white is flour is milled with the germ and bran removed. Do your best to avoid bleached flour.
Whole Wheat Flour
If you desire you can also use "whole wheat" flour combined with white or unbleached, use only about 1/3 of the total quantity of flour as "whole wheat" otherwise your loaf will be extremely dense.
Corn Masa
The original recipe, when I found it, called for using corn starch and corn meal. This is all well and good, but I've found that using Masa, which is corn flour, is much better, cuts down on the number of additional items I need, and has the same overall effect as using corn starch and corn meal. You can also make many other things with corn masa such as tamales and a very finely textured corn bread.
Pure Water
Water should be pure so you should use bottled water or water you know to be pure such as home filtered water. If you use bottled water be sure that the vendor certifies that it is pure water, not tap water bottled.
Yeast
You are also going to use "rapid rise" yeast. The variety purchased at the store in single packets should be fine for this. However, if you suspect you are going to do a lot of bread baking I strongly suggest you buy it in bulk; it will be much cheaper that way. Unused yeast can be stored in a dark pantry, in the refrigerator in a sealed container, or even in the freezer.
About Servings
This recipe assumes that a serving is two slices of bread for 133 calories for both. Since the bread is round this is an estimate only.
Preparing and Cooking Boule Bread
The Pre Ferment sits for eight to twelve hours so be prepared
Prep time 20 min - Total time 600 min - 133 cal/serv
Ingredients for 10 servings
16 oz flour, sifted or 2 and 5/8 Cup • 10 oz water • 1 tsp yeast, rapid rise • 1 tsp salt, sea or kosher • 1 tsp sugar, whole (or 1 tsp honey) • 2 quarts hot tap water (see instructions) • 3 Tablespoons Corn masa or meal • Olive oil for dough and rising container
Pre-Ferment Step
In a deep walled medium sized bowl combine the all the bottled water, 5 ounces (or 5/8 Cup) of flour, and all of the yeast, sugar or honey, and salt. The water should be room temperature, but it should be pure. Combine these ingredients well with a spoon or whisk (do not try to create a foam if using a whisk) and cover the bowl with a towel. Leave at room temperature and check the mix in 20 minutes; it should be foamy. This is proof the yeast is working.
Re-cover the bowl with a towel and place the container in the refrigerator for eight to twelve hours.
Dough Step
Transfer the pre-ferment from the refrigerator into your stand mixer bowl. Add to this the other eleven ounces (or two Cups) of flour. If desired, one cup of this flour can be "whole wheat." Attach the dough hook, lower the stand mixer head, and begin kneading the dough at the slowest speed. Allow the mixer to knead for from two to three minutes. This should be just as long as it takes for the ingredients to form a dough ball.
Leave the bowl in the mixer, but retract the head and hook. Cover the bowl with a towel and let sit for at least twenty, but no more than thirty minutes.
After this twenty to thirty minute rest, lower the dough hook into the dough and knead at medium speed for five to ten minutes; this time depends on gluten binding. You know the dough is completely kneaded, and the gluten well activated, when you can pinch a small bit of dough and stretch it away from the dough ball. In doing this you should be able to stretch it far enough for light to pass through without breaking the dough. If you can't do this knead for one minute and test again. Continue kneading until the dough passes this test.
First Rise
Pour one quart of the hot tap water into a square pan (I find a broiling pan suitable) and place this in the bottom of the oven. Place about a tablespoon of the oil in the bottom of a straight sided bowl and place the dough ball into the oil. Rotate the dough ball so that the oil completely covers the ball top, bottom, and sides.
Place the bowl containing the dough ball on a rack over the hot tap water and cover the bowl with a towel. This is the first rise step and it will take one or two hours.
After an hour or two check the dough ball; it should have doubled in size in that time.
Second Rise
If the dough has doubled in size, dust a large cutting board or the counter top with some Masa or corn meal. Also, dust your hands with some of the masa or meal.
Turn the dough out onto the prepared surface, and with your knuckles, press the dough out into a smallish circle. Fold one side of the dough to the center and then the opposite side to the center. Rotate the dough ninety degrees and once gain fold one side to the center and the other side to the center.
Cover the roughly ball shaped dough with a kitchen towel. Allow this second rise for no less than ten minutes and no more than twenty.
Boule Shaping - Third Rise
After the ten or twenty minute wait, flatten dough ball again using only your knuckles. This time fold the dough into itself on all sides to get a ball shape. Gently flip the dough over and squeeze the bottom together so that the upper surface is smooth. You should end up with a ball shape. To help this shape along, using an open hand, gently squeeze the dough toward the center while rotating the ball in small steps, moving in a circular motion.
Once you are satisfied that the dough is a nice shape, move it to a pre-dusted (with corn masa or meal) baking sheet. Once again cover the ball with the towel and allow the ball to rise for one hour.
You know the dough has done its final rise if you can gently poke the dough ball and the depression quickly fills back in.
Ten to fifteen minutes prior to the hour third rise, preheat the oven to 400° F or 210° C. Leave the pan of water at the bottom of the oven.
Baking the Boule
In a small bowl mix 1/3 cup of pure water and one tablespoon of masa or cornstarch. Remove the towel and paint the top of the ball until it is just coated. Slash the top of the ball with a knife in three or four places. Make these cuts one half to three quarters of an inch deep. These slashes will allow the boule to expand without breaking.
Add more hot tap water to the pan in the oven if necessary and transfer the baking sheet with the boule onto the middle rack. Allow to cook for 50 to 60 minutes.
You can also check the core temperature of the bread with a probe thermometer. The bread is done when the internal temperature reaches 205° F to 210°F degrees. Or in centigrade from 96° to 100° C. Remove from oven, turn oven off, and allow the bread to sit out, on a wire rack, for at least thirty minutes.
Recipe:
0.0/5 Stars (0 Votes)
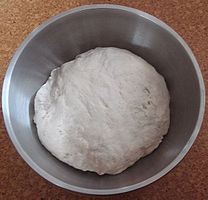 Dough before First Rise Wikcommons | 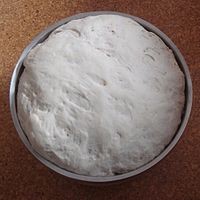 Dough after First Rise WikiCommons |
 Decorated Boule Wikicommons | 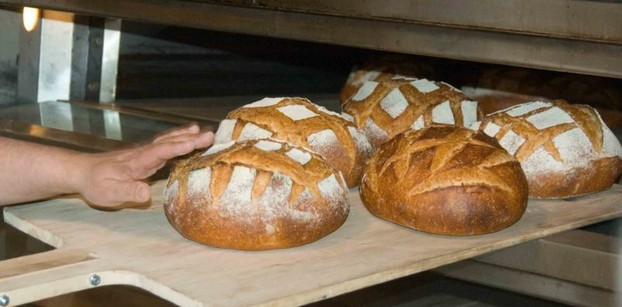 Small Boule WikiCommons |

Quantities in Metric Units
Prep time 20 min - Total time 600 min
Ingredients for 10 servings
454 grams flour • 295 milliliters water • 5 grams yeast • 5 grams salt • 5 grams sugar or honey • corn masa or meal • olive oil • 1 liter of hot tap water
Recipe:
0.0/5 Stars (0 Votes)
Notes on this recipe
The following notes will help you get a delicious boule as well explain why some of the steps are as they are:
- You should always wash your hands before any step involving touching the flour or dough
- I am recommending one teaspoon of salt, but you can use two
- Because the salt is added prior to kneading, this will affect the texture
- More salt will give a finer texture in the finished loaf as well as make the bread saltier
- Covering the dough with a towel prevents airborne contamination of the bread dough
- Covering the dough in the fridge prevents evaporation
- If you use bleached flour increase the temperature to 425°F and cook for ten minutes less
- If cooking in centigrade preheat the oven to 205°C
- You always want to shoot for an internal temperature of 205°F to 210°F regardless
- If using centigrade that internal temperature range is 96° to 100° C.
- The hot water under the baking rack keeps the humidity in the oven high for better bread
- Allowing the loaf or boule to cool will give the bread time to firm up in the center
- Bread made with no preservatives WILL spoil; keep unconsumed bread in the fridge
- The olive oil used over the entire boule will give the crust a crisp texture
Bleached fours may contain residual chemicals, which is why I do not recommend using them. However, if you have no choice or just like bleached, use the higher temperatures recommended above. High heat is supposed to cook away any residual chemicals.


Coda
This is one of my favorite home cooked breads. Though there is a long wait time, primarily as the pre fermentation mix chills in the refrigerator, it is well worth the wait. The long pre-ferment will give the bread a (very) slightly tangy flavor. Though you can use two teaspoons of salt for flavor I recommend keeping it down to one. More salt will give a finer texture and denser boule. Less salt will give random sized bubbles and a more rustic texture.
Updated: 06/24/2013, LiamBean
You might also like
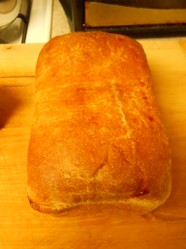
Two Loaf Traditional Sandwich BreadThis is a bread most of us "grew up" with, but with some modifications. The i...
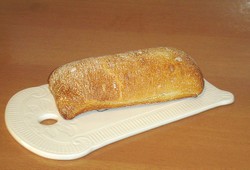
Ciabatta - Italian "Slipper" BreadCiabatta is Italian for slipper. This is fitting since the finished loaf is s...
Disclosure: This page generates income for authors based on affiliate relationships with our partners, including Amazon, Google and others.

 Crêpes and Crêpe Disheson 09/14/2016
 About Me - Liam Beanon 11/28/2014
 About Ebolaon 11/08/2014

Comments