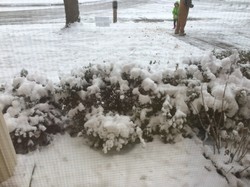
The promise of yet another Polar Vortex making this another record-breaking winter has many people extremely worried about how they will cope. Let’s face it, gas and electric bills cost many retired and fixed income families so much it makes paying the house payment, buying good nutritious food, and medicines each winter month increasingly difficult. Which I believe we all agree is not a good thing.
On the other hand, we DIY types are always looking for a home improvement project that will make the most of our investment of time, and moneys spent. Keeping our homes free from drafts due to old air leaking windows, and sliding patio doors is a handyman and woman type DIY project that we get excited about completing. This easy to do and inexpensive project benefits us all by reducing our heating bills, and keeping our homes a much healthier place we, our kids, parents and beloved pets all live.
Continue reading this article as we discuss which products works best you should buy. How easy and inexpensive these products install in just a few minutes. Without the need to buy any special tools, all you will need is a hand held hair dryer, a pair of scissors, a little time, and the products recommended in this article to winterize windows this cold weather season.

Winterizing windows – Easy and inexpensive DIY project
by teddletonmr
Polar Vortex will cause extremely cold winter this year. Use this easy inexpensive DIY project to winterize windows, conserve resources, lower heating bills, and keep warm.
Winterize windows to save money
It cost less than you think to eliminate Drafts from old windows
It is easy to Insulate 5, 3-feet by 5-foot windows using the 3M indoor window insulation kit purchased at Amazon for the low cost of $12:99 U.S at the time of writing this article.
Made in the U.S by the 3M Company, this all-in-one indoor window insulator kit contains enough of the insulating film, and double-sided Scotch tape needed to cover 5 normal sized windows provided you make no mistakes measuring or cutting the  plastic clear insulating film or tape.
Take care when cutting the window insulating film. The instructions suggest cutting the plastic sheeting 2-inchs / 50mm longer and wider than the area, you plant to cover actually measures. Giving you a little extra material to work with makes installation easier. However, you only have enough material to cover 5; 3ft X 5ft double hung or casement windows as long as you do not make any big mistakes measuring or cutting the large sheet of window film to size.
Clean surfaces before installing double-sided tape
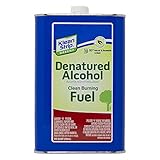
Using a mild detergent and Denatured alcohol
With just enough double-sided Scotch Tape contained in the kit to install the window insulation film to 5 painted wood or plastic window moldings. The picture frame like moldings surrounding your home and office windows, you must first thoroughly clean the surface of the interior window moldings before attaching the double-sided tape. Before attempting to apply the tape to the window casings that will secure the window insulation in place keeping the heat from escaping through the drafty windows. the best way to make this happen, using a mild detergent and warm water solution to clean all the dust, dirt and kitchen type film from all the window frame surfaces.
Dust & dirt, spray polishes, and oil cleaner conditioners, often leave residues that will keep the adhesive on the tape from sticking securely. Cleaning these areas with a clean lint free cloth, and denatured alcohol will solve this problem.
 | Klean-Strip Green QKGA75003 Denatured Alcohol, 1-Quart Klean-Strip Green Denatured Alcohol is made with a higher level of natural and renewable resources - twice the renewable resources as their regular denatured alcohol. It contain... |
Make sure double-sided tape sticks
The molding surrounding the window must be clean and dry
After making sure that, the area where the tape will go is clean and dry. Peel off the protective paper covering from one side of the tape only, and stick it to the outer most edge of the window casing. Starting in the middle of one side of the window frame, go all the way around the window making as few cuts in the tape possible. Making sure every bit is well stuck and there are absolutely no gaps. Using hair dryer to warm up cold surfaces will help to form the tape around corners, and help the adhesive stick better.
With the double-sided tape adhered well all the way around the window. It is time to measure before cutting the plastic window insulation sheet.
Note: before installing the double-sided tape, used to secure the 3M window insulation. Remove / take down any window blinds, curtains, and other items that will interfere with installing the plastic sheet insulation.
(Helpful measuring tip) using a tape measure or similar measuring devise not your thing, or you do not have such a tool in your junk drawer or tool kit. No problems, simply rummage through the closet or pantry until you find a bit of string or cordage. Remember, the important thing with measuring anything is repeatability.
- Align one end of your measuring tool, be it a stick or piece of string. With the top of, in this case your window, above the tape. In the event you need a helper and no one is around. Consider using the string method; tie a loop at one end of the string about the same size as your little finger. Use a pushpin or drive a small nail or brad on the outside edge of the window molding to serve as an anchor point for the string and hook the loop around it, and measure from that point to the bottom of the window.
- Measure from top left side of window, to the bottom left side of the same window pull the string taught and mark with a sharpie or use a one inch / 25mm bit of painters tape as a small flag wrapped around your measuring string, using the top edge of the tape as your mark. This way you can use the painter’s tape flag to make notes on i.e. H, for height, W for width etc. Duplicate this procedure for each height and width measurements.
- Simply transfer the marks on your measuring string to the window film, check your marks twice, before cutting the window insulation to width using a good sharp pair of dressmaker’s scissors.


Installing 3M indoor window insulator kit
Start at the top of the window and work your way down
- After removing the protective paper covering exposing the adhesive on the double-sided tape, make sure to avoid leaving wrinkles in the plastic film that otherwise will cause air leaks.
- Start applying the plastic sheet of insulation film, working from the top left corner of the window, towards the top right hand corner.
- Pull the plastic film taught enough to avoid leaving wrinkles, puckers, and getting the film uneven across the top. However, do not pull the plastic film to the point where it deforms.
- Pay special attention on keeping the plastic sheeting running about ½-inch above the top most edge of the weather seal tape, you installed at the top of the window frame earlier.
- Apply pressure evenly as you press the window insulation into the adhesive on the top side of the double-sided tape.
- Work along each side of the window from top to bottom.
- Remember it is extremely important to keep an equal amount of the excess plastic film outside each piece of the double-sided Scotch tape, as you work your way to the bottom of each window sash. Doing so, keeps the plastic film running squarely with each side of the window frame. Messing up here, will most likely cause you to waste not only valuable time, and materials, your sanity as well may be called into question.:)
Helpful installation Tip, use a clean dry cotton dishtowel, gently press and rub the plastic sheet of window insulation into the strip of double-sided tape adhesive, once the plastic is completely resting on the tape all the way around the perimeter of the window.


3M window insulator kit is easy to install
Finishing touches
Trim excess window insulation, use hair dryer or heat gun to smooth wrinkles
Once you have the plastic sheet of window insulation firmly pressed into the adhesive tape. Use an old hair dryer or heat gun to gently heat up the plastic sheeting starting at the top of the window, working all the way down the window.
The plastic window insulation will shrink and tighten, as it heats up, once the wrinkles disappear, move on as to not over-heat the plastic. This process will leave a transparent, wrinkle-free fit and appearance that reduces condensation forming on the window glass, subsequently preventing frost build-up on the inside of the glass.
With the heat gun trick having removed all the wrinkles, all that is left to do is to use a pair of scissors or razor knife to carefully remove the excess plastic from around the outside edge of the tape, and rejoice in the fact. You just completed another DIY project around your home.
Hair dryer or heat gun
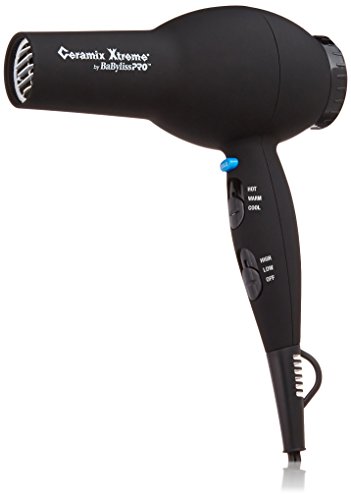 |
| BaByliss Pro BAB2000 Ceramix Xtreme Dryer Only $59.99 |
 |
| Wagner 0503008 HT1000 1,200-watt Heat Gun |
You might also like
Use Essential Oils to keep spiders awayUsing essential oils is a great natural and inexpensive method to keep spider...
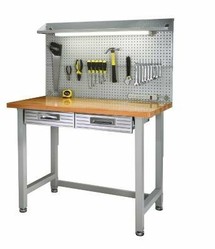
How to build the perfect garage workbenchLighted workbench in the garage makes the perfect spot for craft projects, bu...

 Apple Watch the Best Talking Watch Bargainon 01/16/2023
 In-depth review of a Bushcraft Backpacking Survival hatcheton 12/05/2014
 Growing cucumbers on a trellis is fun and easyon 08/05/2014
 Successful Fastpitch softball coach equipment needs liston 10/28/2014
Winterizing windows chat
That's a very useful article, thank you.
This seems like a very affordable solution. A DIY project that looks quite doable and easy goes a long way to ensure a warm and secure winter.