This article will show you exactly how to crochet an anklet using a simple single crochet pattern. Once you have mastered this design, you can adapt it to nearly anything you would like. Since beading and crocheting are so versatile, with so many colors and styles to chose from, crocheting jewelry is a wonderfully creative idea.

How to crochet an anklet with beads
by cherylone
Crocheting is a wonderful past-time. You can make blankets, hats, scarves, gloves, table runners, even rugs by crocheting them. But, did you know you can also crochet jewelry?
The anklet itself
You can add more beads, less beads, less crochets, whatever you want.
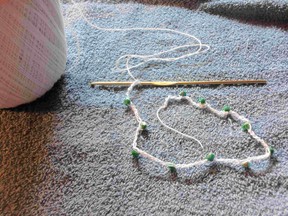
The anklet described here is 10" long from the first crochet to the last one with a 2" tail on either end. It can be tied on using the two tails, or you can add a clasp to your design using the tails to secure them. You can adjust your counts and your beads to make it larger or smaller. You can use regular yarn and larger pony beads to make key chains, larger bracelets, even necklaces. The options are limited to your imagination and, of course, creative muse.
You can easily get your needed supplies from EBAY
The materials you will need:
The anklet I made here is 10" long from the first crochet to the last one with a 2" tail on either end.
 To make it you will need:
- white embroidery thread
- 11 green bi-cone shaped glass beads
- size 0/2 crochet needle
- clasp set (optional)
How to begin your anklet
Do not cut your embroidery thread from the spool (or skein). Leave it intact until you are finished with your project.
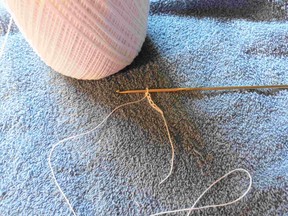 To begin your project, take your thread (yarn, etc.) and without removing any length begin beading on your beads. If you have chosen to use very small embroidery yarn and are having trouble getting the yarn through the beads, try using a beading needle.
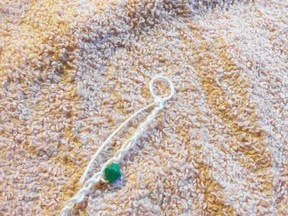
Then make your first knot leaving a 2" tail. Make 5 single crochets and then pull up a bead and crochet it into the anklet. (Please see video below on how to do this.)
Continue the pattern
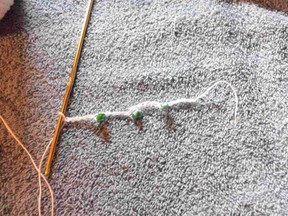
 Crochet another 5 single crochets and add another bead. Continue the pattern until all beads have been crocheted into the anklet. Then do one more set of five single crochets and knot off the anklet.
Before you knot the anklet, measure it to see if it will be the length you wish. If it will be too long, you can always remove some of the beads and crochets and then knot your anklet off at the desired length. Since the yarn has not been removed from the skein, you can simply remove the extra beads once the anklet is complete.
If you need to make the anklet longer, you will have to pull out the crochets and add more beads. Then begin the pattern again, crocheting in each bead as before. You could also use the same number of beads and just add more single crochets to make the anklet longer, if desired.
Finish it off with a 2" tail.
Use the tails to tie the anklet to your ankle.
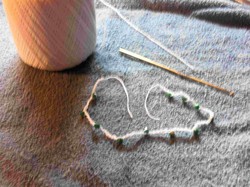
 The final product © Cheryl simonds | 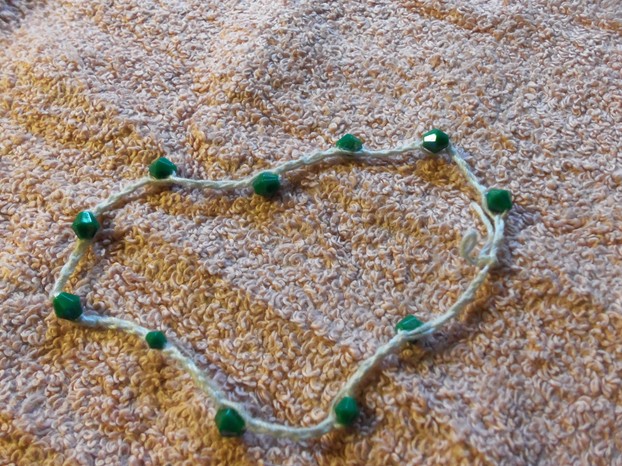 Shown tied as if on an ankle. © Cheryl Simonds |
or you can add a clasp
as shown here
 To add a clasp, you can do several different things. Above I have shown you one way of doing it.
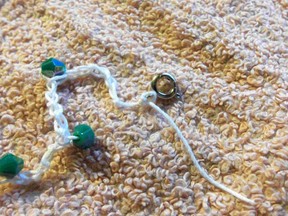
Use a pen or pencil to tie a loop on one end of your anklet. Add a small amount of jewelry glue to the knot. When dry, snip off the excess. On the other end, tie on a clasp and add a small amount of glue both on the knot and on the small loop of the clasp. When dry, snip off the excess.
You can also tie on a jump ring for the loop; add magnetic clasps in the same manner; or, if you really like to be creative, try crocheting in a small loop and knotting it off on one side. Add a large button to the other end and 'button' it on.
Another way would be to use a beading needle and attach the loop and clasps as you would with wire-beaded jewelry. I should note that the attachments will have to be sewn in several times, knotted into place and then jewelry glue added for extra strength.
Variations on this pattern
Once your anklet is complete, you can use it as a pattern for your next great project. Use a larger needle and yarn to make a necklace. Use a double crochet and beads for a key ring. Use different colors of yarn and beads to make unique patterns. Use smaller beads and less crochet stitches for a different styled pattern. Use your imagination and have fun.
Amazon might be able to help with your crafting supplies
If you would like something like this made, but don't really have the creative muse to make it...
check out this link.
Catteur Jewelry shop
In this shop, you will not only find many hand-made jewelry creations, but you can contact the creator and have something custom made with your choice of colors, patterns, sizes, and even clasps. Check them out.
Updated: 11/02/2012, cherylone
You might also like
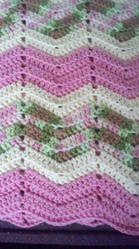
Ripple Crochet Baby Afghan PatternFree instructions for crocheted baby afghan in the ripple pattern.
Medicine Wheel Ripple Afghan Free Crochet PatternA free crochet pattern for my Medicine Wheel Ripple Afghan along with an expl...
Disclosure: This page generates income for authors based on affiliate relationships with our partners, including Amazon, Google and others.

 Fruit and vegetable juice or whole fruits and vegetables, which is better for youon 04/23/2013
 How to use memory wire to create jewelryon 12/19/2012
 The Spriteon 11/27/2012
 How to keep your feline companions safe and content during the holiday seasonon 11/10/2012
Tell me what you think, or just say hi
You are quite welcome, katiem2, I loved making this hub and the anklets were so easy I couldn't resist putting them out there for anyone to try. Thanks for stopping by!
What a fun project for the the girls and I. I used to make these with stretchy bead cord to make chokers for my daughters. I used a bright blue cord and added neon pink, blue, green, yellow and pink beads. They loved them and never took them off until they feel off. Thanks for reminding me of this fun project. :)K