Decoupage is a great do-it-yourself-project that anyone, from small children to the elderly can enjoy. With some imagination, glue and pretty paper you can transform ordinary objects into unique items for your home, and precious gifts to special friends and family. Here's a full step-by-step tutorial.

How To Decoupage
by Sannel
The word decoupage comes from the French verb decouper, meaning to cut. The method involves gluing decorative paper cut-outs onto various objects.
Decoupage a habit-forming art form
I love to decoupage. In fact, decoupage can be rather habit-forming. Ever since I started this very fun and inspiring old art form, there appears to be pretty pieces of paper glued on to everything imaginable around me! Furthermore, the possibilities to make use of the scraps of paper I have laying around, seems to be endless. All of you crafters who has ever tried this fun and creative hobby, knows what I'm talking about.
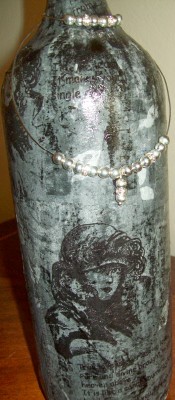 This empty wine bottle is all dressed up with some tissue paper and silver beads. Sannel |
Rewarded with beautiful pieces of art
As soon as you start to decoupage and get rewarded with beautiful pieces of art, you'll be on a constant lookout for many more objects to be transformed into decoupage masterpieces. With just some glue and some pretty paper, you're all set to start. Well, you need of course something to glue that pretty piece of paper onto, but since you can decoupage on almost anything, you should have no problem finding objects.
Decoupage = To cut out
The word decoupage comes from the French verb decouper, meaning to cut. The method involves gluing decorative paper cutouts onto various objects, then applying several coats of sealers to make the cutout appearance disappear, and the final unique result will appear as though they were painted onto the original item.
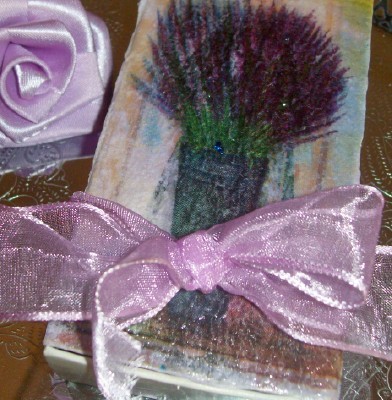 I took an ordinary matchbox and turned it into a lilac lavender creation Sannel |
Pastime of the élite
It's difficult to determine where this art form actually started from, but it is believed that this form of practice started in Eastern Siberia, where nomadic ethnic groups cut fabric figures to decorate items in the tombs of their ancestors. Those tombs date as far back as before Christ. However, it was in China in the 12th century that this art form first was historical mentioned. Chinese peasants appeared to have used colored paper cutouts for decorating lanterns, gift boxes and their windows, among other things. It is known that many of their cutouts had inscriptions for health and well-being.
It was not until the 17th century that it would reach Italy (Venice) and France, thence became immensely popular, especially after the import from the Far East of oriental decoupaged and lacquered furniture. The Asian lacquered items became so popular in Europe at the time, that the demand exceeded the supply, which resulted that the depentore "Venetian cabinet makers and lacquers" started to produce fake lacquer work to keep up with the growing demand. This work, recognized as "lacca contrafatta-counterfeit lacquer."
Historical people like Madame de Pompadour, Marie Antoinette and Lord Byron loved this hobby, that was considered to be a pleasurable pastime of the aristocracy.
More resent artists of the 20th century are Anri Matisse and Pablo Picasso who used decoupage in their works. I guess one of the best known examples of this art form is the “Blue Nude” of Matisse.
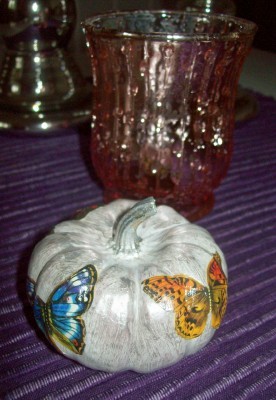 Why not decoupage a pumpkin! Sannel |
Spare our landfills-Decoupage!
Decoupage has never lost its popularity, and is now bigger than ever. In the 12th century, there was no need to give much thought to the environment, like we do in today's world. And since decoupage is an art form that reuse and recycle old items more than any other hobby, it is very environmentally friendly. You can say that yesterday's art form turns out to be today's recycling! This art form is indeed a hobby just right for today and for the future.
So next time you're thinking to throw away something, take a second look, it may look great with some glue and paper, and you will spare our landfills from more trash.
You can recycle furniture, paper, books, plastic, glass, fabric, wrapping paper, old stamps, boxes, metal, plastic jars, lampshades, picture frames, ceramics, wood, paint buckets, plates, milk cartons, wine bottles . . .well, I could go on and on.
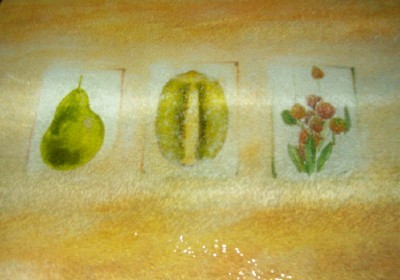 Decoupaged cutting board Sannel |
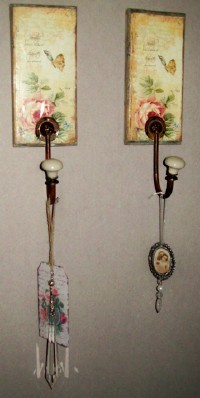 Decoupaged hooks Sannel |
Start practicing on simple projects
I recommend the best way to learn decoupage is to start practicing on simple projects like a shoebox, matchbox or an inexpensive plate. The more competent you get, you can work yourself up to more complex pieces, such as a coffee table or a bed board. Don't worry if you make a mistake. You can simply start over or recycle it until you'll get it right.
Before you start on your project, it is always good to lay out the design the way you have pictured it. This helps you to make sure you'll have enough paper, and where exactly the cut out pieces will go. You can overlap the images if you like, or create some sort of collage.
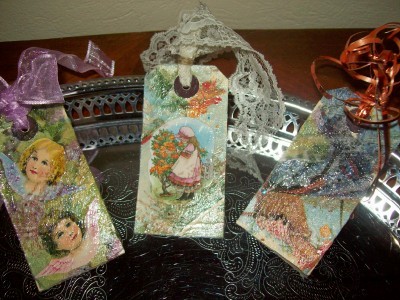 I decoupaged these Manilla tags. It will be marvelous gift tags Sannel |
Supplies
This is a very inexpensive hobby and its so easy to learn and do. There is only a few supplies you need to get started:
First of all you need glue. You can use standard white glue such as Elmer's and dilute it with water. However, you get best result with decoupage medium, which is very inexpensive anyway.
Invest in a good pair of craft scissors with long, thin tips that makes it easier to reach into small, difficult angles and corners.
You need something to spread the decoupage medium or the glue. A small paintbrush is great as well as foam brushes. Cotton swabs, works fine for very small images. I found that using your finger to spread the glue is also a great tool. To spread the glue on larger projects, I believe brayers are best (it is a tool like a miniature rolling-pin.)
If the project you are working on will be used or handled often, I recommend to protect the surface with an acrylic spray sealer or varnish.
You need paper such as paper napkins, wrapping paper, stickers, old stamps, photographs from magazines or newspapers, pages from books, greeting cards, sketches, fabric, custom decoupage paper or anything else that you may find suitable for the purpose.
Damp rag or sponge to keep both your hands and workstation clean.
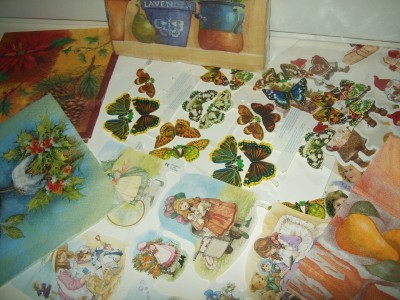 Paper cut outs and napkins for decoupage Sannel |
 | New Decoupage: Transforming Your Home with Paper, Glue, and Scissors Get ready to take decoupage way beyond its Victorian image. Contemporary decoupage works are made with family photos, magazine clippings, handmade papers, or any other image tha... |
 | Decoupage: A Practical Step-by-Step Guide Complete with 30 projects, this beautifully illustrated guide reveals the endless variety of articles of all shapes, sizes, and surfaces that can be embellished with decorative ... Only $6.36 |
 | Decoupage & Decorative Paint Finishes: Creating Treasures Out of Everyday Objects Explains how to transform everyday objects and garage-sale finds into extraordinary custom-made objects, offering step-by-step directions in the art of de+a7coupage and decorati... |
 | Decoupage: A Practical Guide to the Art of Decorating Surfaces with Paper Cutouts "Perfect for beginners as well as experienced decoupeurs."—Victorian Home and GardensAptly called "painting with scissors," the art of decoupage (embellishing surfaces with deco... Only $10.98 |
 | Napkin Decoupage: Simple Clever Effective Discover the delights of napkin decoupage with this start-to-finish guide packed with technique know-how and stylish projects. The practical chapter of essential techniques guid... |
Instructions:
1.Make sure the item you’re covering is clean from dust and debris and that the item is dry. If you’ve painted it, be sure the paint is completely dry.
2.Cover the item of your choice with decoupage medium or glue in a lavish layer. Any spot your pictures will touch should be coated.
3.Attach the pictures or paper to the object. In doing so be careful of the position, and be certain that there are no air bubbles or wrinkles. If you’re attaching a large picture, start smoothing it from the center and work your way out to the edges. This is one of the most crucial steps. Even, smooth and accurately placed pictures is what gives the project a flawless, professional finished look.
4.After you have covered your object, let it dry completely.
5.Once it is completely dry, coat it again with the diluted glue or decoupage medium. Continue this drying/coating process until the picture edges are completely smooth and you’re happy with the results. The more coats of glue you add, the nicer it gets and the object transforms into a picture.
6.You may now like to add sealer or varnish to the object for extra protection. This is very important for furniture, as it generates a smooth and protected surface. Bear in mind to varnish all items that might get heavy use.
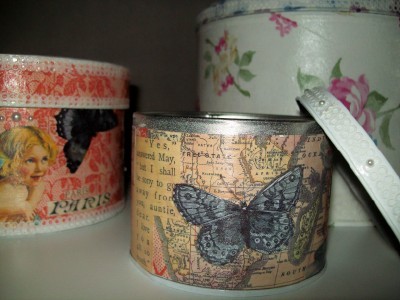 A boring box can turn into a nice giftbox Sannel |
Great do-it-yourself-project
So go ahead and get creative! Decoupage is a great do-it-yourself-project that anyone, from small children to the elderly can enjoy. With some imagination, glue and pretty paper you can transform ordinary objects into unique items for your home, and precious gifts to special friends and family.
Have fun!
©Copyright 2012 By Sannel Larson.
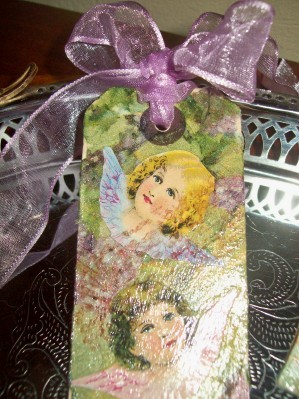 Decoupaged Manilla tags - Makes beautiful bookmarks Sannel |
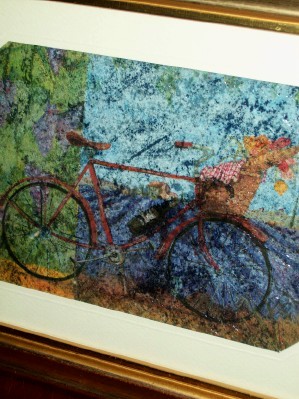 I used an ordinary tissue napkin and some diluted glue to make a picture. It sure looks like an oil painting, doesn't it? Sannel |
 | Music for Painting - Painting,Decoupage and Inspiring Relaxing MusicOnly $9.49 |
 | Walnut Hollow 15" x 11" Seving Tray WALNUT HOLLOW-Pine Serving Tray. Creating is always fun but sometimes work! Walnut Hollow has taken all the work out of your crafting with these pine wood trays. Features: great... Only $24.74 |
 | Decorative Glass Plate White Orchid - 4" A pretty small decorative plate that looks vintage. Transferware on glass with flower motif. Great gift! |
Thank you for reading,
Sannel
You might also like
Cupcake Card Template and TutorialLooking for a free Cupcake Card Template that you can use to make some super ...
Paper Crafts for Kids: What to Do on a Rainy DayWhat can you do with kids on a rainy day? With only a piece of paper and a li...


 Gravity Glue-Rock Sculptureson 08/26/2017
 Fibromyalgia and Suicideon 08/01/2012
 Sannel's Healthy Pound Cakeon 07/17/2012
 Lentils - The Healthy Foodon 07/09/2012

Please leave a comment!
I appreciate the how, yet it is the artist and the art catching the eye. Having explored this venue once before in an academic setting it was not the hobby, it was the surrealism of expression studied. From a distance pictures are painted defining the surrounding space with chosen objects such as the bottle or the 'boring' box offering treasures to the subconscious mind. Oddly, and at times, the awareness of the conscious see just the box, a butterfly, yet miss the dream, the vision, the illusion of newness with a smile.
A glimmer of hope of tomorrow is shared, a twinkle in each little girls eye, a constant running thread in this masterpiece presented. The sphinx says read between the lines, while remembering the how-to. The illusion offered with the space leaves the reader with the grace of imagination offering mercy, which frees the observers soul to envision the flight of each butterfly. Soon, a garden is seen, a child at play with friends, those butterflies, whose softness of flight was once a silly cocoon, And, before that a munching bandit of leafs turned slowly like a rhyming fable told at night of a princess, a castle, and few less homeless pets.
Thank you Sheri! I'm glad my wiz has brought you some inspiration for new decoupage projects.
I'm bookmarking this for later reference. I love decoupage and you have given me some inspiration here for a few new projects.
Hi Cherylone! I'm so glad if this wiz gave you some ideas and inspiration to start decoupaging with your daughter. Thank you for your time.
Hello android! I appreciate you sharing your time and words here with me. Thank you!
Wow, I love this article. I, and my daughter, are always looking for things to craft. This is a great help. Thanks for sharing.
Great article... I read this topic, and love to find some great infotmation. If there is more information about this article you will... I do share more... Thanks...
Hello Ragtimelil! Your welcome! Thank you for your time and comment.
I haven't done any in ages. I might find some use for it around here. Thanks for reminding me.
Hi 2uesday! Yes, it's a wonderful and creative way to recycle those lovely greeting cards that otherwise would be discarded. Thank you for taking the time to comment.