DIY: How to Install Concrete Floors

by RobertKeith

Concrete floors provide a clean, glossy look to your interior floors, and they are durable, water-resistant, and easy to clean, which makes them suitable for various applications.

They can also be finished in different textures, colors, aggregates, and stains to suit different preferences. And since they absorb heat, they can also help lower your energy bill.

Concrete floors are practical enough to be installed yourself provided you follow the correct techniques, which are as follows:

Step 1: Create a Protective Barrier

The first step to installing a concrete floor is to create a protective barrier to safeguard against debris and moisture. It also helps create a level surface for the concrete to be placed. 

To begin, place timber rails, cut to the thickness of the floor, around the perimeter to keep the concrete in the location you want. 

Pour a 1 to 2-inch layer of sand on the floor. Next, place a layer of plastic over the first layer of sand, and then follow up with another 1 to 2-inch layer of sand on top. 

Laying Floor Tiles
Laying Floor Tiles

Step 2: Install the Reinforcement

Place the reinforcement, which can be various materials, including rebar, wire mesh, or fiber mesh, which is fiber inside of the concrete, on top of the sand. Generally, the type of reinforcement you use depends on the standard building codes in your area. 

When using wire mesh, as a general rule, you should have at least two inches between mesh lapping. 

Next, place about 4 Dobie concrete blocks under the wire mesh so that the mesh is lifted above the sand. This ensures the concrete is able to flow under the mesh as well as on top of it. In other words, it enables the reinforcement to be in the center of the concrete. 

Finally, twist the Dobie wires to the wire mesh to ensure the mesh stays put. 

Step 3: Obtain an Inspection

At this point, you may need to undergo an appropriate inspection either by a design professional or a city official to ensure the base of the floor is up to standard before pouring the concrete. 

Step 4: Mix and Pour the Concrete

Mix the leveling concrete, using a mixing bit or a paint mixer attached to the heavy duty drill, according to the directions. The finished product should resemble a thick batter. 

Begin by pouring a layer of concrete over the base, and be sure to get the concrete in the corners of the area. 

Next, level the concrete using a concrete screed or a 1/4 gauge rake. You could also use a 2 x 4 as a wood screed. Maneuver the screed over the concrete until the concrete is level, and use a 1 1/2-inch putty knife to smooth hard to reach corners. 

Step 5: Finish the Concrete

Once the concrete is even, use a trowel, a large rubber squeegee, or a bull float to smooth out any lines or imperfections in the concrete so that it is creamy. Or, you may broom finish the concrete to apply tile. 

Step 6: Allow the Concrete to Completely Dry

Allow the concrete to dry for 10-20 hours, after which time, it will be ready for the finish. Or, simply leave it dull for a rustic appeal. 

Step 7: Apply the Finish

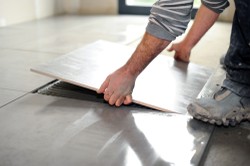
There are various concrete finishes to choose from, from scoring, which utilizes a circular saw to cut shapes or grooves in the floor, to stamping, which imprints wood planks, bricks, tiles, or stone patterns and textures onto the concrete, and even special stains that can be applied to the concrete to create beautiful patterns and elaborate designs. Concrete can even be colored while it is being mixed to create a uniform colored concrete floor. 

Once the stamping, scoring, or coloring is complete, the floor can also be polished to a glossy shine, which also helps brighten the area. 

Concrete floors make great additions to homes, offices, stores, and more. And they don't trap allergens like other types of flooring, which also makes them a great choice for allergy sufferers. If you are considering an upgrade to concrete floors, contact us for a free quote.

Updated: 05/30/2018, RobertKeith
 
Thank you! Would you like to post a comment now?
1

Comments

Only logged-in users are allowed to comment. Login

You might also like

How to Wash Your Clothes with Natural Laundry Products

Limit your family's exposure to chemicals by using green laundry soap. This g...

Yonanas Review

Yonanas is a frozen dessert maker that touts the ability to create an ice cre...


Disclosure: This page generates income for authors based on affiliate relationships with our partners, including Amazon, Google and others.
Loading ...
Error!