
How to Create Your Own Monogrammed Filet Crochet Bookmark
by PJDeneen
These bookmarks make great last minute gifts and are so easy to design yourself.
You Can be a Designer Too
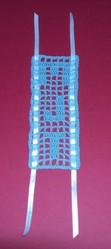
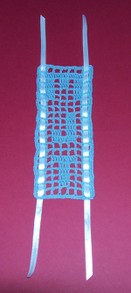
I love to create personalized gifts. This filet crochet bookmark is monogrammed with the initials MJT. I created it from scratch without a pattern. Filet crochet is easy to add your own designs to. You just need to know some of the basics to design your own patterns.
This technique is easily adaptive to letters, numbers and pictures. You'll come across filet patterns for everything under the sun. Actually, I'm sure you'll find patterns for the sun! These pieces can be used like doilies, for wall hangings, furniture covering as well as for bookmarks like I do here.
Graph paper makes this easier, but I didn't use it for this project to begin with, though I did one later to make it easier for readers to understand. You can find free printable graph paper online if you don't have any on hand.
The Basics of Filet Crochet
To create a design without a pattern, you need to keep the following basics in mind and have an understanding of crochet terminology:
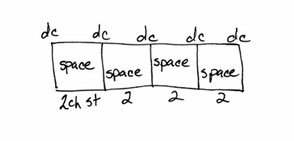
- An open mesh area (or space) of filet crochet is the equivalent of 4 stitches which includes 2 double crochet (dc) and 2 chain stitches (sc). Refer to the illustration below to see what I mean.
- To fill a mesh area, you simply crochet 2 double crochet in the space.
Please note that I'm in the US. In other parts of the world, a double crochet is actually a treble crochet.
Materials Needed
- Size 10 crochet cotton thread.
- Size 7 steel crochet hook (1.5 mm).
- Scraps of 1/4-inch wide ribbon.
How to Create the Mesh
This is how to begin a pattern that has the 7 spaces like this bookmark:
Ch 26 stitches. Dc in 8th stitch from hook. This serves as the first dc, 2 st, dc section. *Ch 2, skip 2 stitches and dc in next stitch. Repeat from star until the end. Ch 5 and turn. Skip ch 2 space, dc in next dc.
I started my letters on the next row thus: Continue making the mesh areas until reaching center (4th space), 2 dc in 4th space. Dc in next stitch. *Ch 2, skip 2 stitches, dc in next st. Repeat from star until the end. Ch 5 and turn.
Next row: Skip ch 2 space, dc in the next dc. *Ch 2, skip 2 stitches and dc in next stitch. Repeat from star once. Dc in each of next 3 dc. *Ch 2, skip 2 stitches, dc in next st. Repeat from star twice more. Ch 5 and turn.
The Letters
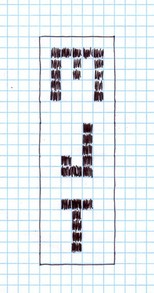
Since I don't know what letters you want to create, I'm going to leave the rest up to you. But here is a graph of my pattern to get you started.
As you can see, my letters were each 5 spaces tall. The J and T are each 3 spaces wide. The M is 5 spaces wide. And I left two mesh rows between each letter and one on each end. Each darkened space in the graph represents 4 dc (two that fill in the space and one on each side).
I will probably do this differently next time and adjust the pattern so that all of the letters are the same width. Also, I would leave a space in the middle of the top of the M to more resemble the dip in the written letter. Other than that, I'm happy with this project and now I'll use this technique to make more gifts.
Finishing
To finish off the bookmark, I did single crochet (double crochet outside of US and Canada) around all sides. I weaved a piece of ribbon on each side. I hope this has inspired you to create one of these. They make excellent frugal yet thoughtful gifts for any book lovers you know.
Another quick crochet gift idea
Crochet Towel Topper Free Pattern
This crochet towel topper is another excellent frugal and quick homemade gift to make.
You might also like
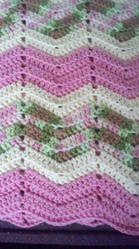
Ripple Crochet Baby Afghan PatternFree instructions for crocheted baby afghan in the ripple pattern.
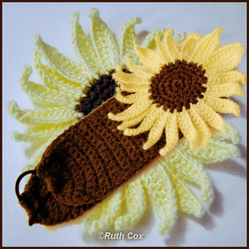
Crochet Sunflower Headband Ear Warmer PatternCrochet this sunflower headband for yourself or as a gift to another. Loads o...



 Supplies and Techniques for Repairing Bibles and Other Cherished Bookson 12/21/2012
 Crochet Towel Topper Free Patternon 11/28/2011
 How to Make Almond Milkon 11/25/2011
 Will Voice Recognition Put Medical Transcriptionists Out of Work?on 06/21/2011

Comments
That makes a very unusual bookmark. Doesn't look like it takes too long either. Nice idea!