Lighting is more than just illuminating the subject. Lighting is a story telling agent. Lighting is an art and it is important to know how to use light and how to do a basic four point lighting set up for film, testimony, and interview. A four point set up is a great starting point that you can grow on from there. Once you understand the basic set up you can create from there.

How to Set Up Four Point Lighting
by skFliehman
This is an article about why you need studio lighting and how to properly set up four point lighting.
 Light Bulb |
The Importance of Good Lighting
When I was younger I did not appreciate a properly set up lighting system. To me lighting was simply a way to illuminate the subject. For me back then if we could shoot outdoors or with all the house lights on then that was enough. I look back now and want to strangle that guy! Sure lighting in its simplest form and function is to illuminate something. It is designed to “light” up a room. But even think about that phrase “light up a room”, good lightning in its simplest form brings life, warmth,and completeness to a room. People pay good money to have fashionable lighting fixtures in their homes and offices. People will shop and look for hours for the right light and lighting fixture decorations. Good lighting is important to people. How much more important is good and creative lighting to the filmmaker and photographer? How much more important is good lighting to the artist? In the hands of a good designer, lighting can be a form or art. Lighting is a story telling agent the same as a paint brush, pencil or in our case a camera lens. Lighting informs us about the mood of the characters or talent. Lighting tells us if the scene is warm and inviting or cold and menacing? Lighting shares the feeling of the scene with us even before an actor or speaker opens their mouth. Many people put all their film budget on the right camera and lenses. It’s important when setting out on a film making adventure to put great thought into what kind of camera and lens you want. But don’t forget to put as much thought and emphasis on the right kind of lighting set up. In my opinion there are two different lighting set ups that artist like to use.
 Studio Lights | 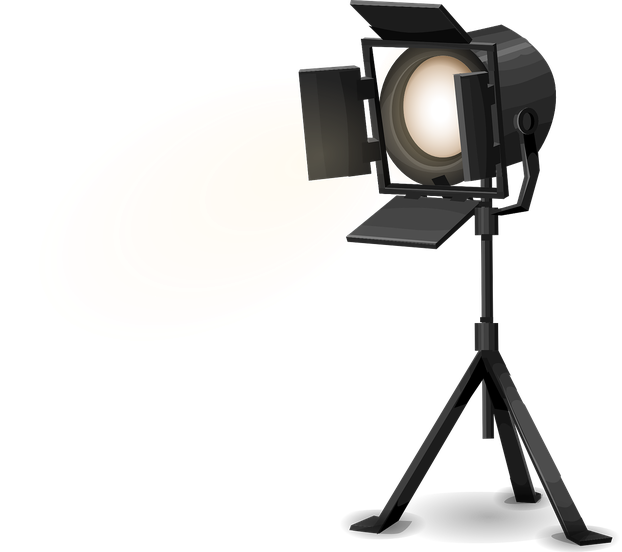 Studio Light |
Two Different Studio Lighting Set Up's
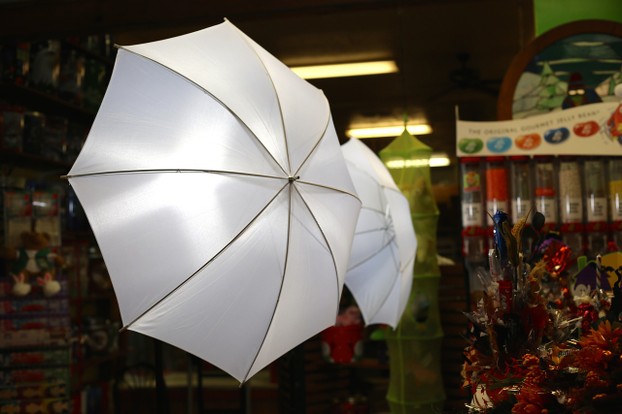
The first set up that I think about is an umbrella lighting set up. This is an arrangement that is normally done by still flash photographers. These specially made umbrellas are designed to reflect and throw light. They are meant to cast a lot of light over a lot of space. You can set the intensity levels differently so that that you still get the desired effect. They can also be set up in a flash setting to get a blast of intense lighting on your subject. Just because this method is used primarily by photographers that does not mean that videographers can’t use it. I love and use my umbrella system a lot when shooting video.
The second is a traditional videography lighting set up. Lights are set up to be cast in a more directional manner. One of the major tools to give direction and shape to light is the barn doors. Barn doors are a fitted metal piece with flaps that turn up, down, or in to sculpt the light beam. With barn doors your bright, booming beam gets turned into an on purpose piece of art. Modern studio lights also come with slots for ND filters and color filters. You can get a blue filter and ad a blue hue to your scene. I personally love LED light panels. LED’s are set up with a dial so that you can change the intensity, and even the color of the light. You can go from a indoor 3200K to a day light color or 5600K. K in this instance stands for kelvin, how we measure the color temperature of light. LED’s can be fitted with barn doors as well thusly in my mind making the perfect light sculpting fixture!
 Umbrella |
Four Point Lighting Set Up
Key Light:The key light should shine on the subjects best side or features. It is the brightest and most intense light, and it will cast the most light across the face. It is specifically designed to highlight and shine on the subject. Usually the light is positioned just above the head but not in a way that the light shines directly down on them. Maybe position it at a 45deg angle or somewhere around there.
Fill Light: The fill light is the shadow softener. The key light is going to create some harsh shadows. The fill light softens those and will create a more pleasing and desirable image. It’s not exactly a beauty light but it works similar to one by softening the shadows and features.
Hair Light: The hair light is very important to the final image. It shines on the back of the head which gives a nice light accent to the head. The important term here is accent, you don’t want a halo image. Too close or too strong hair light will make your subject look to angelic or ethereal. Unless you want that, otherwise soften this light so that there is just a nice touch. The second thing this light does is separate the subject from the background. That outline of light will pop your subject from the dark wall.
Back Light: The Backlight illuminates the background. This light is designed to wash out any weird shadows created from the other lights. If you have an interesting back ground it can also help the features stand out. It may also be nice to use some barn doors and maybe just throw a slash of light across the wall or some other interesting effect.
I hope that this article has been of service to you as you start your filmmaking journey. Remember that light is like your artist brush, learn to sculpt and use it to your benefit. Learn to set up your four point light.
 Four Point Lighting |
Four Point Lighting Instruction Video
Updated: 04/22/2016, skFliehman
You might also like
True Facts About The Waltons That Would Have Shocked The WaltonsThe tales from Walton's Mountain invoke an age of innocence; though naturally...
What Happened to the Waltons After The Waltons Finished?We're going to have to assume that the Walton family lived happily ever after...
Disclosure: This page generates income for authors based on affiliate relationships with our partners, including Amazon, Google and others.
 Shooting a Live Eventon 03/16/2016
 3 Ways to Change Your Life by Servingon 04/03/2015
 Family Mission Tripson 04/01/2015
 Serve with a Rescue Missionon 04/01/2015
Comments