
How to Make Parisian Style Macarons
by TabithaY
Parisian-style macarons, or macaroons, have grown in popularity, but can be intimidating for the home cook. Never fear - you just need precision and attention to detail!
Introduction
I love Parisian-style macarons, those dainty little meringue sandwiches. The fillings can range from jelly or jam to a rich chocolate ganache with everything in between. Ideally, they should be crispy on the outside with a softer interior that melds with the filling. They're amazingly addictive, and I was determined to learn how to make them at home given the high prices - and difficulty finding good macarons here in the States
I did my usual Hermione and looked around on Amazon for an appropriate book, picking Mad about Macarons! by Jill Colonna, a Scottish ex-pat living in Paris. It's an excellent cookbook geared toward the home cook and includes specific equipment lists (most of which are necessary, I found). She gives very clear instructions with lots of flavor and filling variations. I've made only a few tweaks to the basic steps based on my personal experience.
You will see that the measurements are in metric. I considered converting them for U.S. cooks but decided not to mess with the basic recipe since it works very well as written (although I do give the oven temperature in Fahrenheit). The digital scale I recommend below will measure in metric and is indispensable for this type of precision baking. I also changed some of the terminology from the original to what's more commonly used in the U.S.
Don't be discouraged if your first batch isn't perfect! I'm a pretty experienced baker and had some problems - but learned a lot in the process. For me, the biggest challenge was getting the oven temperature and baking times right (I had a bunch of overbaked macarons). I quickly realized I need to get a new, easier to read oven thermometer and also that my cheap cookie sheets give better results than my heavy, expensive ones from a specialty retailer.
So experiment! The most expensive ingredient is the ground almonds, and any new equipment you need to buy can be used for years.
Mad About Macarons
 | Mad About Macarons!: Make Macarons Like the French The best guide available for making Parisian macarons at home. Jill Colonna guides you simply yet precisely through each step in making perfect Parisian macarons every time. ... |
Equipment
If you've done any baking over the years, you will probably have some of this equipment.
- Digital scale (I have 2 of the model below - it's really handy)
- Mixer - I love my KitchenAid stand mixer, but a hand-held model will work just fine
- Large spatula
- Large piping bag
- Round piping tip, ideally used with coupler tip. I used a Wilton size 12 with good results.
- Flexible plastic scraper, often sold as a bowl scraper
- Baking sheets, 3 or 4 depending on their size
- Baking parchment
- Sieve
- Two mixing bowls, or one bowl plus the bowl for your stand mixer, if applicable
Make sure everything starts out perfectly clean and free of grease. Line the baking sheets with the parchment paper.
Equipment Suggestions
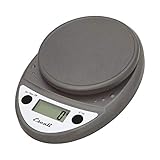 |  |  |
| Escali Primo Digital Multifunctional ... Only $27.89 | KitchenAid KSM150PSER Artisan Series ... Only $499.95 | Ateco 1303 Bowl Scraper |
Preparation
So one of the more unusual tips included in the cookbook was to age the egg whites for 4 to 5 days before making the macarons. I have heard variations on this before, so I figured I'd give it a try. Since I didn't do a comparison of the results using aged vs. unaged eggs, I can't say if it made a difference, but it's easy enough to do.
Separate the eggs and put the whites in a clean, airtight container in the refrigerator 4 to 5 days before you make the macarons. You will have a lot of egg yolks left over! Considering making some homemade mayonnaise, crème brulée, or hollandaise sauce.
Ingredients
150g egg whites, aged (about 5), brought to room temperature
100g granulated sugar
180g ground almonds
270g powdered sugar
If you can't find ground almonds in the store (I get them at Trader Joe's), get whole ones and grind them in a food processor.
Make use of the tare function on the digital scale to make measuring easier. Place a mixing bowl on the scale, press tare to bring the display to zero, and add the ingredients (make sure the units are set to grams).
Instructions
Mixing
If using a stand mixer, insert the whisk attachment.
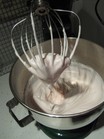
Whisk the egg whites, gradually adding the granulated sugar. You want stiff, glossy peaks when you draw back the beater. This is the stage to add a a little food coloring if desired - I prefer paste food color.
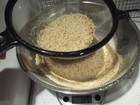
Sift and mix the ground almonds and powdered sugar. I found this approach to work well:
- Set the mixing bowl on the scale. Press tare. Make sure the scale unit is set to grams.
- Sift the ground almonds into the bowl until you get 180g. Discard the large almond pieces that remain (or save for other uses).
- Press tare again on the scale to bring it back to zero.
- Sift the powdered sugar into the bowl until you get 270g.
- Remove from scale and mix well.
Use the large spatula to mix the beaten egg whites into the dry ingredients. You don't need to fold - you will actually be trying to work out some of the air.
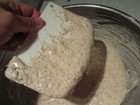
Switch to the bowl scraper and work the mixture, pressing down through the center of the bowl, to force out some of the air. Do this for about 5 minutes until the mixture is smooth and forms a ribbon on the scraper when lifted from the bowl.
Piping and Shaping
Prepare the piping bag and tip. Put the mixture into the piping bag (a stand or tall jar can be handy for this step - I need to get something appropriate for future use).
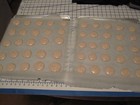
Pipe the mixture onto the prepared baking sheets. You just need to put the tip close to the sheet and allow the piped batter to form a little round, lifting away with a rounded motion. Any ridges on the surface should settle out in the resting stage.
Make each round about 1.25" (3 cm) in diameter with at least half that between each.
Allow the piped macarons to rest for at least 30 minutes. This step helps the distinctive, cracked foot (pied) form around the bottom of the little cookie as it bakes.
Baking
Preheat the oven to 320F (160C). As I mentioned in my introduction, this is where I had the most challenges. You will probably have to experiment with different temperatures, rack placement, and baking sheet combinations to see what works in your oven.
Bake in the center of the oven, one sheet at a time, for roughly 10-12 minutes. If you gently touch the top of one macaron and it moves, continue baking for a few more minutes.
Remove from the oven and allow to cool before removing. Use a thin spatula to remove the macarons, but the parchment paper should prevent any sticking.
Assembly
Match up the macarons in pairs by size on a layer of parchment paper, having one face down the other face up.
Pipe or spread your chosen filling onto the bottom half (with the flat side up) and carefully press the top (flat side down) into the filling. Use a slightly circular motion to press the sides together.
You need just enough filling to show a bit at the edges but not so much it overflows. Again, this should come with practice.
Put the finished macarons in the refrigerator for at least 24 hours. This lets the filling meld into the cookies for that perfect texture - believe me, it makes a difference! Let come to room temperature before serving.
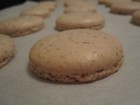
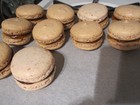
In-Progress Photos
Fillings
You can use a wide range of fillings on these goodies. Some suggestions are
- Jelly, jam, or preserves.
I tried apricot preserves, and they were amazing. - Pastry cream.
You can flavor and/or color it to match your cookie color. - Ganache.
This is an option that I tried. It's very good, but extremely rich.
Macarons are also perfect for delicate little embellishments, from piped chocolate to artful spatter painting with liquid food coloring. Or try edible luster powders for a subtle shimmer.
Edible Luster Powder
 | Wilton Gold Pearl Dust Wilton Gold Pearl Dust Only $12.99 |
 | Wilton Orchid Supplies, Pink Pearl Dust Wilton Orchid Pink Pearl Dust Only $9.99 |
 | Wilton Silver Pearl Dust Wilton Silver Pearl Dust Only $9.99 |
 | Wilton Pearl Dust, Sapphire Blue Give your fondant, gum paste, royal icing and molded Candy Melts decorations a beautiful, glittering finish, Sapphire Blue Pearl Dust |
Additional Commentary
I'm finishing my second attempt at making macarons after applying some of what I learned the first go 'round.
- I moved the oven rack up one level so it was almost exactly in the middle of the oven. This definitely seemed to fix the problem I had with the bottoms of the cookies getting too brown.
- I thought I should try a higher oven temperature since my first batches took noticeably longer to bake than the recipe stated, so I took it up to 350F. Not a good idea, I discovered! The little foot didn't form on the bottom of the cookie. So I turned it back down to 320F and just baked them longer with much better results.
- I kept the cookies smaller, just under the 1.5" width. It's personal preference, but I just like the look of them better at this size.
- I have to add a lot more food coloring. It looks fine when it's just the egg whites, but it gets far too washed out once mixed with the almonds and sugar. So I have to make the egg whites look way too dark to get the right ending color.
More to come, I'm sure!
You might also like
Fresh Lemon Pound CakeThe zing of lemons balances the dense texture of a traditional pound cake. In...
Cake Push Up PopsIt's not a cake, not a cupcake and not a cake pop. Cake push up pops are the...


 Essential Kitchen Tools: Gadgets and Accessorieson 01/26/2012
 Essential Kitchen Tools: Kniveson 01/25/2012
 Essential Kitchen Tools: Pots and Panson 01/24/2012
 Basics of COBRA Health Insuranceon 01/21/2012

Comments
I just love cakes and cookies. It looks a bit difficult to make, but I or my girlfriend will definitely try this.
Thanks!
Splendid description of the macaron baking process. My compliments! :)