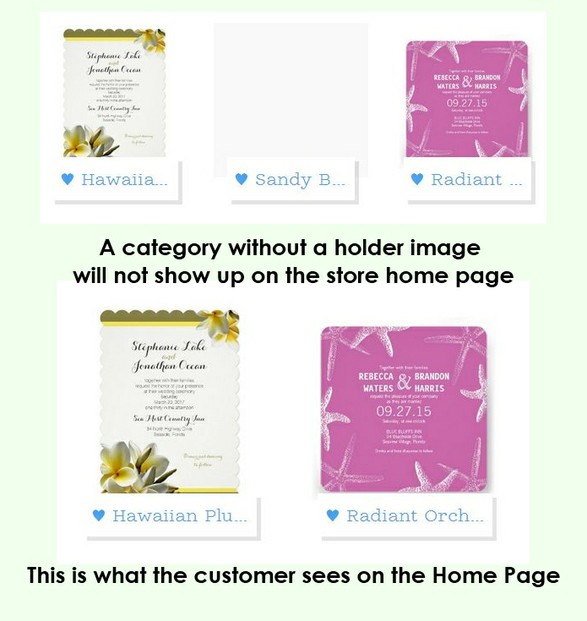
When this page was first written, Zazzle gave us gray folders to hold the places of our individual store categories. Now the category will be blank unless you add something to hold the place. The category WILL NOT SHOW in your store if you don't decorate it with something.
On this page I will explain how to easily upload an image to the category holder so customers will see the section, and hopefully want to buy something from it!
This is a quick way to make sure the category shows, and the single image can later be replaced by a more professional-looking set of products as the category holder, if you know how to do that.
All that is needed is one design to upload, and then text entered to describe the section.

How to Add Images to Zazzle Categories
by dustytoes
It's easy to create a Zazzle category and then fill it with products, but there must be an image on that place holder for customers to find it.
How To Find an Image
First, fill the category so you'll have products to choose from.
 However you decide to organize your Zazzle store - by product or by design- you will need to use the categories to make the store easier to navigate. You will most likely end up with thousands of products in the store. In order to keep things nice and neat, create a category for each set of items.
Which ever way you decide to group products, the category holder will need an image. The category sections will remain out of site on the home page if you don't add an image to the section.
If you are knowledgeable and creative you can make graphics with text to represent the category. That can be a time-consuming venture. But there is an easy way to make the category show.
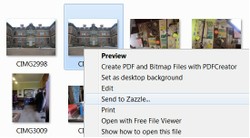
Grab an image of a product from the category that needs it. On my laptop I use the "snipping tool" to cut around it and then save it for upload. On a Mac use the "command, shift, 4" and do the same cut around the product. Find one of the best looking products to represent the category and take a screen shot of it. If the product has the "customize" button in the way, click on customize to see the image clearly before making the snip.
Go back to the category area in the back end of your store and find the category that needs the image. In the edit mode, you will see the area where the image belongs. Simply upload the image and you are done!
 No Image Means an Invisible Category |
Categories and Sub-Categories
In the image above, the shop owner will see the empty category, but on the storefront, it won't show at all. That means that any customers who come to your store and land on that first page, won't even know you have any of this items for sale. The products can still be found through tags and searches, but it's in your best interest to make sure they appear with all the others.
Any category can have numerous sub-categories. Those will not show up until the main category is chosen, and they must also have images in order to show.
The trouble I have with sub-categories is that the order of the products can't be changed. Main categories have that option.
Zazzle Reminiscence
I began selling at Zazzle in 2007 and the website has made many changes throughout the years to keep up to date with this fast-paced online world.
It's difficult for me to remember exactly how things were way back then. There were certainly not as many products. These days Zazzle adds new products weekly, if not daily at times.
We used to have the option to colorize our stores. Background, header, text, sidebar, and so on. Some people would create truly hideous combinations. The consensus was that a plain white background looked most professional. And Zazzle changed all of the site to look the same in 2013. We can still add our own banner image.
One of the products that we were offered to create was the Ked's shoes. I remember that people went nuts making awesome looking shoes. Some people opened new stores (yes, me too) just to display the shoes. I did sell some shoes, but suddenly Ked's shoes were no longer available. I lost an entire store.
So keep in mind the fact that products can disappear and all your hard work will be gone.
When did you begin working at Zazzle, and what do you remember?
Zazzle opened in 2005.
I have been there quite a while and remember this:
 dustytoes
on 04/05/2014
Amy Jordan and her FolkArtBlond store. She was one of the nicest people I have ever met at Zazzle, and super talented. I have a poster of one of her angel paintings hanging on my wall. Sadly, she died and it was quite a loss for all of us who knew her.
You might also like
My Zazzle Success StoryI've been selling products on the Zazzle site since 2007, and my earnings con...
How to Use Zazzle Bulk Image UploaderZazzle Bulk Image Uploader does precisely what it says on the packet. It's a...


 Farm Tractor Birthday Party Ideas10 days ago
 Fun Dinner Menus For Thanksgivingon 10/20/2023
 Luau Party Theme Invitations and Ideason 10/05/2023
 Preparing a Camper Inside For Travelon 10/06/2023


Was this easy to understand?
No, so far my work on Zazzle is promoting other people's artwork. That's keeping me busy at the moment.
Barb - You can use the image already in your images files at zazzle. If you find it is not small enough, just resize the original photo you uploaded from your computer using whatever photo enhancer programme you use. You can either "resize" or "compress".
I am not a techie person and I don't have a Mac. I've used all different size images for the folders so I think they will re-size to fit okay. There may be an easier way to do this, but this is how I do it. The Zazzle forum may have some info.
I've been wanting to know how to do this for a long time. Thanks for the tips. I'm assuming that one can't just use an image already in one's images at Zazzle to place it on the folder because it might not resize to be small enough? I have a MAC and have not heard of the snipping tool. If I knew the right size, I could just make my images smaller on my computer by cropping or just adjusting the size, could I not? Or maybe I have a tool I don't know about.
Hopping over to zazzle to get rid of that gray right now!
Thank you for the tweet!
Back to study and this page is stunning, just amazing! Tweeting it ...
Katie you are so cute. You're welcome.
One fine day I will graduate from Pam's school of Zazzle until that day I'm loving the learning. Thanks again :)K
Thanks for reading Brenda and Sheila. I hope this is easy to understand.