Best and Easiest Way to Remove Unwanted Features From Photos

by Sheri_Oz

Cloning doesn't always produce the desired results, sometimes leaving telltale signs. Let me show you how a program I discovered can make your photo enhancing more effective.

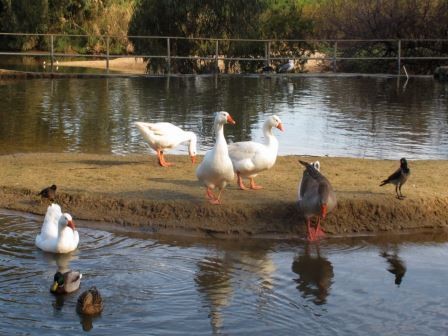
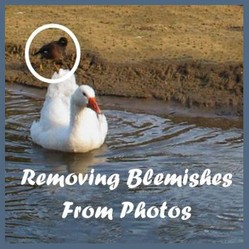
You've taken care with the composition and lighting of your photo and you are sure you have captured a brilliant shot. Then, you want to scream in frustration when you see that an ugly fly had landed unexpectedly on the perfect flower petal or that there was a scrap of paper lying on the grass that you did not see when you were on your photo shoot.

The cloning tool on your photo enhancing software program is great for small blemishes but does not produce good results when larger imperfections require your attention.

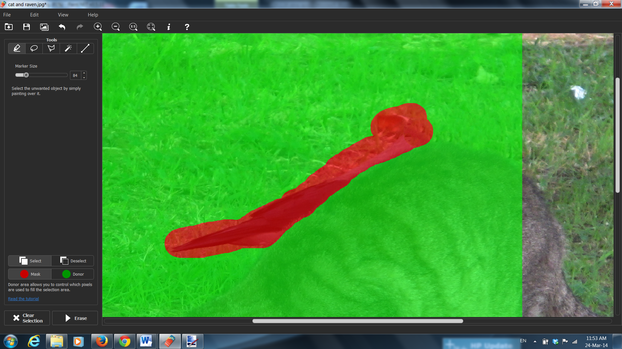
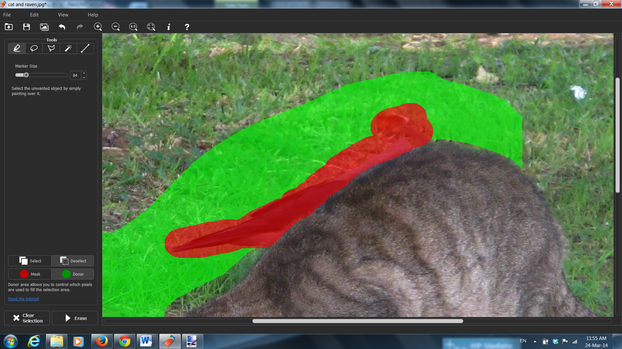
Perhaps you can imagine my delight when I happened upon Inpaint. It has rendered many photographs that I considered unusable to potentially artful works.

A Photo I Liked Except for that Extra Little Bird to the Left

It looks like it is perched uncomfortably on the tail of the goose.
Original Photo with Unwanted Bird
Screenshot by Sheri Oz
Corrected Photo
Corrected Photo
Screenshot by Sheri Oz

The Software I Used to Do This

You can download a trial program from inpaint. If you like it as much as I do, you can purchase it for only $20. They do not have an affiliate program, therefore, I do not make commission on this - I just wanted to share something with you that I fell in love with.

The Raven is Totally Unwanted in This Photo

I will show you the steps required to remove it. It is EASY!
Original Photo With Unwanted Raven
Screenshot by Sheri Oz

Open Inpaint and Then Open the Photo in the Software

Basic features are circled and explained below.
Opening the Photo in Inpaint
Screenshot by Sheri Oz
  1. Size of the paintbrush. This allows you flexibility in your work.
  2. Buttons to determine the areas you want to cover and the background you will use to cover it with.
  3. How the brush appears on the screen - you move it to the position needed on the photo.
  4. Zoom button to make the photo larger and therefore easier to work with.

Selecting the Area to Be Covered and the Background to Use to Cover It

Use of the Select and Delete Buttons
Screenshot by Sheri Oz

First click on the red button at the lower right of the screen and then click "Select". This will allow you to paint on the element in the photo that you want to remove. I only do a portion of large elements because trying to remove the entire blemish at one go may result in a somewhat artificial appearance.

As you select the area you want to remove, the green rectangular area indicates the background elements that will be used to fill in for the removed element. You will refine the green area in the next step.

Specifying the Filler Elements

Refining the Background Area to Be Used as Filler
Screenshot by Sheri Oz

Now click the green button and "Deselect" and you can "unpaint" the green areas that you do not want to be used when you remove the blemished area.

When you have the red covering the element you want to remove and the green covering the element with which you want to replace it, you click "Erase" that lies beneath the red and green buttons at the lower left of the screen. In a few seconds you will see the results.

By Magic! The Raven's Head is Gone!

At the same time, I discovered a previously unnoticed blemish in the grass, so I will continue to remove the rest of the bird and this new unwanted element.
With the Selected Area Removed
Screenshot by Sheri Oz

Removing the Rest of the Bird

Selecting the area to remove.
Selecting the Rest of the Raven for Removal
Selecting the Rest of the Raven for R...
Screenshot by Sheri Oz

Selecting the Filler for the Removed Area

Selecting the Area to Use as Filler
Screenshot by Sheri Oz

Without the Raven

But then I noticed some other spots demanding my attention.
Other Imperfections Can Also Be Removed
Screenshot by Sheri Oz

The Final Photo Without Blemishes

Final Photograph
Final Photograph
Screenshot by Sheri Oz
Updated: 04/04/2014, Sheri_Oz
 
Thank you! Would you like to post a comment now?
5

Do you like this magic trick?

Only logged-in users are allowed to comment. Login
Sheri_Oz on 03/25/2014

Virginia - go for it! Glad you read this before you deleted them.

Virginia Allain on 03/25/2014

That was great. I was just thinking about deleting a big batch of photos with these minor imperfections. Maybe I should try this on them.

Sheri_Oz on 03/25/2014

Thanks, Pam. That way the cat photo came out makes me wonder if there are other photos I thought belonged in the bin that can actually be turned into something worth keeping.

dustytoes on 03/25/2014

Hey, this is pretty cool. I do have trouble with the clone tool when I need to fix a larger area. I might give it a try - thanks Sheri. And your cat picture ended up looking really good!

Sheri_Oz on 03/25/2014

Hope you give it a try, Violette.

VioletteRose on 03/25/2014

Thank you so much for sharing this, cloning is difficult to do in many instances. This sounds helpful :)

Sheri_Oz on 03/25/2014

Yes, you can use their trial offer first and only if you like it buy it. It took me all of 20 minutes to decide I just had to have it.

lou16 on 03/24/2014

This is really cool, I will have to give it a try.

You might also like

Easiest Way to Watermark a Photo

If I can do it so can you! I couldn't understand all the directions and made ...

Enhance Your Photos: For Beginners

Free downloadable software and easy-to-learn tools can transform your so-so p...


Disclosure: This page generates income for authors based on affiliate relationships with our partners, including Amazon, Google and others.
Loading ...
Error!