Note: If you do happen to use the temperature increase/decrease button, you should know that after an hour it returns to the program - you could alter it again if you wish
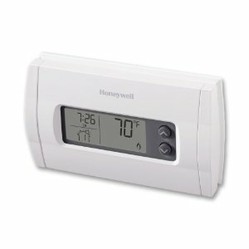
The Honeywell RTH230B 2 day Programmable Thermostat - Is it the best?
The Honeywell RTH230B Thermostat is a programmable piece wherein programming for 48 hours can be done in advance. In addition to this there's a lot that you need to know...
Overall. the Honeywell RTH230B programmable thermostat is certainly the best if you're looking for high quality and small size for a cheap rate. There's one aspect that certainly needs to be stressed on - Overriding the system!
No matter how much we think it through, it's not necessary that we're going to stick to the same plan 48 hours later - right? That's the reason this programmable thermostat has the capability to be re-programmed just for a particular instance of time; that is, if you re-program it for an hour or so, the instructions that you already fed in for the next day won't be erased.
But, every amazing device does have a draw back and this thermostat has a single problem which you should certainly know about - When you toggle the temperature up/down buttons, the display doesn't light up; and hence, you're going to need to switch on the lights in the room. Other than that, there's nothing to worry about.
 Honeywell RTH230B 5-2 Day Programmable Thermostat
Honeywell
Digital Heat/Cool Thermostat, 5/2 Programming With 4 Periods Per Day, For Use With Central Gas, Oil, Or Electric Furnaces & Air Conditioning, For Single Stage Heating & Cooling ...
$163.0
Advertisement
Pros - Honeywell RTH230B
First let's take a look at the plus points of this amazing thermostat
Easy to install - You may be doing this for the first time ever, but you need not worry as the installation manual is detailed and you would be able to do it with ease. Moreover, I've written an installation guide at the end of this article just in-case you needed help.
Appearances are praise worthy - No one would want an ugly looking thermostat in their houses - especially the living room. Therefore, Honeywell has taken the trouble to ensure that this piece blends well with any interior decor. It's got a neat clip on cover which hides all the programmable buttons other than the ones used to increase/decrease the temperature in the room.
Soft buttons - The buttons to control the time as well as temperature are really soft and comfortable to use.
Time display - The time could be displayed either using the 12 hour clock or the 24 hour clock, it depends on what you're comfortable with.
Programming and working - The thermostat is really good at it's job and the temperature is always accurate at the preset level. Moreover, weekends are totally unlike the weekdays and hence the temperature controls would need to differ; hence, there's an option to program separately for weekends too!
Heating and Cooling - This thermostat is perfect for homes where both heating and cooling are needed as it's an auto switch over. All you need to do is set the temperature.
Battery Consumption: Is it a problem? - Many people complain about the battery consumption and they say that it goes through them like water. But, there's absolutely no problem with the design and functioning of the Honeywell RTH230B programmable thermostat; the problem lies in your wiring. Hence, you need to make sure you do it right when you install it. Call a neighbor for help if you need someone. Instructions on connecting the wires are given below.
Cons - Honeywell RTH230B
Nothings perfect and this piece has a negative aspect as well!
No Display light - As already mentioned in the beginning of the article, this thermostat is really bad if you choose to operate it in a dark room. When you try to alter the temperature you will not be able to see what you did - unless you have a light on in the room.

Advertisement
Would you consider the Honeywell RTH230B for your home?
Why do you make that decision?
Yes! It seems easy to operate and is cheap! Moreover, it functions well
No arguments yet.
No! The lighting problem would be a huge problem for me
No arguments yet.
Add your argument
Log in to add an argument to this debate.
Where can it be used?
This is surely the million dollar question
Would this thermostat be the perfect choice for your heating/cooling needs? Well, we can't say for sure unless your needs come in these categories:
- Regular Heating and Air-Conditioning systems
- Single State Heating and Cooling
- Just Heating or Just Cooling
- Central Air - Conditioning
- Warm Air Furnaces
- Heating hot water
- Systems for gravity and steam
- Fireplaces operated by gas as well as
- Some other 750 millivolt systems.
Installing it in your home
Here's how you need to install the Honeywell RTH230B Programmable Thermostat in your home
Before checking this out, you would be happy to know that the installation manual explains all this as well.
Your Safety - For safety purposes, the first thing that you need to do is cut off power to the thermostat (In case you had an older one installed).
Getting Ready for the install:
- Once you've removed the old thermostat, you would need to mark each wire as this would help prevent any sort of confusion - this is only needed if you use both heating and cooling - else, there won't be many wires.
- If at all there's not a lot of wire at the end, you could strip a bit of the insulation so as to retrieve a decent amount of wire.
- Now you need to make sure that they don't slip into the wall socket, how you do this is up to you - try tying them around a knitting needle maybe?
Installing the Honeywell RTH230B Thermostat:
- Take off the face plate and loosen all the screw connecting the thermostat and face plate. The screw shouldn't be removed completely - it doesn't; but, you shouldn't try to.
- Now you would need to figure out the spots for mounting the thermostat - the mounting holes. You could do this by holding the thermostat against the wall and mark the spots.
- Once you've made the required holes (drilled through) you could then pass the wires through into the base plate.
- Now that that's done, screw the base plate and fix it onto the wall.
The tricky part - Connecting the Wires right!
When attaching the wires, you need to make sure that you're fixing them to the right terminals. If you've had a previous thermostat installed just follow the same connections; but, if it's your first time, you would need to know what to do:
- Rc = Cooling Power
- Rh = Heating Power
- W = Heating Signal
- Y = Cooling Signal
- G = Fan
- First and foremost you would need to remove the red cable for two and five wire installations; if you're opting for three and four wire installations, you would need to leave it as it is.
- Now you need to attach the wires, this is what needs to be done:
- Two Wire Heating - Attach wires to the W and Rh terminals
- Two Wire Cooling - Attach wires to the W and Rc terminals
- Three Wire Heating - Rh and W terminals need to be attached with the Red Jumper cable so that it connects the wire to the W terminal and this to the G terminal.
- Three Wire Cooling - Rc and Y terminals need to be attached with the Red Jumper Cable so that it connects the wire to the Y terminal and this to the G terminal.
- Four Wire Heating and Cooling - The Rh and W terminals need to be connected with Jumpers to the Y and G terminals.
The heat and cool relays need to be connected to all the corresponding terminals with the jumper cable (The Fan relay) connected to the G terminal off the Cool relay.
Compare the best Honeywell Thermostats
This Honeywell thermostat table would help you pick the best model for your home within minutes as the features are listed besides the model number.
Comments
lobobrandonAug 1, 2012
katiem2Aug 1, 2012