Ease of Use
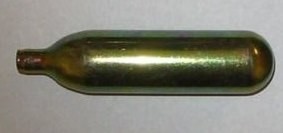
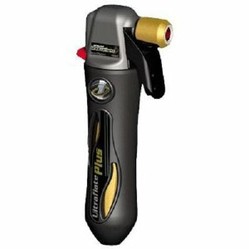
The Ultraflate Plus is designed to work with the 16g CO2 canister (the type that has a smooth, non-threaded neck on it.
- Here's a step-by-step for using the Ultraflate Plus. By an extra CO2 canister and practice so you can get used to it.
- Start by replacing the flat tube with a new one.
- Slip the CO2 canister into the head of the nozzle, and then screw the outside housing on over it. This will puncture the CO2 canister and ready it for use.
- Now put the nozzle over the valve. If you have a presta valve its a simple push-on. If it is a schrader valve, you will need to screw it on.
- Squeeze the trigger. It only takes a few seconds for the tube to inflate.
If you aren't using it right away and just want to put it in your bike pack for safe keeping, you can store the CO2 cartridge inside the Ultraflate Plus by putting your CO2 cartridge in backwards. If you put it normally it will be punctured and the CO2 will leak out slowly.
Flexibility with Cartridges
Their are several different sizes of CO2 cartridges on the market. However, I recommend using the 16 g size. A 16g cartridge will normally inflate a road bike tire to about 100 PSI and a mountain bike tire to about 40 PSI.
However, sometimes you might find yourself borrowing a 12g cartridge, or maybe you need to buy 16g threaded cartridges instead of unthreaded ones because that is all that the local bike shop has.
The nice thing about the Ultraflate plus is that it can handle both the 12g and 16g sizes.
The manufacturer will want you to buy Genuine Innovations branded Co2 cartridges. However, I have used many different off-brands with absolutely no problems.


 Dealing With Dogs When Running and Cyclingon 06/13/2012
 Lock Laces For Triathleteson 06/13/2012
 How Much Water Should You Drink While Cycling?on 05/22/2012
 The Top 3 Best Cycling Water Bottleson 05/22/2012


Comments
It looks really easy to use and doesn't seem to take up much room