There are many ways to produce rag rugs. You can weave them, hook them, braid them, crochet them, knit them, knot them or make a toothbrush rug. I find the toothbrush rug method to be very satisfying and requires only one simple tool, the toothbrush needle. You don’t need any experience with knitting or crochet to make a rag rug. They look similar to braided rugs but use only half the fabric.

How to Make a Toothbrush Rug
by Ragtimelil
For a really green project, try a toothbrush rug. You can use recycled fabric and even the tool is repurposed from a toothbrush.
There are many theories about how the toothbrush rug originated. Once source says they were an old Scandinavian art used to made even hats and mittens. The stitch was brought over with immigrants and was simplified to the stitches used today.
However it began, it recently has enjoyed a revival. It is a great way to use up leftover fabric and is simple enough for anyone to learn. It makes durable rugs, chair mats, tote bags or anything that needs a sturdy fabric. Weavers prefer long strips of cut rags but toothbrush rugs are more easily done with shorter strips. It’s a perfect craft for recycling old clothing and other fabrics.There are some very pretty rugs on this blog.
Cotton or similar fabrics are recommended but they can even be made from recycled plastic bags for outdoor use.
Make a Toothbrush Needle
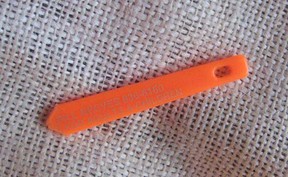
The toothbrush rug got its name from the use of an old toothbrush to make the needle. It has become harder these days to find the old style toothbrushes with a flat handle and a hole in the end. Sometimes you can still find them at discount stores. Cut the handle off the toothbrush and trim the sides to make a dull point on the end opposite the hole. Then sand it smooth and it’s done.
The needles can also be made from PVC, plastic, bone, metal, or anything that can be shaped into a flat needle with a hole in the end.
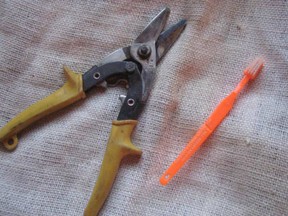
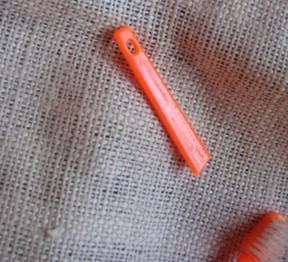
 | Individually Wrapped Toothbrushes, 30 TUFT, 24 Pack Choose from a variety of sizes, styles and firmness levels to suit patients' needs. 30-Tuft, Extra-Soft Nylon Bristles. |
 | Aunt Philly's Toothbrush Needle; 6 Items/Order TOOTHBRUSH NEEDLE |
The Stitch
There are many different ways to start and stitches to use. I found one way that works for me and I have tended to stick with it although after reviewing some YouTube videos, I might try a few of the other stitches out later. The directions I found for stitching a rug were pretty confusing and the videos were not very clear either. I finally found a way that seemed to work and have tried to illustrate it so that you can understand it too.
Collect your fabric and cut into strips about 1 inch to 2 or 3 inches wide.
There are several ways to start your rug. Most start from the center and work outward although you can go back and forth in stripes too.You can crochet the first row, or braid it or do some stitching over a starter strip, which I could never get the hang of. I like to crochet mine. If you don’t know how to crochet, it’s really very simple to do a chain. Make one looped knot. Put the hook through the loop and pull the long tail through just enough to make another loop. Do not pull it too tight. You will need to get your needle through the stitch. Do this a few times until you get a chain long enough to be the center strip of your project.
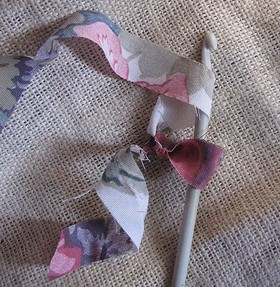
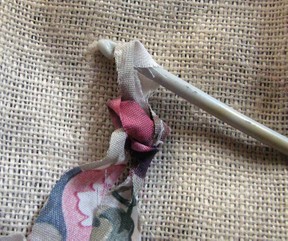
Now thread your needle with the long tail of your strip. There are many stitches used for toothbrush rugs. I use a stitch similar to the button hole or blanket stitch. Go back and insert the needle through the top of the first stitch. Pull the needle through and then through the loop made with the strip.
When you get to a corner, add two more stitches in the corner stitch. This will make a neat turn. On your first row, you will actually do six stitches in the end stitch - three for each corner. I’m doing a rectangle rug this time, but if you want to do a circle or oval, you don’t need much of a chain to start. You will be working around and adding stitches whenever you think it needs it to keep it flat.
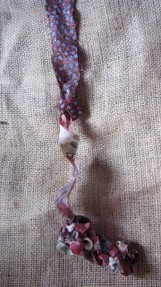
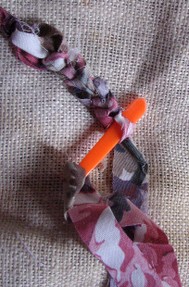
The Stitch in Yarn
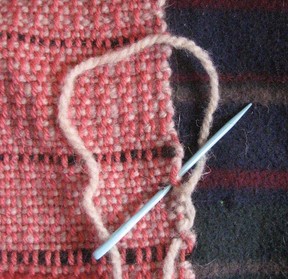
Since I always had a difficult time seeing what was going on with the fabric strips, I photographed the same technique done with yarn. I think it is a little clearer and you can see a bit better what is happening.
Adding Strips
To add on the next strip of fabric, remove the needle and, if you haven’t already, cut a slit in the end. Thread your new strip through the slit. Cut a slit in the new strip and thread the opposite tail through that slit. Pull it through and thread on your needle. You’re ready to continue.
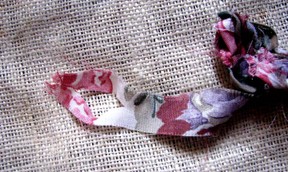
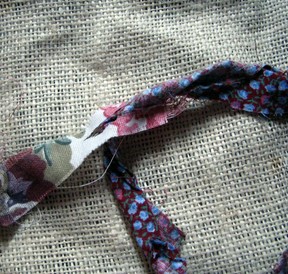
Finished Rug.
When you get to the end, run the needle through several loops to hide it and trim.
This would make a good potholder, or I could keep going and make a chair mat or even a rug. It may look a little lumpy now, but after being sat or walked on, it will flatten right out. Steaming would help that too.
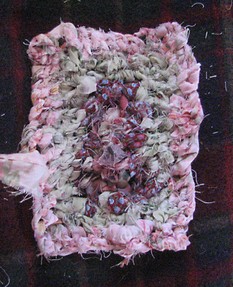
This is the way I do my toothbrush rugs. If you read tutorials or watch videos on YouTube you will see other ways of doing it. There is no real right way. Do whatever seems easiest and most fun and if you like another way of doing it, I won't mind. I might like your way better. That's the real magic of crafts. They were meant to be shared.
You might also like
Crafts and Your Mind, Body and SoulMany people enjoy handicrafts because they find it soothing, but there may be...
How to Make an Easy Weaving LoomEver thought you might like to try weaving but didn't want to spend a fortune...


 How I Found My Free Family History Programon 09/05/2013
 Finding a Graveon 09/01/2013
 Do Border Collies Make Good Pets?on 08/11/2013
 Hubert Patey - an Indentured Servanton 08/02/2013

Crafty Comments
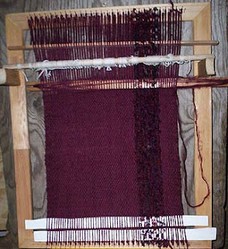
There are many ways to reuse fabric. It's a great resource. I'm working with making rugs on frame looms using fabric strips for both the warp and the weft right now. Another way to make a nice thick rug.
What a clever idea. It is vital to retain old crafts and make them flourish. When I was a young boy in inner Manchester, a poor urban district, there were still old people who were using rugs that they had made out of recycled materials.
It's great to keep these crafts alive. If we don't they may be lost forever!
When I was a kid ( I am now 70) my great aunt showed us how she made rugs with fabric strips and a toothbrush tool. I couldn't recall how. Thanks for showing me.
Great. I want to see your rugs!
I just love this article and now my daughter does as well.
Thank you. I didn't expect it but was happy to have it.
It doesn't take long to finish one. Take pictures!
And congrats on your Editor's Award! Very well deserved!
I need a new rug, so I'm very tempted to give this a try.