
How To Sew A Button On
by mulberry
Knowing how to sew on a buttonis a basic life skill that shouldn't be reserved for a semstress. Here are simple instructions for those who somehow missed this lesson.
 |
Need to Sew a Button on Your Shirt?
Whether you're a kid just learning some of the basics or an adult who just never learned how to do it, sewing a button on is extremely simple and something you can do in just a few minutes. On this page I will show you a demonstration as I taught my young neighbor how to do it.
Remember, the more times you do it, the easier it will be.
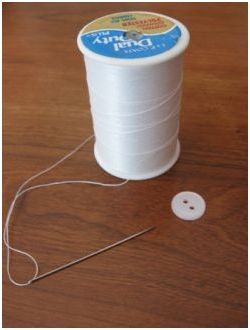
Here are the tools you'll need to sew a button on:
- Thread to match the garment/button
- A button to match the garment or other buttons that are already on the garment. If you're starting from scratch, you need to be sure the button is the right size to fit through the hole.
- Scissors to cut the thread
- A needle. You won't want it to be too long and certainly not too thick. One and half inches long is ok.
How To Sew a Button on Your Shirt
You'll want to sit where there is plenty of light. Natural sunlight is best.
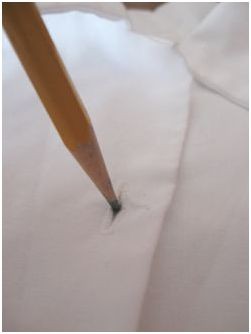
Start off by identifying exactly where you want to locate the button. If a button has been in that spot previously and you're merely re-attaching it, then there may still be holes or a bit of thread left there that allow you to see exactly where to start sewing,
If not, then you can use a pencil to mark the spot. Simply lay the garment flat, so that it's closed just as it would be when it's buttoned. Take a pencil, stick it through the button hole, making a small mark on the spot where the button will go. Be sure to use something washable when you make the mark. A white pencil is great on most fabrics, but if you're on white fabric a regular pencil will be much easier to see.
 |
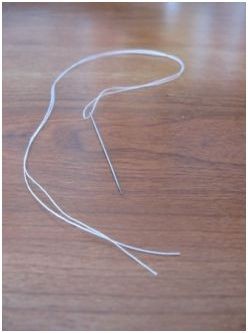
Next you need to thread your needle. For a single button, you can pull approximately 12 inches of thread from the spool. Thread one end through the needle.
I tend to double my thread so that I can sew the button faster. So after cutting off your 12 inches of thread, pull the thread through the needle so that you end up with two sides of thread that are an equal length.
By doubling the thread this way, you end up having to take half as many stitches to get a strong hold on the button. Some however, prefer to use a single strand and make more stitches, citing the theory that more stitches is what will secure the button better. The choice is up to you.
 Thread |
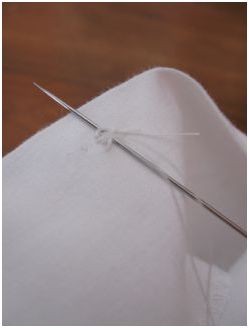
Next, knot your thread securely so that the thread will catch and anchor on the fabric when you pull the needle through.
You can do this by grasping the thread near the end opposite the needle. Then loop the thread around the tip of your finger, slide the loop off of your finger with your other hand, and tuck the end of the thread through the loop to pull a tight knot in it.
 knot |
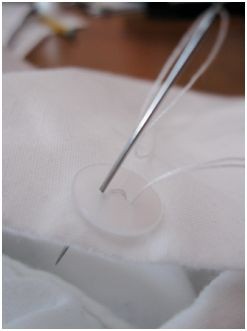
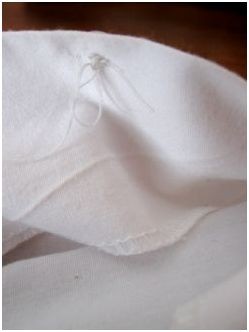
Now you're ready to start sewing. Place the button on top of the fabric, over the mark you made earlier. Be sure you have the button facing up. Hold the button with your non-dominant hand (your left hand if you're right handed). Then with your other hand just below the fabric, push the needle directly up through the fabric and one of the button holes.
Pull it through until the knot catches below. Once the thread is completely through, you will loop around and take the needle down through the other button hole. Then reach below the fabric again and continue pulling the needle and thread through completely. Don't pull the thread too snugly. If you make it too tight, it will make the garment difficult to button.
 Stitch |
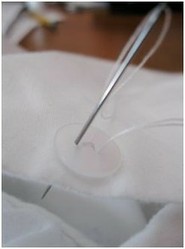
Now repeat the process of sewing up through one hole and down through the other 5 or 6 times. If there are four holes in the button you will do two of them and then, when they are finished, you will simply move to the other two holes when you are on the underside of the fabric and then complete them in the same manner.
Once you have the button sewn on, you need to secure it with a knot. When your last stitch is done, you will be on the underside of the fabric. From here, you'll be able to secure your work where it won't be seen.
 button |
From this underside, simply run your needle through some of the stitches you've made. Then as the thread is being pulled through, run your needle through the loop that is created. As you continue pulling the thread, a knot will form. Repeat this process for a double knot.
You can now trim off the thread just above the knot. Now it should withstand washing and still hold secure.
Once you've learned how to sew a button on, the entire process will taken only a few minutes to complete.
 knot |
A Full Demonstration
 | Singer 1512 Beginners Sewing Kit, 130 pieces Singer 1512 Beginner's Sewing Kit contains all the basics for sewers and non-sewers alike. Makes a perfect traveling companion or as a child's "My first sewing kit" gift; ... Only $15.99 |
 | Singer Sewing Kit in Storage Box The Singer Sewing Kit in a small reusable plastic box is a great travel sewing kit for quick and easy repairs. The storage box helps to keep everything you need in a small ... Only $8.66 |
 | Singer Sew Essentials Storage System The Singer sew essentials storage system is a 165-piece set that comes with 8 Storage compartments, 20 medium spools of thread, 75 pins, seam ripper, 30 hand needles, a pin ... Only $44.99 |
 | Sewing Kit Be prepared for any sewing emergency with this handy folding sewing kit. Includes multi-colored thread, scissors, measuring tape, needle threader, thimble, needles, buttons, ... Only $2.00 |
An Extra Tip for Securing the Button Properly
Wizzley author Graceonline provides another tip for helping beginners secure the button properly. She describes how to use a shank to provide a buffer and to help the button stay in place longer. She says:
"To make the shank, you raise your needle one last time to the button side of the fabric. This time, do not go through the button. Bring the needle up as before, but grab it before it goes through the button, so the thread is beneath the button and on top of the fabric. Then wind the thread neatly around the button stitches 10 times, so the button is sitting on a sort of thread pedestal. That's the shank. Slip your needle back through the fabric to the other side and knot off."
You might also like
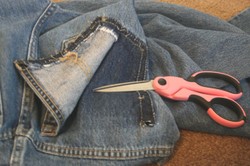
Sewing Crafts to Repurpose JeansRepurpose those old jeans into functional crafts! Use the denim to sew up som...
How to Make Stuffed Felt Hearts TutorialA step by step photo tutorial on how you can make stuffed felt hearts with co...

 About the Backlit Sensoron 05/07/2012
 Travel Steamer Buying Tipson 05/07/2012
 Yonanas Reviewon 04/20/2012
 Misting Fanon 11/28/2011

Comments
Well written and illustrated, thanks, and as you say, very easy. I do most of the sewing and mending in my home. Oh, my wife still quilts, but I sew on the buttons, do the hemming, replace zippers, make the curtains etc...
I agree. Basic sewing skills are quite important from sewing on a button to fixing a hem. I find that repairing the hem on a curtain or a small tear in a sheet, gives items a whole lease on life and really keeps down expenses. You don't need to buy as many things.
Very useful information. Sewing has become a bit passe, and everyone should know how to repair a button. The tough thing is sewing it on so that it won't come back off within a few wearings. :) Passing this on to my college daughter.