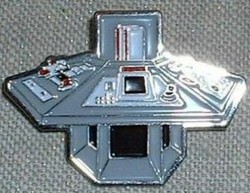
Now once we decided to follow through on this project we had to think about what we were going to use to build the TARDIS Console!
The solution: be creative and hunt down and reuse common household things to use for our time travel device construction.
This means you may not be able to find exactly what we used for our own TARDIS console, but you will find be able to find substitutes that work just as well if not better.
The TARDIS Console Build Step By Step
- Step one is finding a suitable hexagonal shaped foundation for your console. Now we made a few attempts at measuring up and cutting one out for ourselves and weren't quite happy with the results. The solution was a hexagonal shaped plastic plant pot. They come in all shapes and sizes. We used, one that's a sort of pyramid open on the top and found the exact size perfect for a realistic scaled TARDIS console for our seven year old nephew. Ideal!
- Next cut hard cardboard pieces and glue them around the hexagon shape making the panels of the TARDIS console. This is easy to do since the foundation is already there letting you cut them to the right size without much effort. Where the panels connect and along the outside rim use black electrical tape to reinforce the panels. Later you will want to cover this with glued down black heavier stock paper to make it look better than with the electrical tape visable.
- On the panels themselves you can have great fun glueing all sorts of knobs and dials, pieces of old radios, things from the discount store etc. We wanted to involve our nephew in making some of the choices of what went on the console! One of his favorites is an old calculator, where he types with quite a bit of focus as he prevents the Daleks from exterminating us all!
- Now for the Time Rotor. The time rotor required a bit of thought, until we found a small office waste bin (the kind you would use next to a desk in an office) that fit our opening near perfectly. This serves as the foundation of the time rotor. On top of this you can glue three plastic pen holders of various sizes . Alternatively you could use three strips of clear tubing filled with shiny perspex tubes to create a realistic TARDIS Time Rotor. You can add to the look with flashing lights (even Christmas lights will do!) for a little extra fun that the kids really adore!
Now you have the strategy on how to make a TARDIS console for the little Whovian in your life. Please do share how your adventure turns out. I would love to hear all the fun details!


 How To Start A Tutoring Businesson 09/02/2017
 Cat Scrapbook Ideason 01/11/2017
 Country Themed Scrapbookson 01/10/2017
 How To Research and Scrapbook Your Family Tree and Historyon 08/22/2015


Are You Going To Make A TARDIS Console?