Depending on what you are planning to make, choose your base. The base can be an ordinary box or a ceramic bowl or a balloon or any other item you want to recreate. If you want to make a sculpture of some kind, you can even use chicken wire or some other malleable material to make an armature and lay strips of paper mache on that.
Once you have decided on what to use for a base, making the item is quite simple.
Here are the basic ingredients you need:
base item
paper mache paste: mix flour and water 1:1 or to give a gluey consistency
newspaper, torn in strips
vegetable oil spray
water based craft paint to cover the newspaper
whatever else you need to decorate your final project: glitter glue, sequins, buttons, fancy papers or fabrics, etc.
Ripping the paper in strips is something fun that kids can enjoy doing. You want the final strips to be fairly even and maybe not too long so they are easier to work with and will lie flat against the base.
It's important to gather all necessary ingredients together before you begin -- that is, the newspaper strips, the paste, the base, and the oil spray. This is because once you get going, things will get messy, including your hands, and you don't want to have to keep running off to wash your hands in order to rip more newspaper, for instance.
The decorations and paint, however, you won't need until the next day because your project will need to dry for about 24 hours before you can decorate it. You can wait to gather those items.
Cover the item you want to use as your base, or mold, with vegetable oil spray. This is to keep the paper mache from sticking to the mold and maybe ripping when you try to remove the mold. If you don't have any oil spray on hand, you can substitute something else. You could substitute liquid oil or margarine, though I think the spray is easier and less messy. I have heard of some people using vaseline instead. Again, that can be the messy way to go. Any of these things will work however, as the goal is to be able to remove the mold once the paper mache has dried.
Then you simply dip the paper strips into the paste and lay them on the base. Be sure to smooth each piece so you don't end up with air bubbles and a rough surface. After you have laid down one layer, add another. If you are careful and place only one layer at a time, you will have a more even final project.
If you find you are using too much paste and it's beginning to ooze, place a strip on top without putting it into the paste. It will absorb the excess.
Again, how many layers you need depends upon what you are making and how sturdy it needs to be. The more layers you put on, the sturdier the item will be but the thicker it will be, too. You need to balance sturdiness with aesthetics and think about the object's use.
When you have put on as many layers as you feel you need, put the object aside in a safe place and let it dry for 24 hours.
Then you can decorate it the way you want. Most people start with painting it to cover the newspaper look. Then add whatever else you want. For boxes and bowls, some people like to cover the surface with modge podge, as it gives it a certain sheen.


 Children Learn Through Playon 09/17/2015
 Boston Public Gardenon 06/19/2015
 Remembering the Supremeson 01/20/2014
 How to Help Your Baby Sleepon 09/14/2013


Please Leave a Comment
Great article. As a teacher, I made many paper mache projects with students. I'll have to do this one with my grandchildren.
Nice information about paper mache.
@kinworm: What a great idea! Trees and mushrooms from paper mache look great! I'd love to see yours -- another wizzle idea?
@katiem2: Pinatas are one of the things that are fun to make with paper mache. I've just added a video tutorial above with instructions. It sounds as if you've had a lot of fun with your kids and paper mache!
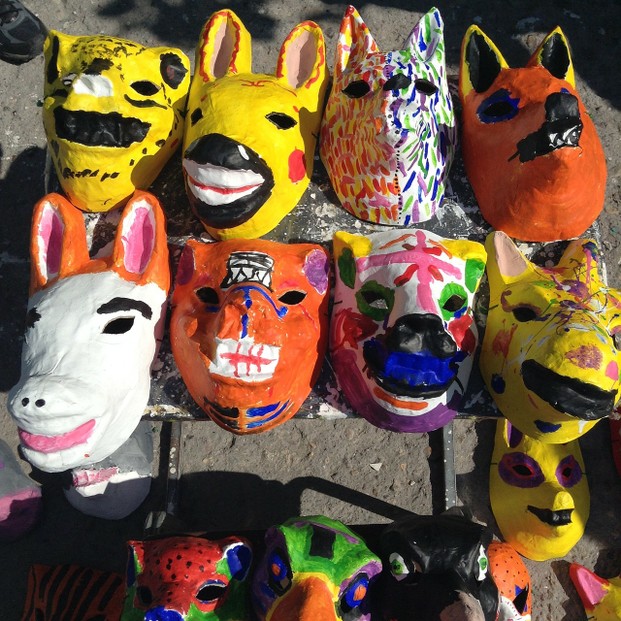
Great advice, I've attempted many paper mache pinatas before I got it right. Oh I wish I had found this tutorial sooner. But I'm here now and still learned a great many helpful tips solving the difficulties I've experienced with paper mache projects. This is a fun way to create birthday party pinata, the kids love getting their hands all gooey and create their own work of art. My daughter makes mask, awesome keepsakes. I only wish I knew of a nice way to frame and mount them so they are better preserved and safe from damage.
I do love paper mache, Sheila. It's a brilliant paper craft and very inexpensive too. One of my fave things is to construct 'trees' and 'mushrooms' from paper - you can then paint over them and use for displays.
You're right, Samsara. It's so easy and you don't need a lot of expensive materials to make something pretty nice. An old box and ripped up newspaper and a little flour -- not too hard to get a hold of. Kids love to make gifts out of junk.