Mix the Mortar
Use the latex-modified thinset mortar specified for your tile. If you’ve installed porcelain tile, buy mortar made specifically for porcelain. If it mixes and goes on like other mortar but sticks but sticks better to porcelain’s nonporous surface. Pour about three-quarter of the recommended amount of water into a plastic mixing bucket and have a helper slowly add the mortar. While the helper is pouring, mix with a mortar paddle (a paint paddle will break) driven by a ½ inch drill. Add water until the mortar has a smooth, paste like consistency. Wear safety glasses, a dust mask, and rubber gloves to protect your skin from the mortar, which is caustic.

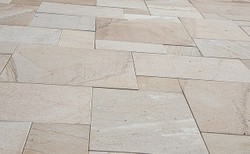
The Basics of Laying Down Ceramic Tile
by BobVicars
Ceramic tile is the most durable flooring you can install. It stands up well to water, making it popular in kitchens, baths, and entry halls. It’s also low maintenance, making it p
Test the mortar. Put some mortar on a scrap piece of plywood or on the floor and use your trowel to form a peak. If the peak holds its shape, the mortar contains the right amount of water. If the peak slumps; add mortar to the mix. If it crumbles add water. Continue adding, mixing, and testing until you achieve the right consistency.
Spread the Mortar
Start in the center of the room and spread mortar right up to the edge of one of your layout lines. Apply the mortar first with the straight edge of the trowel, and then comb it with the notched edge. Use a trowel with the notch shape and size recommended by the manufacture-the notches control the amount of mortar on the floor. Comb the mortar into straight lines.
Set the Tile and check the Spread
Put two tiles next to each other in the mortar, with a spacer in between. Press both firmly into the mortar. Double-check the consistency of the mortar by pulling the tile up and looking at the bottom. The back of the tile should be covered in mortar. IF you see only parallel mortar lines, the adhesive is to dry. If the mortar squeezes up between the tiles, the bed is way too thick and you need to drop the angel of the trowel as you comb. If the mortar on the floor fails to stay in ridges, it is too wet.
Set the First Tile
Set the first tile. Comb out the area of mortar that you tested, adding more mortar if necessary. Lay the first tile at the intersection of guidelines. Twist the back and forth slightly to make sure it is embedded in the adhesive. If the tiles are 12x12 inches or greater; comb the mortar into straight lines with the trowel. Then put the tile in place and move it back and forth between 1/8 and ¼ inch. Perpendicular to the direction in which you combed. This helps fill any voids created by an uneven back.
Set The Second Title
Set spacers next to the first tile and place the second tile alongside the first, twisting it slightly. Continue laying tiles until you have filled the layout section. Twist each tile as you set it.
Clean The Tiles
Mortar that sticks to the top of the titles will be difficult to remove. Wipe off the face of the tiles with a damp sponge as you go. Use a sponge that’s just wet enough to wipe up stray mortar but not so wet that it leaves the rest of the mortar runny.
Updated: 04/29/2015, BobVicars
You might also like
How to remove grout from tileGrout removal can be a very expensive job. Knowing how to do it yourself can ...
Disclosure: This page generates income for authors based on affiliate relationships with our partners, including Amazon, Google and others.

 How to remove grout from tileon 05/04/2015
 Why I Don't Loan Toolson 05/02/2015
 The Basics of Installing New Underlaymenton 04/29/2015
 Why I’m Not a Fan of DIY Networkon 04/25/2015

Comments