- Perler or Hama beads in white, red, black and green
- A small or a large circular pegboard
- Special ironing paper and an adult to fuse/melt the design together
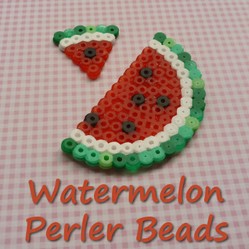
Watermelon Perler Beads Fruit Pattern
Tutorial how to craft page for how to make a watermelon fruit slice pattern design in fused Perler and Hama beads. This is fun for both kids and adults to make as functional items.
Summer fruits make for a really refreshing theme for crafts to do in the warmer and hotter months of the year. Discover how to make a simple design craft that is easy for kids to make as well as adults. Completed watermelon designs can be turned into jewelry, magnets, drink decor, coasters and decorations for the home.
Because these patterns are so simple and fun to make, they are good group activities for children to work at whether as part of an out of school club, girl scouts, children's parties and other occasions. All you need are some fused beads, circular peg boards, some of the special paper that normally comes packaged with many of the activity buckets and an adult to iron the designs and fuse and melt those beads together. Have fun.
All Personal Images belong to the author of this article: Marie Williams Johnstone
What You Need: Tools and Supplies
Tutorial also available on my CraftyMarie site.
Step 1: The easiest place to start on this pattern design is around the edge of your fruit slice. The small circular pegboards are the ideal sizing for these particular patterns and that's the tutorial I will be showing you although be aware that you can also use a larger sized board working from the middle peg down to the 8th circular row. The smaller boards are quicker to use since you can start right on the outside edge of pegs.
You can work with just one or many different shades of green for the outside of your watermelon. I really like using several different shades in a random fashion just as you might see on the skin of the real thing although this pattern will work with whatever green you have in your bead bucket. Working around just half of your pegboard, fill the outer edge in with green as shown.
Step 2: Once you've got the outer skin section sorted with the green, you can work up the next inside row in white beads for the pith part of the watermelon. White is a good color for this part or a pale cream.
Step 3: You can make a pip-less fruit but the dark black pips are what help people to instantly recognize what this is meant to be. The pips are much easier to pop in first - just inside the half section or slice that you've been working on. A small amount of solid black beads, say 3-5, are ideal to represent the pips if you pop them in randomly into the design.
Step 4: Now we can add in the red flesh around the pips. You can use a solid red which is fine but, even better, I found is a translucent red which is a red glitter variety - I've shown the glitter beads below for your convenience. Choosing to use a translucent color instead of a solid adds in a bit more realism to the completed half slice design - it has more of the juicy flesh look to it which a solid red does not.
Scroll Down to See a Coaster Design and More Ideas

Advertisement
Drink Coaster Style Great for Summer
You can easily make a "coaster" design by completing the other side of the peg board in the same way. Of course, you don't need to turn this into an actual drinks coaster but lots of people choose to do that with this size and shape which just works and makes a great summer design - perfect for a pool party.
Small Motif Perfect for Fun Jewelry
This photo is to show you that you can squeeze two separate designs of this fruit onto a small circle pegboard. You've got the half slice plus a wee little triangle of watermelon and this one is ideal for jewelry designs such as necklaces or even earrings. It looks really sweet.
I always try and cram as much as I can onto a board before ironing to melt the plastic beads and set the patterns into place. It's just quicker that way and makes crafting more productive.
Add a Slice to Cool and Refreshing Drinks
In the tutorial below on fruit slices, you'll find out how to turn your half sliced designs into finished decorations that can be used to adorn your drink glasses. From a distance, they can look like the real thing. This is a fun project and especially when making decorations for a themed party or event.

Advertisement
My daughter and I love the lovely pastel shades of colors in the Sunny Days bucket plus the fact that you get 3 fun shaped pegboards including two flower designs and a butterfly which is one of our favorite ones to sit and fill in. This set gives you a range of colors which are great to use alongside the rather standard primary ones. You'll need a tub with the basic colors like red and black to make the watermelon design though - if you don't have these then look for a multi-mix jar. In the UK and parts of Europe, you can get Hama beads which work in exactly the same way.
Your Comments
AngelaJohnsonApr 2, 2015