
Creating Bookmarks at Zazzle
by WhiteOak50
I am doing a 365flowers RedGage Challenge with a group of folks. We have taken our daily photos and have started creating products on Zazzle. My newest idea is Flower Bookmarks.
How to create Bookmarks on Zazzle
Turn your passion into a keepsake
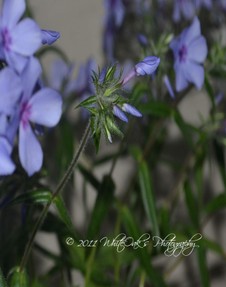
Many of us are doing a 365 day RedGage Challenge that I started about 33 days ago. I wanted to do the challenge for many reasons and so far it has been one of the best experiences. But to take it further, many of us that have a Zazzle Gallery decided to devoted a folder for 365flowers. We will taking the photo we upload each for the challenge, and then take it into our Zazzle Gallery and create a couple of products.
Some of us are making a particular item such as magnets, others like myself have decided to only create a few items, while others are creating a full product line.
I was thinking about this and wanted to create a bookmark because not only do I have a ton of books, but I also collect artistic bookmarks. So I took today's photo, which is the one in this module and created my first set of bookmarks and wanted to share how I did it.
I added a voting module below because I am curious who makes them and if they are a success.
I choose a Post Card
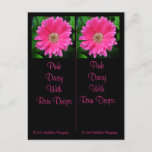
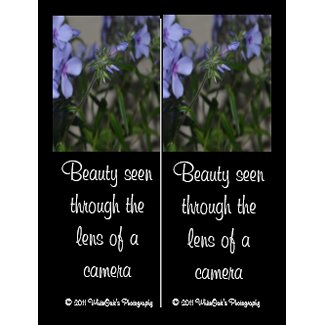
Blue Flower Bookmarks Postcard by WhiteOaksPhotos
After experimenting with several products I finally decided on making bookmarks by using a post. I feel the bookmarks will be a good size, they are very inexpensive and you get two for one price.
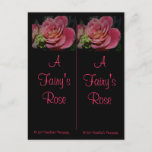
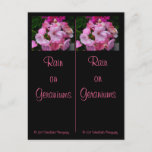
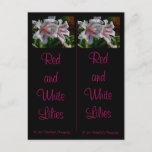
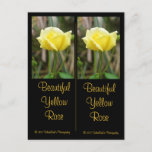
Set your post on the vertical position. Insert the photo you want to use and resize it so it only uses a little less than half of the space. Align within the allowed space and copy it and paste another identical photo to the other side of it. Now you should have two small photos on the front of the post card in the upper space. Make sure there is enough room in the middle to add a separation line.
Write whatever you want too and again copy/paste that under the other photo as well. Now you should have two photos and two text showing. I selected the background to be black and added a fancy font, but the color choice and font style is up to you. I also added my copyright information real small on the bottom of both of the bookmarks.
To get the line down the center separating the two bookmarks, open a text box and do a long line of dashes. By using the arrow key you can turn that text box so it is vertical instead of hortizonial. Position it so it all looks balanced and you are done!!
The back of the bookmarks. At first I just made the back of the bookmark plain black. This morning after creating today's new bookmark Macros Peach Quince I figured out how to add a design.
First thing first, by using your commands under edit "select all" than click on cut to get rid of everything on the back of the bookmarks. I change the background color to be whatever I want. Next open a text box and write something: I wrote Flower Garden on the back of the bookmark and changed the font to "Picture" (I believe they offer 17 different picture choices) I found one I like and changed the font to that. Now the back of the bookmarks have a simple little design instead of the words "Flower Garden".
Happy Creating!!
Would you like more information about the 365flower Challenge?
Here are some link you may like
Have you ever created a Bookmark on Zazzle?
Adding a Finishing Touch to your Bookmarks
In doing research about the bookmarks, I found som that are very fancy with beautiful designs on the back as well as the front. I have not figure out how to do that yet, but that will be a good update to post.
When you are designing the bookmarks, keep in mind about Gardening Club Gifts, Goodie Bag Gifts, and little gifts that can be sent very easily by mail.
You may want to consider adding your link on the bookmark most likely on the back. There was a time when I use to add my link to every card I created on Zazzle.
I hope this article has helped you a little, or at least getting your creative mind thinking about new products at Zazzle.
Bookmarkers on Zazzle
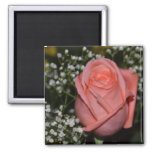
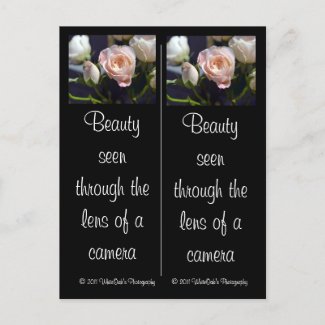
Spray Rose & Rose Bud Bookmarks Postcard by WhiteOaksPhotos
Often when I post a new kind of product on Zazzle, I will purchase one because I want to see the quality of the work. I ordered this bookmark and another one and to my surprise these bookmarks are going to work great.
You can take and punch a hole in the top area and add a piece of ribbon to decorate it and give them as small gifts. The best thing is you get TWO Bookmarks for the price of one postcard.
You might also like
Macro PhotographyEach photographer will have one particular form of photography they enjoy doi...
Practice Photography in your own Back YardYour own back yard is a great place to practice your photography skills.



 Old Abandon Buildingson 06/10/2012
 Wedding Invitationson 07/04/2011
 Ezekiel Low Sodium Breadon 06/25/2011
 Continuing my thoughts about Homesteadingon 06/10/2011
Thanks for stopping by!!
This is a nice idea - I really wish zazzle would offer a book-mark as a separate product because not everyone is going to want to cut their own, even if they get two for the price of one.
I like this idea, sounds pretty good.
If there is anything I can explain better barbarab just let me know. I agree, I like the two for one idea as well. If you look at the postcard just imagine it being cut in half, and you would work both sides the same way. Shrink down your photo, and place it on half of the card, copy and paste the photo again and paste it next to the first picture. You would do the same with the text as well.
I couldnt figure out how to make one with a postcard and ended up using a rack card...I have to work on the postcard one though...I like the two for one deal!
Fantastic! I didnt even know I could make a bookmark!!!
I better go and look more closely!!
Cace if you decide to make any, please stop by and leave a link so I can see them :0)
Great idea! I love finding new tips to experiment with.
Once you start doing them tssfacts, it really does become easier and each time you learn a little more or something different.
Cosmopinkice if there is anything I can explain better to help you, please just let me know. I am still getting use to making them, but learning something new each day. I would be more than glad to help you if I can.
This is very interesting information about creating bookmarks on Zazzle. It makes perfect sense, but I wasn't creative enough to put it together. Thanks and great imagination!