Personalize Zazzle Products Easily

by Sheri_Oz

It is easy to modify text and other design elements on zazzle print-on-demand products and personalize t-shirts, cell phone cases, posters and all other products on their site.

You found the perfect gift. Well, almost perfect. You would buy it if the background wasn't just plain white or a color you don't like. It looks drab and uninteresting to you. You wish it was pink, or blue, or purple. The letters should be in a different font, or bigger, or smaller. . . . .

One of the best things about ordering from zazzle is that even if you are not a graphic designer or photographer you can turn any of their products into something that is uniquely yours, something that only you could have ordered. It is so easy to change many of the design elements on zazzle products.

Let me show you how.

Customize a Gift for Yourself or Someone Else

I'm going to use the iPad cover as an example because it is a simple basic design and has extra features in addition to text and images that can be modified by the purchaser. You will see these as we go along.

I suggest you open the product page I am going to show you in a new tab or window, so you can follow me in all the steps I do.

While there are several steps, the process is very easy and I hope you will give it a try.

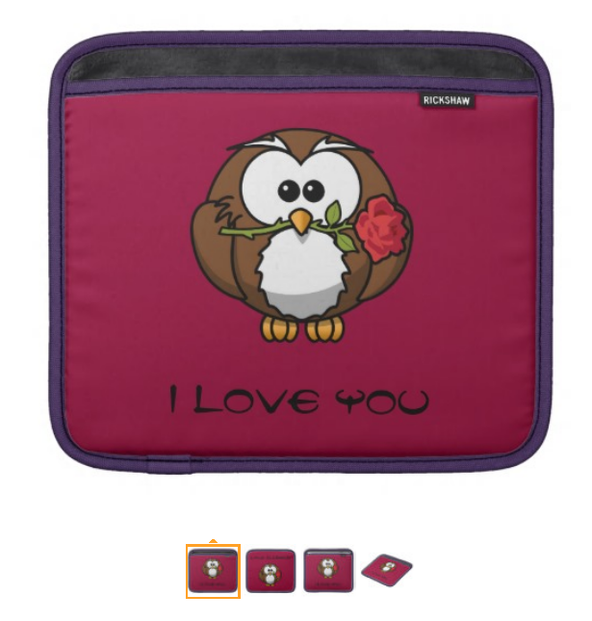
Click on the image below to open a new window or tab and follow the instructions with me.
Ad Zazzle

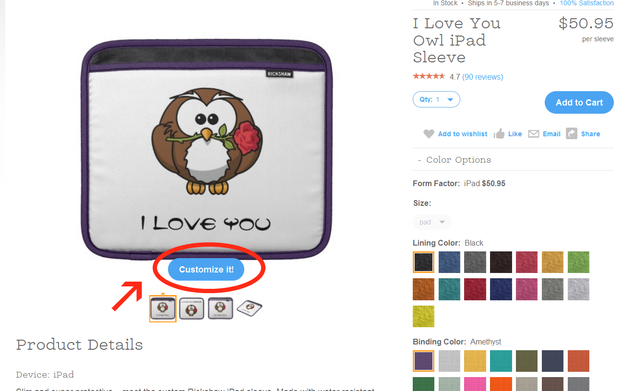
This is the page that opens for the product. Click the "customize" button I circled in red at the bottom left of the screen.

Please note that there are two blocks of colored squares. These are for changing the colors of the binding and the lining. You do not need to click "customize" to do this. It is not found on all products. We will come back to this feature later.
First Step of Customizing Product

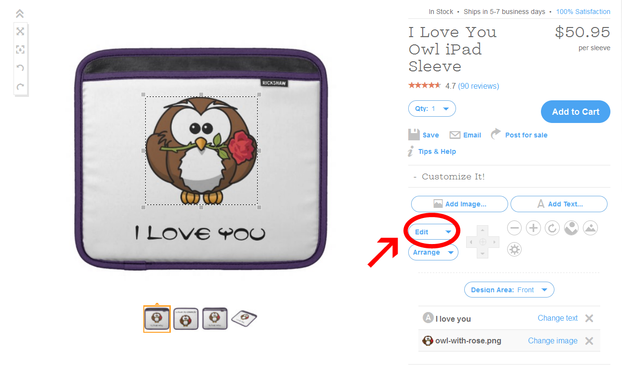
Now this page opens. We are only going to change the background color at this point. The white makes the ipad sleeve look anemic, in my opinion. Click on "edit", the button I have circled in red.

On the list that opens, click on "background" and a new smaller window with colored squares will appear. You can drag the window to be next to the product to make it easier to work with.
Customising Background Color

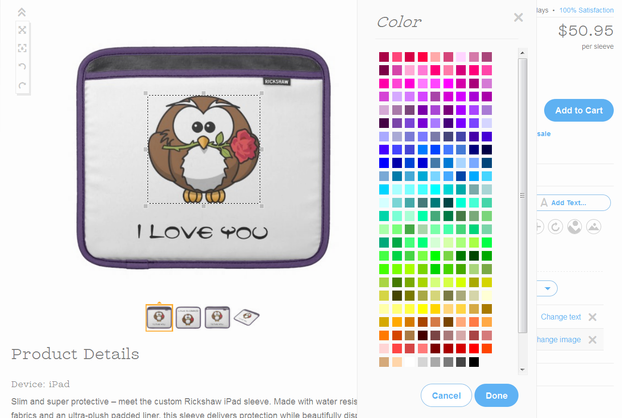
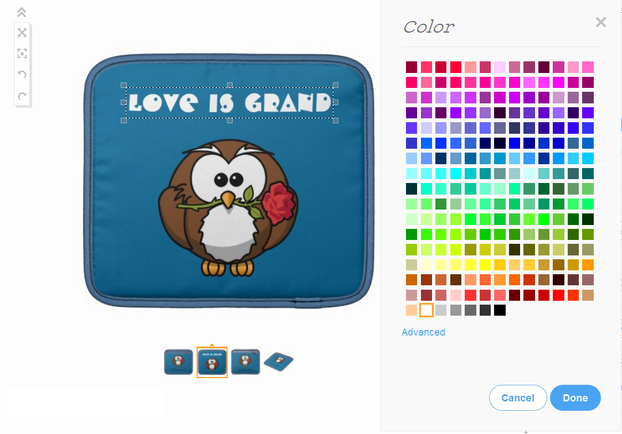
Now you can select any color you want. The window will not close until you click "Done" on the bottom right of the colors window. That means that you can try a number of different colors until you find the one that "clicks" for you.

When you have that "aha" moment, click "done" and the colors window will close.
Changing Background Color

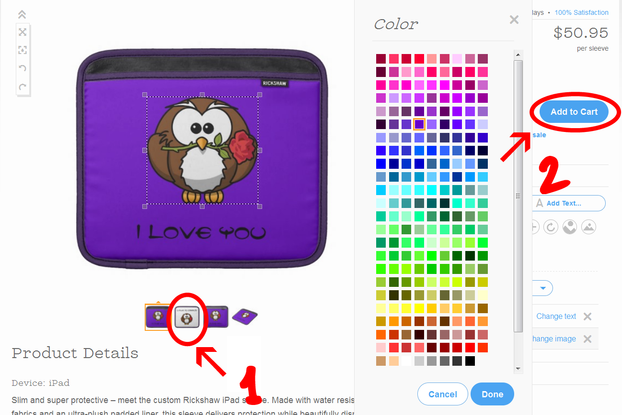
Let's say that you decided on the color I saved below. There are only two more steps: First, be sure to color the background of the back of the ipad cover (arrow 1), unless you want to leave it white.

Then, clicking on the second arrow, "Add to Cart" - you pay for your ipad cover and wait for it to come home to you.
Finalizing the Background Color

This iPad Sleeve Looks Great in A Variety of Background Colors

The Product With a Red Background

But it looks even better when the lining and binding are in matching colors.

Play around with the lining and binding colors for more options

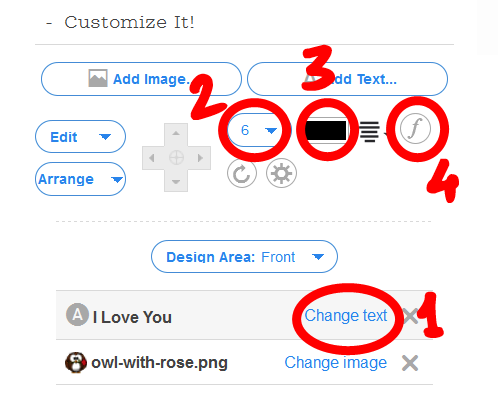
You may want to change the size and font of the text. For that you click "customize" and then click on the text box to highlight it (number 1 on the image below).

I'll use the example of the back of the ipad sleeve, just for variety. Don't forget to make sure front and back match in font type.
Changing Text

The numeral (number 2 on the image above) represents font size. The black rectangle (number 3) represents font color, and the"f" (number 4) is the text color.

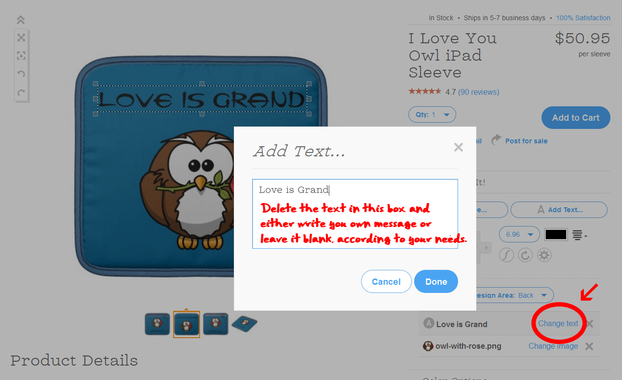
If you want to change the wording of the text, you click on "change text" on the text box (shown by the arrow on the image). This will open a window in the middle of the screen, allowing you to change the text.

You can delete the text entirely or add something in your own words: a message, a name or an event the ipad may commemorate.
Changing Text

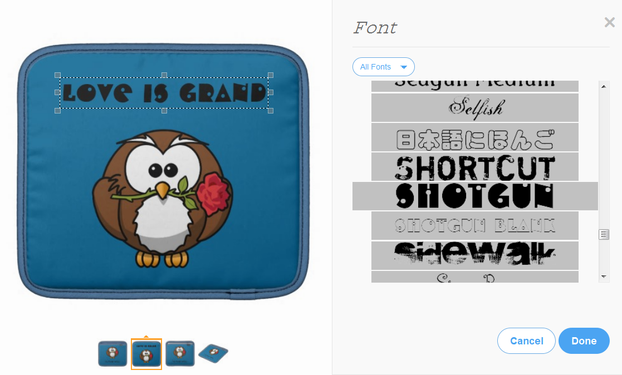
When you click "f", a window with a variety of fonts opens up. You can drag the list next to the product and try out different fonts to see how they would appear on your ipad.

When you are happy with the font, click "close". I selected "Shotgun" in this case.
Changing Fonts

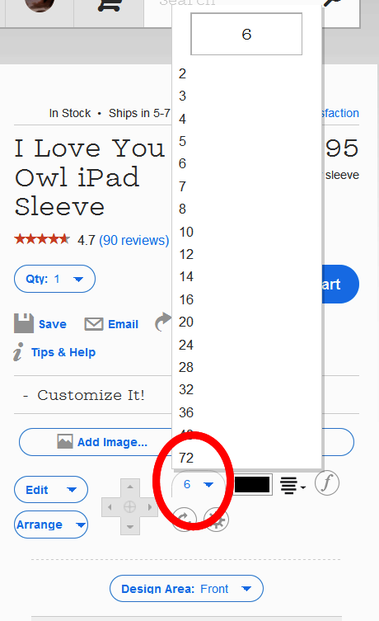
When you click the numbers, you get a scale that allows you to increase or decrease the font size

I originally used the font, Tannarine, for the ipad and a small size worked. But for the font, Melanie. I changed it to 22. Try it and see what a difference it makes.
Changing Font Size

After changing the font size, I changed its color to white by clicking on the little black square (it is now covered by the color palette).

After clicking your choice of color, click "done" and the window will close.
Changing Font Color

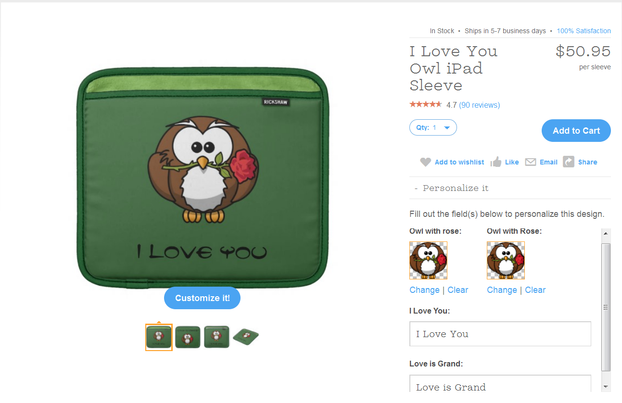
Sometimes when you open a product page, you see templates the designer made available for text and images to make it easy to change them. You just rewrite (or delete) what is in the little text boxes, or replace images using the "change" feature.

Even when there are templates, however, if you want to change the background color, font type or font size, you need to "customize" using the steps described above.
Customize with Template

I hope that you now feel confident enough to play around with the various features that can be customized in order to make a product truly your own. After all, that is what zazzle and other print-on-demand products are all about - giving you the freedom to either buy something as the designer prepared or to add that little extra something that is uniquely you.

Giving a friend or family member a gift that you had a hand in designing yourself can mean so much more than mass produced products, especially in today's commercialized world. For example, you might know the recipient's favorite color and can use that as the background color of the product you select. Or, perhaps you know his or her favorite saying and you can add that as text.

Updated: 04/17/2014, Sheri_Oz
 
Thank you! Would you like to post a comment now?
6

Please let me know if you found this article helpful.

Only logged-in users are allowed to comment. Login
AlexandriaIngham on 03/29/2014

Excellent step by step Sheri. I'm still playing around with some of the editing functions when I get time, but I know where to come back to now for some help. Thanks!

dustytoes on 03/29/2014

I thought I had missed something! Don't worry, Zazzle will change things again real soon I'll bet. It's nearly impossible to keep up.

Sheri_Oz on 03/29/2014

Mira - I agree with you. The choice makes this so much fun.
Dustytoes - thanks for pointing this out to me. I used older screenshots here and hadn't realized how much things have changed on the zazzle site. I updated all the photos now.

dustytoes on 03/29/2014

I wonder if that number scale for the font size is only for certain items. Mine doesn't show like that. Very comprehensive page Sheri.

Mira on 03/29/2014

This is great, Sheri! It's wonderful that Zazzle allows you to change the background color and offers so many fonts to play with.

Sheri_Oz on 03/28/2014

Well, then, I hope it is now no longer a mystery. It's really much simpler than it looks. Give it a try and tell me how it goes - even if you don't intend to buy anything - just for the practice! :)

ologsinquito on 03/28/2014

Great info. Even though I have added Zazzle products to some of my pages, customization is a mystery.

You might also like

Make a Custom Zazzle Quick Create Template

Easily make your own custom template to create a large number of specially de...

Use Polyvore to Display Your Products to Advantage

You are selling your designs on Zazzle, Etsy or other online shops. Help shop...


Disclosure: This page generates income for authors based on affiliate relationships with our partners, including Amazon, Google and others.
Loading ...
Error!