How To Cut Out Parts Of A Picture In GIMP For Beginners

by Paul

Along with making something transparent, cutting an element out of an image and placing it on another is one of the most frequently required tasks.

So, you're familiar with the basics of GIMP, you know how to make something transparent, you understand layers and you know what the tools do - now let's put that to use.

Having the ability to remove certain parts of an image is an essential and critical tool to have. It's mostly used for taking one part of an image and putting it on another, but does have other uses.

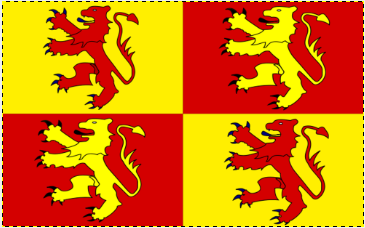
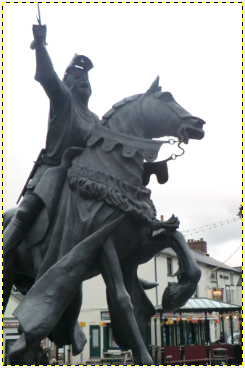
I'll be taking Owain Glyndŵr and his horse and adding them to his flag.

If you're unsure about any of the basics of GIMP, you can find out about them here.

The Images

If you're going to cut out one part of an image and add it to another, you're obviously going to need two pictures. The closer the two image sizes are to each other, the better as this will help prevent any scaling issues.

Also, the quality of both images should be similar - this can of course be tricky. With the images I've chosen, there were slight issues with the file-types as the flag is .svg and the image of Owain is .png creating a fuzzy outline when combined.

Flag
Owain
Jo Harrington

Getting Started

First up, open GIMP and paste in the image you wish cut a part from. This can be done in many ways that I'm sure you're familiar with, I personally use CTRL+C to copy and then CTRL+V to paste.

Now, we've got to select the correct tool for the job. I'm going to be using the Scissors Select Tool (I) to cut out Owain and his horse as the colour of his statue often merges with the background. It's possible to use any of the other select tools depending on your situation.

The Scissors Select Tool (SST) allows you to click around the outline of an object and the SST will automatically being to draw a selection line around the object between nodes. It will place nodes wherever you click (they're the white circles on the image below) which can be moved by holding shift and clicking and dragging.

Nodes

For the more complex bits or where the outline crosses over a part of the image which has a similar colour, it's best to use more nodes. In the image below, I used a large amount of nodes close together as it was rather blurry and this confused the SST as it found it hard to distinguish between the horse and the background.

Close nodes

Some parts of an image require less nodes but more careful placement. Here there's a fuzzy outline on the underside of the horse. It took me several attempts to re-align the nodes to a position that fit the outline perfectly.

It's well worth making the effort to ensure that the selection lines do indeed match the outline. It'll make your final image look a whole lot better!

Far away nodes

Cutting The Selection

Once you've traced all the way around the outline of the object you wish to cut out of the picture, click the first node you created. This will connect all the nodes together. Now click inside the ring of nodes and it will turn them into an actual selection.

Next, use either CTRL+X or simply cut the selection. Create a new layer and paste it to this layer. You may need to add an alpha channel if it doesn't already have a transparent background.

Ideally, now is the best time to ensure that the images are going to be of a similar size. You can change the size of the layer you create, so set it to the size of the image you want to place your cut selection on to.

If your cut image is far too large for the layer you've just created, paste it to it anyway and then use the Scale Tool (SHIFT + T) to scale it to a decent size.

Layers

Cleaning Up

Delete the layer that contains the rest of the image that you've just cut something from. You may notice that there's patches in your cut image that shouldn't be there like the ones in the image below.

It's simple to remove these, use the same tactics above and press Delete to remove them.

Cut out

We now have our image cut out and the white bits removed. Hopefully, it will look clean and without any parts of the image that you do not wish to use.

Cut out without white parts

Et Voilà!

Now all you have to do is add one final layer and paste the background you wish your cut image to be placed on ensuring that this new layer is below the one with your cut image on.

You can now move the cut out image and position it wherever you like on the background. I've added a drop-shadow allowing it to stand out more rather than it looking like a flat image.

Final image

If you'd like a guide on anything, please ask below!

GIMP is a free image manipulation program which can be intimidating at first, but is an excellent and free alternative to other software such as Adobe Photoshop.
Perhaps you need a large, tiled image for a background? With GIMP, it's very easy to design and create your own!
There's many reasons for creating your own brushes. It can seem a daunting task, but it's actually quite the opposite!
Updated: 02/09/2013, Paul
 
Thank you! Would you like to post a comment now?
11

Comments

Only logged-in users are allowed to comment. Login
Paul on 02/07/2013

Thanks again and I'm glad you're finding them useful despite having previous knowledge :)

LiamBean on 02/06/2013

Excellent again. I love GIMP, but with these tutorials I'm finding new uses.

Paul on 02/02/2013

It's free to download; give it a try, Dustytoes!

dustytoes on 01/31/2013

I always thought there must be another way to remove a background, but I don't have GIMP. Very interesting, and easy to understand.

Paul on 01/23/2013

Thank you, Hollie! I'm not planning on stopping any time soon either :)

HollieT on 01/23/2013

You've done it again Paul. If this carries on I may even become a competent GIMP user. :)

Paul on 01/23/2013

I can only apologise, Brenda! It might eat 8 hours of your time, but you'll come out with some impressive images!

BrendaBarnes on 01/23/2013

I love Gimp. A long time ago, I used Photoshop for stuff like this but have gotten away from it all. You have inspired me. Please call me in 8 hours and tell me to step away from the computer!

Paul on 01/23/2013

No problem! And thank you for letting me use the picture haha :P

JoHarrington on 01/23/2013

Wow! This is precisely what I wanted to learn! And thanks for using Owain Glyndŵr too!

You might also like

How To Use Basic Functions In GIMP For Beginners

GIMP is a free image manipulation program which can be intimidating at first,...

How To Create And Tile An Image With GIMP For Beginners

Perhaps you need a large, tiled image for a background? With GIMP, it's very ...


Disclosure: This page generates income for authors based on affiliate relationships with our partners, including Amazon, Google and others.
Loading ...
Error!