How To Get Rid Of A Pimple Overnight Fast, Powerful Technique Works Every Time

by Jerrico_Usher

This Is The SIMPLE and EFFECTIVE Formula For Zapping A Zit (or multiple zits) Overnight. Our 1,284,630+ Visitors Have Seen It! Now It's Your Turn!

If you have a big event coming up tomorrow or just have a nasty pimple that you want gone overnight or fast, there is FREE help available In This Article.

This solution works overnight for 98% of the people who've tried it and reported.

We've combed through every comment and used them (questions, our answers, tips offered by visitors, and more) to build an additional 15 pages (separate site) PACKED with detailed information on everything our readers have shared. (those are coming soon as we need to migrate them)...

█████████████████ VIDEO █████████████████

Quick Overview (consolidated to 6 steps)

Feedback

The Formula

The Ice Trick - 10 Steps to no more zit!
Formula
Formula

Introduction

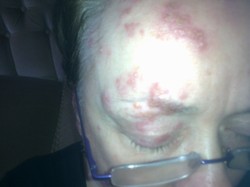
Acne is a very common problem that both adults and teenagers can experience, and often.

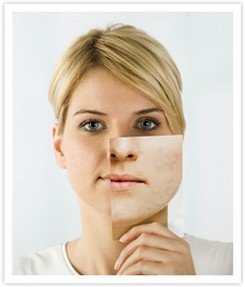
Some suffer from acne year round while others only seem to have an occasional outbreak.

We've all tried just about everything we could think of to get rid of pimples but worse, many of us go to invalid sources for information and end up with everything but what does work. Most of them also have a tendency to cause side effects.

Wouldn't you like the REAL overnight- pimple- removing- concept that actually works and won't cost you anything (for the information)?

Weather you've had acne for years or just got a pimple that refuses to go away- this trick will help you. The formula is for eliminating a pimple overnight but there is much more here to read about to figure out how to keep them away.

If you have a big event coming up tomorrow or just have a nasty pimple that you want gone overnight or fast, there is FREE help available and your here!

It's simple, easy, and powerful.

You will likely tell a bunch of friends who suffer too and will become their savior as I hope to become yours here :)

This works for ANY age!

It's based on basic human biology, not some magic chemical trick, as you'll learn in the comprehensive version (the full site in Choice #3) and the 15 pages that break down some amazing things you may never have known. Even better, it may help you to understand what's real and what's hype out there- that's the real gold actually!

Arrow
Basic Formula For Get Rid Of A Pimple Overnight
6 Steps To Get Rid Of A Pimple Overnight

Textual Steps

(see the products I used to the right and visual of steps)

█████████████████████████████

Visual Steps

(read the textual steps for details, these are the products I used)

█████████████████████████████

Step 1 Wash Your Face

Step 1: The Initial Face Wash

  • Wash your face with acne soap like Clearasil. If you have really oily skin wash it twice, and dab dry with a towel (don't rub).

Step 2: Deep Face Wash: Noxzema

  • Wash Your Face Thoroughly With Noxzema (or any cream with the same active ingredients)

Step 3: The Ice Pack/Ice Trick (building a pack or use a pre-made ice pack)

  • You can use a soft ice pack that's malleable (easily conforms to the shape of whatever it's laid against) and skip this entire section- or you can make your own ice pack and control it's temperature and insulation for better "zit" fighting.
  • Put the crushed ice inside the aluminum foil and seal very well (interlock the edges by folding them into themselves) this will keep the ice cold and from melting too fast. put the foil inside the zip lock bag (again this helps it stay cold.
  • You will need it to be freezing cold. (remove air before closing zip lock bag)
  • Wrap it in a thin towel to buffer condensation and to avoid transferring or spreading oils your face will excrete as the pores freeze/slam shut.

Step 4: Using The Ice Pack To Freeze Your Zits Out

  • After you wash your face put the ice pack on the area where the zit is. The aluminum foil and crushed Ice will form a mold around that area, if you have several zits you can make the ice pack bigger.
  • Hold the ice pack over the zip for AT LEAST 10 minutes, this freezes the pores closed forcing out the oil and dirt. The trick here is

a.) force out the culprit that's causing the zit, the dirt and oil that's irritating the pores, and

b.) to dissolve it so it doesn't just spread to other surrounding pores and make the zit bigger.

  • If you pop the zit it will get bigger because it's like a volcano in overflowing oil into surrounding pores! if you must pop the zit do so while its bathed in Noxzema (challenging yes but safe *smiles*)

Step 5: The Second Wash

  • After ten minutes apply Noxzema (or any medicated cleansing cream) on the whole face (just in case any oil escapes to avoid new zits) and rub in very well around the zit area. If everything goes well the zit should have shrank just a tad, and the Noxzema will absorb the oil and dirt.

Step 6: Acne Cream Step

  • Apply a generous amount of Clearasil or any medicated acne cream like oxy, Clearasil, etc.. Make sure its a cream. This will absorb any excess oils that seeped out when the pores closed and medicate the skin helping it heal.


Once you have the Clearasil on, wait 4-6 hours and repeat as necessary.

Acne Cleanser/soap (Step 1)

Wash face thoroughly with acne medicated soap NOT REGULAR SOAP
Neutrogena Transparent Facial Bars, Acne-Prone Skin Formu...
Neutrogena
Only $8.88

Noxema (step 2)

Once dabbed dry from step 1, Apply generousely and work into face, wait 10 minutes, rinse off (as in textual step descrption)
Noxzema The Original Deep Cleansing Cream
Unilever

The Ice Pack (Step 3 and 4)

Hold Ice Pack Over Zit/area for 10 minutes to freeze out the infection/oils/dirt/close pore tightly

Noxema - Second Wash (step 5)

Repeat step 2: This is to "Mop" up the oils that came out in step 3,4
Noxzema The Original Deep Cleansing Cream
Unilever

Acne Cream Step (Step 6)

Final Step You Keep On for 4 Hours (or overnight)
Clearasil Daily Clear Tinted Adult Treatment Cream: 0.65 OZ
ReGo Trading

██████████████████████████████████████████████████████████████

||||████████ Let's Get Into The Full Recipe Now :) ███████||||

█████████ The Kernal Of How It All Works (including the Full Formula)█████████
Kentucky Fried Chicken Ad
Ad AllPosters

Choice # 2 - Same Formula MUCH More Detailed Explanation Of Steps, theory, background

(comprehensive, but still on this page, approach- It's all in the details)
Comprehensive Course
Step 1 Comprehensive Get rid of a pimple overnight
  • The first step is pretty easy. You do it all the time, but it's HOW you do it that will make all the difference in the world.
  • If your using regular bar soap or any other soap than acne soap or soap specifically designed to help you clear and absorb (then remove) oils on your skin- WITHOUT drying your face out- then your making your acne worse. In fact if your using bar soap your helping your acne get worse!
  • You can use one of the suggestions in our series (if you can't afford or can't buy Clearasil bar or liquid soaps) for natural face cleansers, but if you can buy it Clearasil, Clean and Clear, and Neutrogena (and other types including generic versions of these) are excellent for this step.
  • Before you do anything wash your hands with this soap/cleanser thoroughly- twice if you can.
  • Once your hands are clean- splash water on your face to thoroughly we it. 
  • Use tepid (luke warm to warm NOT hot) water, but DON'T Touch Your face at all.
  • Once your face is soaked and dripping all over the place your ready for the soap. 
  • Leaning over the sink (so you don't get the floor wet *smiles*) put an ample amount of soap on your hands and lather gently- just to make it creamy don't do it like your washing your hands you don't want to mix hand oils into this.
  • In gentle, medium circular motions lather your face touching it with the least amount of pressure possible. This first wash is just to trap the surface oils into the acne soap. 
  • It's designed to vacuum the oils up and encapsulate it into microscopic bubbles. You don't want to push it into the pores (the oils/dirt).
  • Do this for a few minutes until you look like your wearing a mud mask. Without touching your face again, splash water cupped in your hands onto your face.
  • Do this until all the soap seems to be washed away- this takes some patience but the results are worth it.
Clearasil Ultra Rapid Action Acne Scrub 5 Ounce.

2% Salicylic Acid Acne Medication. Clearer skin in just 3 days - Guaranteed. Clearasil Ultra fights pimples fast. With a breakthrough, clinically proven, acne-fighting formulati...

Clearasil
Only $18.99

View on Amazon

██████████████████████████████████████████████████████████████

Step 2 Comprehensive Get rid of a pimple overnight
Noxema Warrior
  • Now your ready for the Noxzema (or any other cream with the same promise of function- to absorb oils and dirt and moisturize your skin, generic Noxzema or our suggestion in the series of oil and plain yogurt works if you can't buy or afford Noxzema, but Noxzema is the one I used with great success.
  • Apply the Noxzema with slight to medium pressure (the surface oils should be gone and the pores oils are what we're after here. Medium pressure in circles will squeeze the pores topical oils out and the Noxzema can go into the pores, we want this actually as it will absorb the oils and dissolve the dirt and contaminants that got in there throughout the day irritating your skin. 
  • Once you get a good rubbing of the Noxzema covering the "infected" area AND the rest of your face (to be sure, but rub more where the zits are to really get them absorbed (oils) into the cream.
  • Be generous with the Noxzema, you want a thick layer because the oils will easily use up a thin layer and you want to keep that dirt/oil in check. As you rub the cream in circles you will be vacuuming up and redistributing (folding deeper into) the oils into the cream itself.
  •  If the layer is too thin and your pressing over and over you may release the oils back onto your face. This is not so easy to do with more cream to absorb it and reabsorb anything that "gets free" from the creams prison "cells".
  • leave this on your face for about 2 minutes after you feel it's been rubbed in well and all the pores are covered and massaged. This will help with your faces moisturizing and give the Noxzema time to break the oils and dirt's down so they become benign.
  •  There are active ingredients in Noxzema that work microscopically just sitting there! 
  • There's a war going on in your face, but what you feel is relief and a cooling sensation that is your face cooling off and the "irritation" stage of your acne being relieved to some degree.

██████████████████████████████████████████████████████████████

  • Get a CLEAN towel never used since it was washed and dried. No reusing of a bath towel you dried off on even if it's still considered clean. You need sterile equipment- this is important if you want an overnight result!!!
  • Using a small piece of the towel at a time, starting with a corner, run it under warm water (high end of warm but not hot). keep the faucet running. With the wet towel scrape off the Noxzema cream like your washing a car window with one of those Squeegees. Only swipe ONCE with any piece of the towel, even if some was left behind in that area. This is very important.
  • Don't be frugal (stingy) with the towel, you may need a few if your skin is really oily (when you started). Use moderate pressure to pull the cream off and run that piece of the towel under the warm water to rinse it off (You will NOT be using this part again, this is to make sure you don't accidentally wipe it on your arm or hand etc... and to be hygienic with the towel. You'd be surprised how much you redistribute accidentally with a dirty towel!
  • Repeat this until your face is completely wiped off, don't worry about the small lines of cream that may still be there- your going to rinse that off with splashing water over and over.
  • This step will have done an initial cleaning of your face and although it was thorough- there is still a great deal of oil/dirt still trapped beneath the surface. The Noxzema should once washed off leave your face feeling a slight tingle of coolness and refreshment. This is a very good sign.
  • The acne will still look likely just as bad, but will have a less rough tint to it, and less redness. If it is more red this just means that your face was VERY irritated which is what causes and sustains acne's effects (swelling etc...).
  • Now your ready for the ice trick- the part of our show where you get feel your face unlike you've ever felt it before - even if you've been outside in freezing temperatures...

█████████████████████████████████████████████████████████████

Step 3 Comprehensive Get rid of a pimple overnight

You can make one at home with the following 4 ingredients or you can buy an ice pack/bottle and just crush ice and fill it and use it instantly. (see image on the right)

||████████ Creating The Ice Pack - From Scratch ████████||

There Are 4 Parts To This Section:

There are 4 layers to this specific part-


  • The ice
  • The Foil
  • The Ziploc bag (insulator and "wrapper")
  • The thin towel buffer (protection from your faces oils).

█████████████████████████████████████████████████████████████

  • The ice pack can be created from a standard (but soft not the hard kind) Ice packs people use when wrapping their knee or behind the neck.
  • If you don't have one of these and can't get one you can make one yourself. This step will show you how to make a home made Ice Pack from scratch and it can be used again and again with one stipulation- change out or wipe down the ziploc bag wash the towel each time.
Ice
  • We start with ice cubes. If you have crushed ice this is great and the easiest way to go. 
  • If 
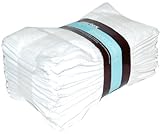
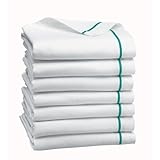
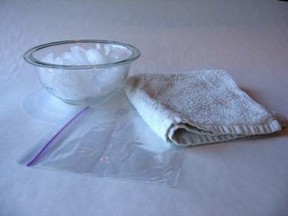
you only have the standard "cubed" ice trays and have at least two trays of ice ready to go then crack them into a bowl and go get a thick bathroom towel. (don't use a good one as we're about to abuse this sucker.
  • Lay the towel out flat and open and pour the ice cubes into it.
  • Fold the outside edges (long sides) into the middle until the crease is at the ice (which should be laid out into a log shape). Fold the other side (long ways) over so it overlaps the first one. This creates a seal so ice doesn't fly everywhere.
  • Grip onto the other tow ends like your picking up a garbage bag and fold them together (like your folding a sheet with another person). Move your hands down to the middle all the way to where the ice is bunched up but give yourself a bit of leeway.
  • Slam the ice onto concrete or the kitchen floor (concrete is safer) over and over again to crush the ice into crushed ice. You can also use a can of corn (or anything canned) or a hammer to crush the ice inside the towel.
  • With the hammer DON'T use the hammer end or claw, use the sides and gently but firmly slam the weight of the hammer down on the ice to crush it- don't do this violently as you'll destroy your towel and ice will fly everywhere!
  • When you feel the ice is adequately crushed (we don't want it to become "frost" type ice but rather small chunks so it's malleable (can shape it to your face like a bean bag but with ice).


█████████████████████████████████████████████████████████████

  • Now that you have your ice, Grab a nice sized sheet of aluminum foil. Don't use cheap thin foil- use Reynolds Wrap or equivalent, it needs to hold the ice and not tear with every sharp sided ice cube or it will let the cold air out. (in other words don't use that cheap dollar tree foil or the kind that comes in sheets like Kleenex).
  • Lay the foil out flat and pour the ice into it much like you did with the towel, except we want a square not a log or rectangle here. (well we want a slightly longer edge on one side but mostly square).
  • Pulling the longer ends together, fold the edges into themselves (see image) to create a tight seal. Fold it down until you have a tight fit over the ice in that direction. End up laying the whole folded piece in the middle down flat.
  • Do the same for the other side folding towards the middle. What you should end up with is a square ice pack looking thing- like when you (or your parents) put hamburger meat in the freezer wrapped in foil for each pound they cut from a bulk package.

█████████████████████████████████████████████████████████████

  • This is the core of your ice pack, but it's going to be far too efficient in being cold so we need to both insulate that cold to last, and buffer that cold (defuse it) so your face doesn't burn off.
  • You do this with a thick (NOT THIN) Ziploc bag (or generic version but make sure it has a zip seal or equivalent that won't let the water that melts drip out (or warm air in).
  • Place the foil ice pack inside the Ziploc bag and push the extra air out of it and fold it down then zip it shut. This should be air tight- any air left in there will warm up the ice and cause a temperature drop- this leads to a less effective pack.
  • The Ziploc bag should be one of the medium to large sizes not small unless you have a single zit to do.
  • The bigger pack is for multiple zits in the same area at once. If your going to endure the pain you may as well get it over with faster right? (yes it's slightly painful but that passes- this is the nerves in your face freezing, but more so the pores "slamming" shut and pushing out the zit juice and dirt :)

█████████████████████████████████████████████████████████████

  • The final step is to insulate the Ziploc bag with a THIN hand towel to buffer between your face and the ice pack. This is to assure the plastic doesn't stick to your face which can spread oils as you will inevitably move the ice pack a bit (shifting) as you hold it and make faces in the first 4 minutes when it's unbearably painful :)
  • (oh get over it, you want that zit gone in one day right?)
  • If you use a towel that's too thick you'll insulate the usefulness of this pack out- the towel is for absorbing condensation of the bag and avoiding oils that will push out of your pores as they slam shut from spreading.
  • It also acts as a semi-abrasive breaking system to hold the pack in place so your not shifting (adds friction so it stays exactly where you put it (and press medium hard to keep it there).

█████████████████████████████████████████████████████████████

Step 4 Comprehensive Get rid of a pimple overnight
Ice Mask
Freezing Out The Dirt, Oils, And Plugged Up Pores:
  • In this step your going to start doing the actual work towards flushing out the bad guys (oils, dirt, contaminants.
  • The ice pack should be used over a large area (if you have a lot of zits in a cluster) but can also be used over a small area or one zit. The pores around that zit may be suffering the fallout of your popping that zit or touching it or it just oozing imperceptible oil spillage over to them and they may not yet be in the "irritation" stages just yet.
  • Just in case, you should cover an area at least an inch around the zit or zit clusters for damage control and "just to be safe".
  • You don't have to use the full ice pack, in fact what you want to do is use part of it at a time and as that part warms up (your face is warm like your body and the body continues to try to compensate for the loss of heat so changing to other parts of the ice pack is optimal. After a minute or so use a different part so you get maximum cold surface area.
  • This area you used will eventually cool off as the cold temperatures inside the pack transfer to the heated parts as your not using it so you can use it again and will- but the towel you place over the pack will assure that you don't transfer any oils to the plastic which don't absorb them and will instead transfer them back to your face in a different part if you accidentally touch it.
  • With the thin towel buffer there your safe as it will absorb the oils but with the pores shut tight and the area being cold, those oils are less fluid and less likely to come out of the absorbent towel your using. You need a thin towel so the cold air transfers into your pores shutting them closed tight.
  • It's the consistent cold that shuts them and "numbs" your face so if you take the ice pack off an area for more than 15 seconds and the face warms back up (before the 10 minutes you need to do it for) you will have to start the clock over again. The idea is not to avoid the discomfort of freezing temperatures on your skin- it's to endure it (after about 4 minutes the pain stops and your face numbs, keep it there though- that's just the start).
  • When your face numbs up you won't feel anything not even the cold in the pack- this is what's supposed to happen- it means the pores are starting to shut and this means the oils and dirt are pouring out. The oils in your pores deep down are actually chemically changed due to the dirt irritating the pore
  • This oil itself becomes an irritant and also solidifies becoming a blockage. What the slamming shut of the pores does is force this "plug" out and keeps it cold (side effect) which makes it easier to clean off in the next step (second washing).

█████████████████████████████████████████████████████████████

Step 5 Comprehensive Get rid of a pimple overnight
  • In this step you simply repeat the Noxzema step in the first "washing" step. The difference, 
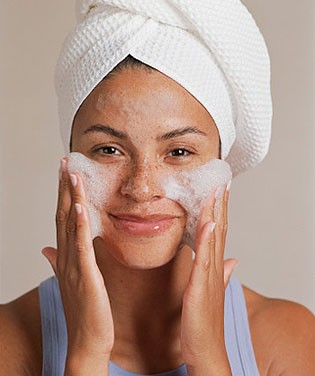
however, is that you start out with the Noxzema step in full (adding, working in, splash rinsing then the towel)- once you finish that, you need to give your fave 10 minutes to rest and "get some air". It's been suffocated for 10 minutes and abused by all the washing, Noxzema etc...
  • The Noxzema is essential right after the ice comes off, and I mean within 15 seconds you need to hit that step again (just Noxzema). The reason being like the Exxon oil spill in the ocean endangered the wild life in the water and eco system, your face is now a toxic waste "dump" where the pores slammed shut it pushed out a ton of dirt, chemically charged oils, and dirt. You don't want that stuff to fall into the same or any surrounding pores- the only thing keeping it from doing that is:
  1. Your pores are closed
  2. Your face is Cold and thus the oils are more solid less able to affect your face until they melt, then the chemically charged oils will start to cause serious acne if you don't clean that up right away (think of it like acid).
  • The Noxzema acts as a neutralizer (it traps and as you rub and fold the cream past the oils it "mops" up the oils and stores it in plastic bags (molecules of the active ingredients encapsulate it like soap does with dirt).
  • It also acts as a skin moisturizer penetrating the closed pores at the microscopic levels and nourishing your skin like a mother calming a scared child after a nightmare- there there, it's all over...
  • There is actually going to be twice as much and twice as harmful oils on your face after this step because it's frozen the pores shut and pushed out the deepest oils in the pores- the other oils and dirt were topical- this is internal- but the good news is that this is the culprit of your acne, the antagonist- the criminals. Noxzema is the police and the only law is the death penalty for bad oils and dirt :)
  • Once your finished with the Noxzema step- before you do the next washing, take 10 minutes to let your face return to normal. It should heat up and it may get oily- don't worry. This is a normal thing your face does anyway.
  • The ice and Noxzema and all the steps we just took dry out the skin of oils (we were trying to do this to remove the bad oils- a dilution period that was necessary). Now the face is ready to return to business as usual without acne so it has to rejuvenate the oils.
  • Your pores are naturally supposed to have the good oils in them and constantly flushing out that oil (very slowly). This is how it keeps out dirt and contaminants.
  • The normal oils your pores produce don't cause acne usually, but when dirt gets trapped in the pore it irritates the skin and the oils become trapped trying desperately to push out the problem. The immune system is activated to surround and dissolve this contaminant to push it through the blood stream and out of the body.
  • That's why you get white heads. If you get a white head from this process realize that's a step in the healing direction- DON'T POP IT. It will dissolve in the second round!
  • After 10 minutes to an hour pass (don't touch your face in this period and don't try to wipe off the oils- they need to be there for the natural healing process to happen) it's time to wash the face again. You've let the face relax, the oils to flow and heal the skin inside the pores and to "regulate" their flows. Now it's time to do a normal washing, the same one you did in the beginning.
  • Once you finish this step and dab dry your face (I use paper towels because it assures it gets very dry and fast but without over drying the skin).
  • Drying the skin will make it absorbent. You want to immediately apply the next step- the acne cream within 15 seconds to start the chemical vacuum process. I'll explain that in the next step.

█████████████████████████████████████████████████████████████

Step 6 Comprehensive Get rid of a pimple overnight
Rejeuvenated Skin
Rejeuvenated Skin
  • This is the final step before repeating the whole process again in 4 hours and if needed in 4 hours after that (with one hour between repeat cycles mandatory!).
  • In this step, directly following the wash and drying with a paper towel stage you apply a thin layer of Clearasil (or others with the same active ingredients- see our series "alternative ingredients" page for some home made ideas from stuff in your kitchen!) over the entire face. This is both preventative as well as expediting the natural flow (and absorption of oils).
  • The face, when it's back to healthy or much more so than it was (severe acne takes more times to reach that glow stage but it should definitely be less irritated thus less swollen and red) will start to produce the good oils again. Your pores have to re-acclimate to the natural state and that means it has to rejuvenate oil production that was interrupted by the "broken" oil (chemically altered by the immune system).
  • Your face will likely start to become oily but don't mistake this as a bad thing. This will happen for about 4 hours but the acne cream's job is to SLOWLY absorb this oil so it doesn't overwhelm your pores. In this way it regulates the flow and allows the face to do it's thing (the skin/pores) without creating new pimples.
  • You must make sure your relaxed and not moving around during this 4 hours if possible. If you move around you will start perspiring and this will push water into the oils and overwhelm the acne cream as well, diluting it's power!
  • if possible spend that time relaxing, watching television (don't sleep during this first round as you may wipe off the cream or dream in a way that makes you sweat- same problem.
  • If you lay on a pillow put a clean towel over it to assure you don't transfer your old oils onto your face- change and clean your pillow cases!
  • After applying the general layer across the whole face start dabbing generous amounts over the problem areas- I mean dab so much on them that you create pimple mountains or I call them "Hershey kisses" because of the way they mound up and create the Hershey flag. This won't be attractive so do this when you don't have to enter the public eye for at least 4 hours!
  • If you get up 6 hours before you have to go to work/school you can do this once then on the second round (exact repeat), you can use brown tinted Clearasil/acne cream and don't necessarily need to dab it just apply it so it covers the zit (which will be drastically smaller or gone). Then take it easy trying to stay in cool areas and out of the heat and out of moving too fast or perspiring.

█████████████████████████████████████████████████████████████

dfg

The Series That Breaks This Formula Down, Gives You Alternative Ingredients, More Quick Fixes, and Much More!

(coming Soon)

FROM HERE DOWN THE SITE PAGES ARE BEING BUILT AND WILL BE UP SOON. YOU WILL JUST CLICK THROUGH TO THE SITE AND USE THAT SITES NAVIGATION TO READ THE COURSE. IT WILL BE SET UP LIKE A SILO (ONE PAGE LEADING TO THE NEXT IN ORDER OR YOU CAN USE THE TOC TO BOUNCE AROUND TO THE PAGES YOU WANT TO READ.

THIS PAGE YOUR ON CONTAINS THE ENTIRE FORMULA BUT THE OTHER PAGES CONTAIN MORE DETAILS AND BONUS PAGES...


THANK YOU FOR YOUR PATIENCE!


1. Introduction Page - What Is The Get Rid Of A Pimple Overnight Series?

2. What Is Acne - The Physics Of Acne

3. What Not To Do If You Already Have A Pimple

4. Preventative Work To Help You Avoid Or Prevent Acne

5. Acne Diet - Tips And Comprehension. Be Pimple Free From The Inside Out!

6. Conditions Often Associated With Acne (like Blackheads, Whiteheads, etc...)

7. Acne Medication Side Effects And Warnings

8. Homeopathic Treatments For Those With Allergies (and those without)

9. Alternative Ingredients (for the steps) And Some Stand Alone Treatments For Acne

10. How To Cover Acne Scars And Hide Visible Scars

11. How to get rid of pimples and other blemishes FOREVER - The Acne Cure Missing Link! (a MUST READ!!!!!)


Each Step Is It's Own Highly Informative Article


The Main 4 Steps - The Formula:


  • Step 1: Wash Your Face, Remove Potential Contaminants!
  • Step 2: Cold Fusion The Ice Trick, Freeze Pimples Out!
  • Step 3: Second Wash - Wash away oils and dirt that surfaced
  • Step 4: The Zits Are Down! Cream Them!
Updated: 11/27/2012, Jerrico_Usher
 
Thank you! Would you like to post a comment now?
3

Comments

Only logged-in users are allowed to comment. Login

You might also like

How to Get the Deepest Darkest Sun Tan

Learn time honored and tested methods of getting the best, deepest, darkest m...

Natural Beauty Secrets: Bamboo

Three unique ingredients - bamboo sap, bamboo vinegar, and bamboo extract - a...


Disclosure: This page generates income for authors based on affiliate relationships with our partners, including Amazon, Google and others.
Loading ...
Error!