How to Use Zazzle Quick Create

by JoHarrington

True artists spend many hours lovingly crafting and polishing their finished product. The rest of us use quick create. Let me show you how to produce 100s of items in minutes.

My Zazzle store wasn't growing very quickly. It was my own fault. I'd much rather mess around with words than images, so Wizzley was taking all of my time.

I did try. I'd set aside an hour or two, determined to add more images and products to my tiny eCommerce shop. Then I'd get bored and drift back here.

It was the repetitiveness that was killing me. Zazzle is great for those with the visual acumen to run with it. But for a wordsmith, it was all copying and pasting the same old descriptions over and over again.

Until, that is, I found and pressed a little button.

How Quickly can you Create with Zazzle Quick Create?

Once I'd found my groove, I was averaging about three minutes to produce around 37 items for my store.

In truth, I have an ulterior motive for writing this Wizzle.  I've been asked by two people in two days how to quickly populate their own Zazzle stores with items.

They were both independently reacting to the knowledge that I'd added over 600 products to mine.  Not so startling in itself, until you realize that I did all of that in a single evening.  Let's just say that Beautiful Britain didn't look quite so empty by the time I called it a night!

I'm writing this for them; and for anyone else who is bound to ask next.  It's to demonstrate how they - and you - could do it too.

Should You be Rushing Large Quantities of Zazzle Products into your Store?

There are pros and cons to this approach, all of which are being debated in the duel column within Dustytoe's article here.
If you run a Zazzle store, I want to help encourage you to keep at it until it becomes the success you are looking for.

Preparing to Create Mass Amounts of Zazzle Products

There are a few things that you need to have handy before you begin.

My assertion, that it takes just a few minutes to mass produce Zazzle items, relies upon the fact that your image is ready and waiting.

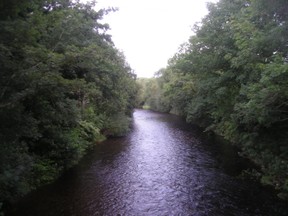
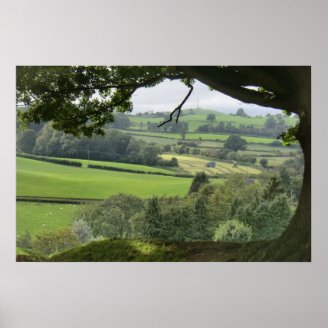
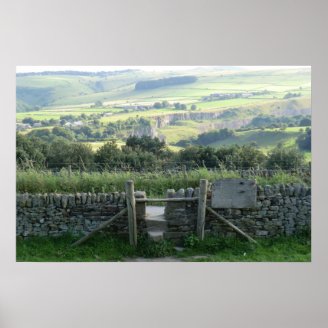
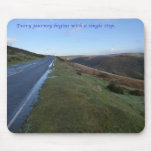
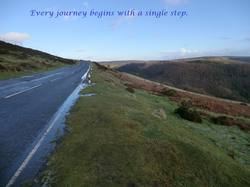
The photographs which form the basis of mine tend to be taken during my travels around Britain. In truth then those two posters above took hours, days even, to create. 

I had to save up the petrol money, decide where I was going, and drive miles to arrive there. 

Then I wandered around snapping away.  This always takes a while, as I have a tendency to forget why I'm there and end up day-dreaming over the view instead.

But pictures collected, I have the return journey.  Factoring in comfort breaks and getting side-tracked by more pretty scenery, it can take hours. Days. I've been known to go missing for a week.

None of this is counted in the 'quick' bit.  I'll tell you when to start with that.

Once you have your artwork, images/photographs, calligraphy or whatever else to upload, then there is one more important point of preparation to make.  If you're going to sit here for hours producing hundreds of items, you need something to occupy your mind.

I went for podcasts on iTunes.  That's how I learned all about Gary Galka.  Trust me, the Zazzle process now won't be rocket science.  It'll be pretty brainless, but effective.  You'll want audio distraction, be it music, talking book or radio shows.

Now we're ready to go!  Start the clock!

The Image that I've Prepared to Use on Zazzle

I have my picture all ready. It's one that I took myself (in a gale, we won't go into that, but to say that I'm a very good driver). I've added a motivational message too.
Image: Horseshoe Pass, Denbighshire
Jo Harrington

Step One: Uploading Your Image

Before you can use any image on Zazzle, you need to have it uploaded there.  Depending on your computer speed, it might take longer to do this than to make all of the products later!

  • Click on your account name on the top toolbar.
  • Select 'Images' from the pull-down menu.
  • Click on 'Upload' - the first option under the 'My Images' sub-category title.
  • Click 'Select Images to Load'.
  • Find your image.
  • Press 'Ok'.

This might be instant. It might be a few minutes. Just entertain yourself while you're waiting.

You can upload more than one by the way.  Nothing starts loading until you press that 'ok' button, so this could be a great moment to send a load of images to Zazzle.  Then go and make yourself a nice cup of tea.

Image:  Zazzle Uploading an Image
Image: Zazzle Uploading an Image

An Alternative Way to Upload Images to Zazzle

Zazzle Bulk Image Uploader does precisely what it says on the packet. It's a quick way to add lots of pictures or designs, so that you can begin the process of making products.

Step Two: Adding Your Image to Multiple Zazzle Items

I shouldn't have told you to start the clock above.  The three minutes really starts from here, as I already had all of my pictures uploaded on that marathon product producing night.

  • Click on your name on the top Zazzle toolbar.
  • Select 'Products' from the pull-down menu.
  • Check that 'current store' is on the one that you want to populate.
  • Click the 'quick create' button in the left-hand corner.
Image:  Zazzle Quick Create Button
Image: Zazzle Quick Create Button

The first pull-down menu is going to be a matter of your own personal choice.  As my images are all landscape scenes, I can't imagine too many people choosing to wear them on a t-shirt.  Therefore I select 'All non-apparel'.

You might have something which would look fabulous on clothing.  Going for 'All Products' is exactly what it says on the packet.  You have several options there.  Go for the one that best suits what you're creating here.

Then add in your picture by clicking the 'add images' box.  I choose 'fill' from the two options in the last pull-down menu.  The other one is 'fit', which will add your picture without cropping it at all. 

I prefer fill because it leaves no white spaces.  The fit one will leave whatever borders are required to show your whole image.  Frankly some of those look strange at best, and rubbish at worst. 

By selecting 'fill', I'm saving myself deleting time later.

Obviously, you finish this part by pressing 'Create Products'.

Image:  Zazzle's Quick Create Configuration Page
Image: Zazzle's Quick Create Configuration Page

When you reach the next page, you could be good to go.  But I backtrack for a moment. 

For some reason, 'all non-apparel' doesn't appear to include paper based products.  As mine are pretty pictures of the awe-inspiring British countryside (yes, they are, stop heckling the page!), things like posters, cards and postcards are ideal items to make.

I click 'create more' from that page, then repeat the previous process, but with 'Paper Products' selected from the first pull-down menu instead.

Now it's time to start playing with my new creations!

Step Three: Double-Checking Your Newly Created Zazzle Products

Not every item is a good fit.  This is the moment when you pause, glance through and see what needs altering or deleting.

After the first few times, you get into a rhythm.  When your images are all of the same type, then some products will never be a great match.   I reached the point where I was able to go click, click, click, while barely looking, and managed to weed out the bad ones quite speedily.

Tick all of those marked for deletion, then click 'delete selected'.  That can be found at the top right-hand corner, near to the 'Next' button.

Finally skim through and see if any need to be edited before they're fit for public consumption.  I found that I only ever had to change one thing.  The mousepad, near to the bottom, wasn't as filled as it could have been.

  • Click 'customize' above the offending item.
  • Find the 'fill' button and click it.
  • Press done.

Voila!  Ready to go!  

I press the 'select all' link to tick all of the boxes (not sure if that is strictly necessary, but it's part of my engram routine now), then click the 'Next' button; and we're nearly done.

Image:  Customizing a Mousepad in Zazzle
Image: Customizing a Mousepad in Zazzle

Having Trouble Aligning Your Pictures for Zazzle Items?

It can be frustrating and tricky to get your photograph or artwork to fill the available space for your Zazzle merchandise. After several thousand of them, I know the tricks.

Step Four: Filling in the Description and Tags

This will complete the information for every single one of your new items.  It's this en masse creation which really does save all of the time.

Every detail that you add in here will aid people in finding your products.  Try to make every word count; and don't skip bits for speed. 

You might have made the most amazing thing in the world. The ghosts of Michelangelo, Van Gogh and da Vinci could be weeping in wonder, wishing that they had made it first (and that Zazzle had been around for them, instead of mere Sistine Chapels and the such).  But what does it matter, if no-one can find it?

Fill in all of these sections, noting that some HTML can be used in the description.  <br><br> will add a blank line between paragraphs.

Image: Filling in the Product Information

Keep going until the end, then press 'Post It' and you're done.

Trust me, it took me far longer to write this Wizzley article, than it did to create those Zazzle products!  Enjoy!

Some Samples of 'Every Journey...' in my Zazzle Store

You have just watched me make these, so it's only right to show you the finished products.
Updated: 01/25/2013, JoHarrington
 
Thank you! Would you like to post a comment now?
11

Comments

Only logged-in users are allowed to comment. Login
JoHarrington on 01/03/2014

That really would make life so much easier, wouldn't it? I'm reduced to creating those things in GIMP or Paint, then transferring it as an image.

Mira on 01/02/2014

What I don't understand though is why Zazzle won't let you use in Quick Create their own fonts and the text you create onsite.

JoHarrington on 12/25/2013

There's a button in there for adding text. When you come to produce one, it should pop up to ask you too.

Guest on 12/24/2013

I still need to figure out how to add text to my Zazzle products. Otherwise, my store will end up with another week of big fat zeroes for views.

JoHarrington on 06/09/2013

Good luck with it all. It's always good to have several strings to your bow.

kimbesa on 06/09/2013

I'm slowly creeping closer and closer to having a Zazzle store. When I clear out some other clutter of projects that need to be "handled" and have set deadlines...

JoHarrington on 06/09/2013

Awww! How annoying! {{{hugs}}}

Mira on 06/09/2013

Yes, select all is definitely necessary. Otherwise all the work you do to customize each product is for nothing, as you end up with no products selected :-(. Happened to me twice. I clicked the Next button and then realized what I had done!!

JoHarrington on 04/26/2013

You're welcome. Let us know when they turn up, so we can all have a good look!

Mira on 04/26/2013

Yes, I noticed this time around it actually said I should wait 24 hours ("Your products could take up to 24 hours to be created.") Thanks, Jo!


You might also like

My Zazzle Success Story

I've been selling products on the Zazzle site since 2007, and my earnings con...

How to Use Zazzle Bulk Image Uploader

Zazzle Bulk Image Uploader does precisely what it says on the packet. It's a...


Disclosure: This page generates income for authors based on affiliate relationships with our partners, including Amazon, Google and others.
Loading ...
Error!