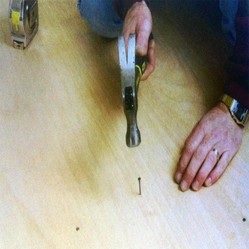
Install The First Sheet
Starting in the corner set the underlayment so its length is perpendicular to the floor joists. Trim the panels, if necessary, so the edges are offset from the edges of the subfloor panels by at least 2 inches. Nail the panel in place with uncoated 4d ring shank or spiral shank nails. Start about ¾ of an inch from the long edge and nail every 3 inches along it. Then work your way across the panel. Drive nails on a 6 inch grid across the face of the plywood every 3 inches along the edges. If necessary relocate individual nails to avoid nailing into the joists.
Install The Second Sheet
Put the next panel down, leaving a 1/32 inch gap between the sheets to allow the minor expansion that may occur. As before drive the nails every 3 inches along edges and on a 6 inch grid across the rest of the surface. Continue laying sheets in the same row, trimming the last sheet as needed.
Offset The Joints
Cut the first sheet of the next row in half so the end seam is offset from the end seam of the first row. (The allowable offset may be considerably less, depending on the floor that will go above it. Always follow the manufacturer’s directions.) Nail it down as before, leaving 1/32 inch between long edges of the sheets. Continue along the row, leaving 13/32 inch gaps between sheets. Lay the rest of the underlayment the same way, alternating between full and half sheets at the beginning of each row.
Fill the Seam
Some manufactures require you to fill the gaps between sheets, other direct you to leave them open. If you need to fill the gaps, use filler made especially for underlayment, apply it following the manufacturer’s directions. Fill just the gaps-don’t build up and feather out the surface the way you would mud drywall seams. Make sure the trowel leaves a smooth surface without any ridges or gaps.


 How to remove grout from tileon 05/04/2015
 Why I Don't Loan Toolson 05/02/2015
 The Basics of Laying Down Ceramic Tileon 04/29/2015
 Why I’m Not a Fan of DIY Networkon 04/25/2015

Comments