Easy Halloween Crafts for Kids

by pkmcr

Kids love Halloween and they also love Crafts! So what better than combining the two and keeping them entertained and involved with some Easy Halloween Crafts for Kids this year?

If you are looking for some Easy Halloween Crafts for Kids to get the kids involved in creating for your Halloween Party this year then you have come to the right place!

Every kid's imagination goes wild on the day of Halloween, and while pumpkin carving is a usual standby craft for Halloween, there are many other things you can do to keep your kids in the Halloween spirit before the big day.

Following you will find five easy Halloween crafts kids will find spooky and delightful at the same time.

So make sure you are ready and start getting things together so that your kids can really enjoy themselves this Halloween.

Make A Bowl Full Of Eyes

One of the Halloween Crafts Activities Your Kids Will Love!

Nothing says Halloween like a bunch of disembodied eyes, right? Well, these are one of those super easy Halloween crafts kids will not only love to make, but they will also be tempted to look at them many times throughout the day.

Materials You Will Need

  • Glass marbles with a flat bottom
  • Eyeball clip art printed on regular printer paper
  • Scissors
  • Jewelry glue

Steps In This Easy Halloween Craft

Step 1 - Find some eyeball clip art on word that your kids like, then print it off a bunch of eyes on regular printer paper. The eyeballs will go on the bottom of the marble, so they cannot be too large. Look for eyeballs that are slightly smaller than the flat marble surface.

Step 2 - Cut out the eye balls.

Step 3 - Add a tiny drop of glue on the front of the paper eyeball.

Step 4 - Push the marble down on the eyeball.

Step 5 - Let dry with the paper side sticking up.

Step 6 - Repeat steps 3 to 5 until you get as many eyeballs done as you can handle.

Step 7 - When dry, put your eyeballs into a shallow glass to display as your disembodied eyes!

A Very Popular Halloween Crafts Ideas Book

Glitterville's Handmade Halloween: A Glittered Guide for Whimsical Crafting!
Glitterville's Handmade Halloween: A ...

Making Your Own Halloween Decorations

Floating Ghost - Great Craft Idea For The Kids

You and your kids will love this Halloween decoration, and it is very easy to make. Your guests will be very impressed when your kids say that they are the ones that made the ghost (even though you will have helped).

Materials You Will Need

  • Cheesecloth
  • Coat hanger (wire)
  • Liquid starch
  • Spray bottle
  • 2L pop bottle
  • Large styrofoam ball
  • Hairdryer
  • Old towel

Steps Involved In Making Your Own Halloween Decorations

Step 1 - Lay down your old towel as a work surface. You will be spraying starch, so the towel is needed to avoid a mess.

Step 2 - Take the coat hanger and straighten it up. Then wrap the center of the coat hanger around the neck of the 2L bottle. Adjust the ends to look like arms with the elbows facing down and the hands up. (If you can't picture this, get your kids to make their best 'scary ghost impression' and you will instantly see how to manipulate the wire.)

Step 3 - Put the styrofoam ball on the top of the pop bottle to act as the head shape.

Step 4 - Drape the cheesecloth over the head and arms to create a ghostly appearance. Ensure that there is a good amount of cheesecloth lying out in front of the ghost, as well as to the sides and the backs.

Step 5 - Spray the cheesecloth with the starch. The more you spray, the stiffer your ghost will be.

Step 6 - Use a hair dryer to dry the ghost fast. If you want, you can also put in the sun to dry, but chances are that the kids will want to see their creation sooner than later.

Step 7 - Remove the stiff ghost from the pop bottle mold and place on a flat surface to display, or string a thread through the top of the ghost to hang from the ceiling.

Buy Your Large Styrofoam Balls

FloraCraft Packaged Styrofoam Balls, 8-Inch Snowball, 1-Per Package, White

8-inch Styrofoam Ball (1/pkg), BA8S

View on Amazon

Foam Ball - 12 Inch Diameter White EPS Polystyrene Sphere

1 pound density EPS(closed cell polystyrene bead foam) 12 inch smooth foam ball.

View on Amazon

Foam Ball - 14 Inch Diameter White EPS Polystyrene Sphere

1 pound density EPS(closed cell polystyrene bead foam) 14 inch smooth foam ball.

View on Amazon

Pine Cone Pumpkins

A Simple Halloween Craft For Kids and Adults

There is usually an abundance of pine cones around during October. This year, get your kids to search for some round, plump ones that they feel look like little pumpkins, and then get busy making them look like pumpkins!

Materials You Will Need

  • Pine cones that have been cleaned and dried
  • Latex spray primer
  • Acrylic paint in orange, black, and green
  • Newspaper
  • Paint brushes

Steps For Making The Pine Cone Pumpkins

Step 1 - Lay down the newspaper on the entire work area.

Step 2 - Spray the pine cones with the latex spray primer. Note: The primer is needed because the pine cones are not suited to adhere to paint and the paint will be rejected by the pine cone without it. Let dry for two hours.

Step 3 - Using a paint brush, let your kid paint all of the pine cones orange. Let dry.

Step 4 - Using a paint brush, let your kid paint all of the pine cones a face using then black paint. Let dry.

Step 5 - Using a paint brush, let your kid paint a green top on the pumpkins. Let dry.

Step 6 - Display your patch of pumpkins!

Make A Pumpkin That Throws Up

A Simple Craft Idea for Halloween That Your Kids Will Love!

This is one of those easy Halloween crafts kids will not only like doing, but will learn from as well. This can be done on Halloween day after you have cut out the pumpkins and have them on display. Or you can make a bunch of tiny carved pumpkins weeks in advance to allow your kids to play around with this on a daily basis.

Materials You Will Need

  • Carved pumpkins
  • Baking soda
  • Food coloring
  • Vinegar (You can't have too much of this.)
  • Plastic sheet to put pumpkins on and hold mess that will soon occur

Steps Involved With This Simple Halloween Craft

Step 1 - Put a layer of baking soda inside the bottom of the pumpkin. Add a few drops of food coloring.

Step 2 - When desired, add vinegar, a cup at a time, into the pumpkin.

Step 3 - Delight in a pumpkin that throws up colored foam!

Make A Witches Hat

The Perfect Hallowen Craft For Kids

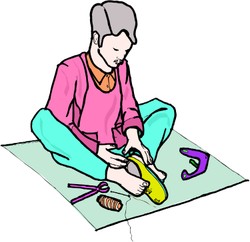
What would Halloween be without witch hats? Boys and girls will both want to wear their personally designed hats and fly off on the broom handle around the house. You may have to be the one who handles the measuring and some cutting, but let your kids participate in whatever way you can during that process.

Materials You Will Need

2 large pieces of black construction paper
Craft glue
Scissors
Ruler
String
Stapler
Pencil
Stapler
Decorations such as googly eyes, paper bats, paper cats, etc.

Steps Rquired To Make A Witches Hat

Step 1 - Take a short piece of string (shorter than the construction paper and tied one end on the pencil.

Step 2 - Hold the end of the string (without the pencil) down on the bottom and middle of the construction paper, then, stretching the string out as tight as it can go and trace out a semicircle starting at the bottom left side of the construction paper and working all the way to the other side. The string acts as a geometric compass making the perfect semi-circle.

Step 3 - Cut out the semi-circle.

Step 4 - Bring both ends together to form a cone.

Step 5 - Staple the paper where the ends come together and have your kid try on their hat to see if it fits. If it doesn't fit, simply remove the staple and try again until it does. Once it fits properly, apply glue along the seam of the hat and press seam together.

Step 6 - Cut short tabs about 1-inch apart on the bottom of the hat. When done fold up the tabs to create a brim on the hat.

Step 7 - Measure the inside of the hat with the ruler. Use those measurements to draw a circle on the construction paper with your string and pencil again. To do this, mark off the measurement of the inside of the hat on the construction paper in random spots along the circle, and then mark off the midpoint so that you know where to put the end of your string. Then allow enough slack so that your pencil reaches one of your marked off measurement and create a circle.

Step 8 - Keep your string in place, lengthen it a bit, and create a larger circle to create the outside of the brim.

Step 9 - Cut out the larger circle and the inner circle.

Step 10 - Place the cut out brim over the hat and make any necessary adjustments to ensure a good fit.

Step 10 - Once satisfied with the fit, put glue on the top of the tabs you cut out and push the brim against the tabs to form the completed hat.

Step 11 - Let your kid decorate the hat however they want to decorate.

Step 12 - Watch as your kid's imagination takes flight as a witch.

More Easy Crafts For Kids and Adults

In today's economy we all need to earn more don't we! Easy Crafts To Make And Sell will enable you to turn your love of crafting into an additional income source for you.
Need to keep the kids entertained during the holidays or need some rainy day activities for your kids? Then the easy craft ideas here are just the thing!
Are The Kids Bored? It's Raining again! Why not keep the kids entertained with some of these fun easy craft ideas for kids? Let them get creative and stop them from being bored!
Updated: 12/04/2016, pkmcr
 
Thank you! Would you like to post a comment now?
1

Comments

Only logged-in users are allowed to comment. Login

You might also like

Star Wars Craft Ideas

Are you or your kids great Star Wars Fans? Then of course you will want to tr...

Fun Easy Crafts for Kids

Are The Kids Bored? It's Raining again! Why not keep the kids entertained wit...


Disclosure: This page generates income for authors based on affiliate relationships with our partners, including Amazon, Google and others.
Loading ...
Error!