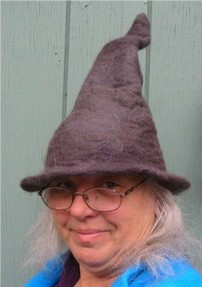
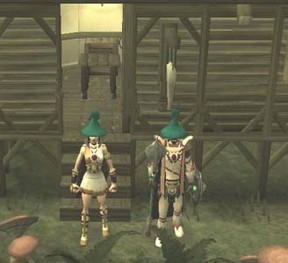
Seen from a certain perspective, these are not witches hats for Halloween. They are the pointed hats from Canifis! Of course you have to be a die-hard Runescape fan to notice that. But they are precisely the sort of people who attend Runefest, or the unofficial gamer meet-ups.
One of these felt hats would look fabulous as a costume for real life events, particularly if you match to the color to those found in-game.
Billed in Runescape as ‘a silly pointed hat’ (the cheek!), it is available for 650gp at Barker’s Haberdashery in Canifis. The teal colored one has been habitually worn by blogger Merch Gwyar for the past five years.
In real life, of course, there is no gp, so you will have to make your own.
Happy IRL crafting xp!

Runescape Fans! Make Yourself a Hat for Runefest
by Ragtimelil
Have you wanted a really unique hat that you can wear any time? How about making a felt pointy hat?
Forms
If you've never felted before, you might want to start with just learning to get the feel for it. I have a couple of other articles on making felt that you can read first. Hats are a bit advanced work but great fun once you get the hang of it.
Read Felt Snakes and Make a Felt Bag
There are several methods of making hats. Some people make a flat piece of felt and then place it on a form to mold it. I've never gotten that technique to work for me. I make a resist or pattern the shape I want and make the basic form that way. Then I slip the resist out and put the felt piece on a form and finish shaping on it.
I've made my own forms with some success using spray insulating foam and something to spray it into like an old hat that is the right size. Once it's completely dry and hard, I wrap it in plastic to protect it from the water. You can also buy really nice forms. Wooden ones are the best but also the most expensive. There are some cheaper ones that are nice at hatshapers.com.


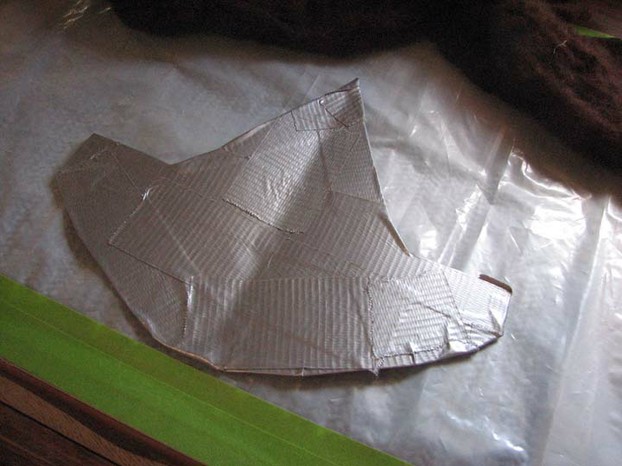
Resist
I start with a resist, in this case, just a piece of cardboard wrapped in tape. You can make it out of plastic or even linoleum. I lay out my work area with plastic, then non-slip shelf fabric and another sheet of plastic. I have more detailed instructions on getting started HERE.
I pulled tufts of fiber off the end of a piece of roving and put one layer down over the resist with the pieces aligned horizontally. I made another layer with them going vertically. Lay down 4-6 layers and feel with your fingers to find any thin spots. Fill those in to make it even. Try not to overlap the resist too much.
Cover the whole thing with a net or sheer fabric to hold it in place. Dab some hot water on it to saturate. Add your soap and rub gently until it starts to hold together. Try to leave the edges that overlap the resist dry. Pull the fabric back from time to time to keep it from sticking to the felt.
Setting it Up
 Resist | 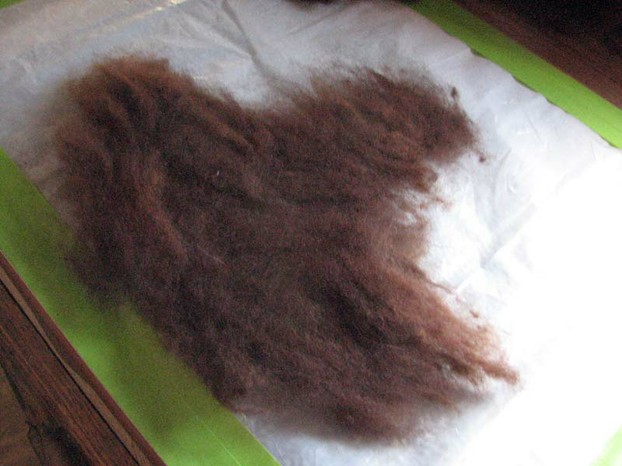 first layer | 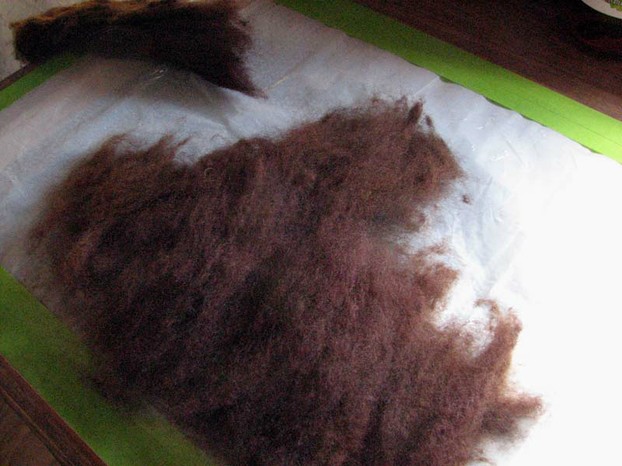 Second layer | 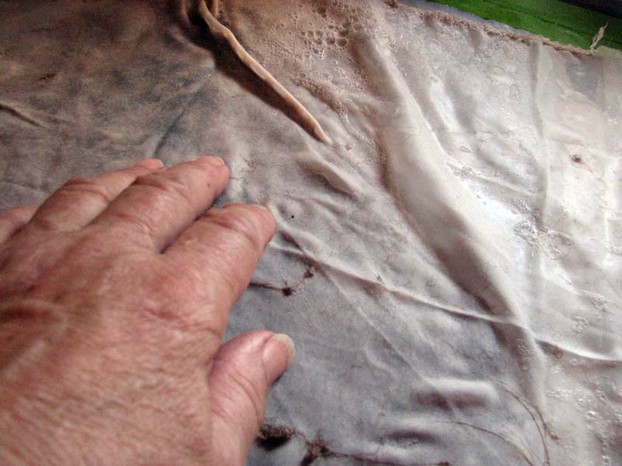 Net covering |
Flip and Continue
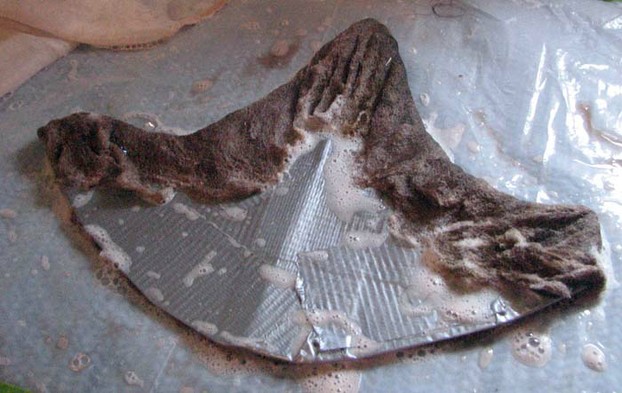
When the felt starts to hold together, flip it over. Carefully fold the excess over without making a fold on the corners. I folded the bottom edges under the resist so that it will stay open for the brim edge. This is a little different from the bag I wrote about with sealed edges. It will work either way, however.
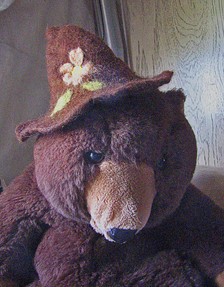
Add layers of roving as above. This time I decided to add some embellishments in the form of a flower. I just rolled some colored wool into a ball or long shape and laid them on the hat. Cover with the fabric, add hot water and soap and again rub gently until it holds together. Flip again and fold edges again. Keep rubbing. It will start to get hard.
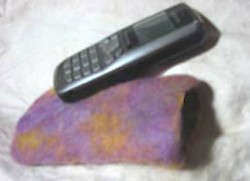
Remove the resist and put your hand inside the hand. Rub the creases until they smooth out. Now place the hat on your form. Really concentrate on the edge where the brim meets the crown. This needs to be as solid as possible or your hat will stretch out like a plate. If your brim is too big or too uneven, you can trim it with scissors and rub the edges to smooth and seal them.
 Flip and Fold | 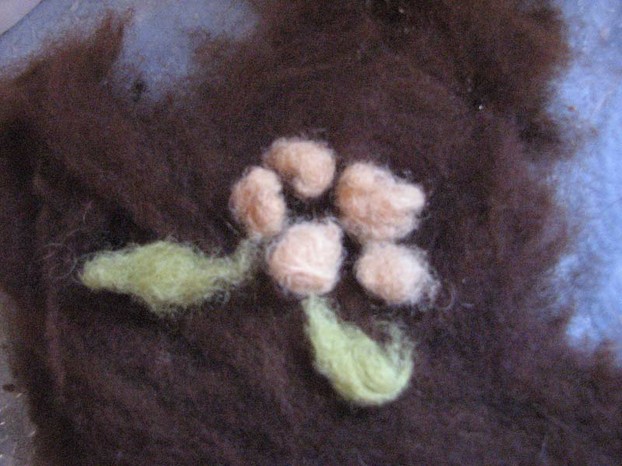 Embellish | 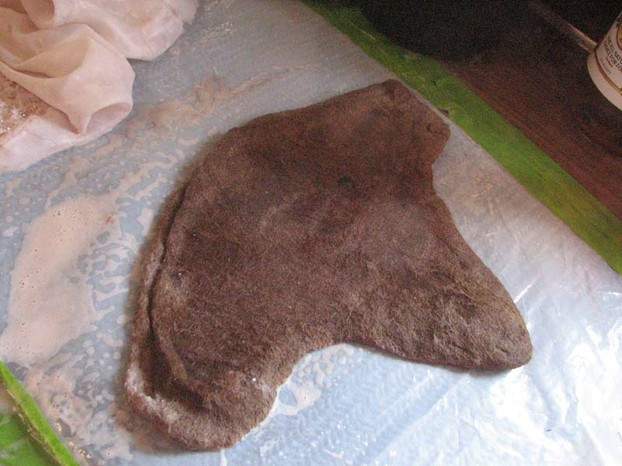 Remove Resist | 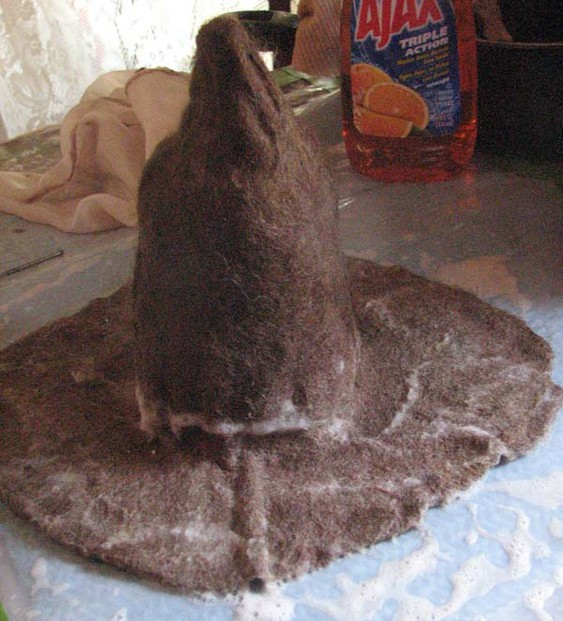 On a Form |
Rinse and Dry
Full the hat by rubbing it more, beating it on the counter, or rolling it. Be sure to change angles since it will shrink in the direction it is rolled in. Rinse all the soap out and give it a final rinse with a touch of vinegar in the water. Shape it and let it dry.
Wear your hat for any occasion and tell them you made it yourself!
Runescape Photo by Merch Gwyar and MFI


Updated: 10/07/2012, Ragtimelil
You might also like
How to Make a Felt BagHere's a basic tutorial on making a cute little bag that you could use for a ...
Detailed Clover Pom Pom Maker InstructionsStep by step how to photo tutorial for making yarn and wool pom poms with a p...
Disclosure: This page generates income for authors based on affiliate relationships with our partners, including Amazon, Google and others.


 How I Found My Free Family History Programon 09/05/2013
 Finding a Graveon 09/01/2013
 Do Border Collies Make Good Pets?on 08/11/2013
 Hubert Patey - an Indentured Servanton 08/02/2013


Hat Felt Comments
Yes, you get to make your own!
Thanks.
This is cooler than an in-game party hat!
I'll happily take the blame for this one, on so many different levels; but the talent is all yours. <3
Thank you. You can blame Jo and Paul.
Brilliant love it!
You know you want one, cariad. <3
LOL Merch Gwyar's hat ftw!
Paul, where? what?
I have a picture in it!
Sue - Yes, I cried when my hay guy told me they tossed a relative's barn full of hat and shoe forms. Making the forms is an art in itself!