How to Make a Needle Felted Pumpkin

by Ragtimelil

Fall is the time for pumpkins. Here's how to make a cute pumpkin out of wool. It's easy and fun.

Needle felting was originally designed to make commercial felt. A big plate of needles could do a sheet of felt at a time. The process could utilize synthetics and some non-wool fabrics The first use of commercial felt was in cushions and mattresses and from there spread to automobile carpets and even to embellish clothing.

In the early 1980s, David and Eleanor Stanwood experimented with using one needle by hand as a fiber art technique. Today, artists are creating sculptures, embellishments and shaped pieces with the needles while wet felting, the traditional method, is still popular to create flat felt pieces.

Needles and Foam

To do needle felting, the first thing you need is to gather your materials. You will need needles.The needles have barbs on them that pull the fiber down and interlock them with other fibers. The "working zone" of the needle is the bottom third starting at the point. You don't need to push the needle in beyond this point.

Needles come in gauges and configurations. The fewer barbs there are, the more control you have but the slower the process. Star needles have more barbs and produce a felt with more strength.

They are extremely sharp and do hurt if you jab yourself with them so do be careful. Older kids can do needle felting and there are holders like the Clover Felting Needle Tool that are a bit safer than just holding a needle. I normally use one needle since it gives me more control but it is a bit slower.


needle and foam

To protect your work surface, you will need a brush or a piece of foam. I prefer foam. You can use upholstery foam or buy a piece.


Wool

wool stuffing


You will also need wool in batts or in roving form. You can buy white wool and dye it yourself, or buy an assortment of colors. For the pumpkin, you will need an orange and green. It's handy to have some black and white and related colors as well.


Sun dyeing with Kool-Aid is a safe and fun way to experiment with dyeing for children and adults alike.

Starting to Needle Felt

felt balls
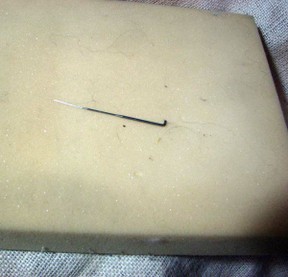
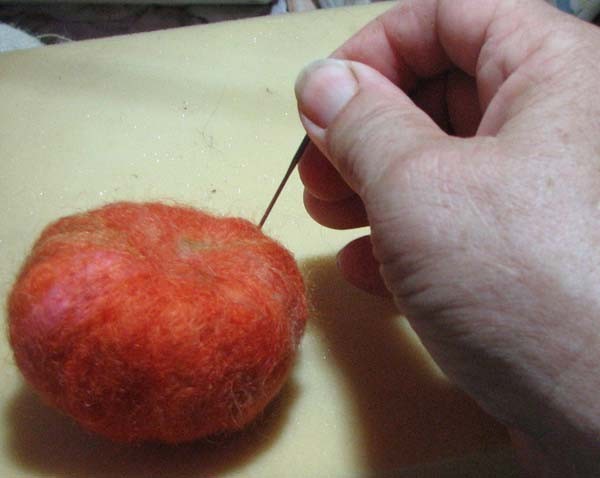
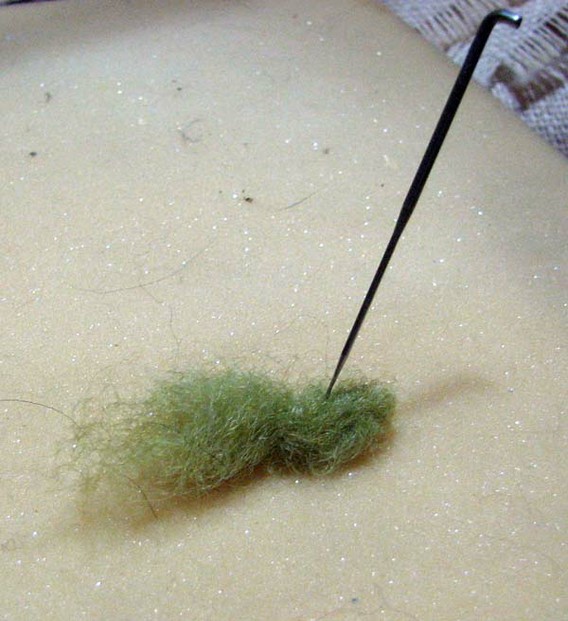
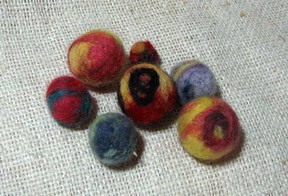
If you haven't done needle felting before, I suggest you take a bit of your wool, and roll it in your hands to form a loose ball. Practice making a ball, or any shape, really, with the needle being sure to go in and out in a straight line. The needles are easy to snap. You don't need a lot of pressure. The more you jab the wool with the needle, the tighter it will get. Watch out for your fingers.

Starting the Pumkin

beginning to felt

I actually use some fiber fill for the core of most of my needle felted pieces. What goes on the inside won't be seen so why waste wool?  You can use wool, of course. What ever you use, roll it in your hands to make a loose ball the size you want your pumpkin to be. Start wrapping strips of orange wool around the ball and poke it with the needle until it starts to hold together.


 Keep adding strips of fiber until it starts to take shape. You can also squish it with your hands to make it roughly the shape you want.

Once it is the shape you want, you can build up layers from top to bottom in ridges. Poke the edges more than the middle of each strip to make it bubble a little in the middle.


Poking with the Needle
Adding Layers
Adding Layers
Building Up Ridges
Building Up Ridges

The Stem

Now you're ready to add the stem with some green wool. I wrap the green around a smooth stick or skewer, slide it off, and poke it until it becomes stiff. You will have to keep turning it over since it has a tendency to stick to the foam. Don't jab too hard. Leave a bit of a fluffy tail that you can use to attach to the center top of the pumpkin.


Adding the Stem

Wrap Around a Stick
Wrap Around a Stick
Making the Stem
Making the Stem
Attaching Stem
Attaching Stem

Pumpkin Face

You can leave it the way it is as a cute little pumpkin, or you can add a face. The eyes are simply little balls of white and dark felted flat.


Pumpkin Face


Updated: 08/28/2012, Ragtimelil
 
Thank you! Would you like to post a comment now?
7

Heart Felt Comments

Only logged-in users are allowed to comment. Login
Ragtimelil on 03/13/2013

You can do a lot with felted sweaters too. We used to go look for pure wool sweaters that we could felt and make something else out of.

KathleenDuffy on 03/13/2013

That's a brilliant effect! I remember in the 1950s my sweaters sometimes came out 'felted' when they shrank! This is much more creative!

Ragtimelil on 09/05/2012

Your kindly welcome. Hope she enjoys her pumpkins!

katiem2 on 09/05/2012

Very nice, My oldest daughter took sewing classes this summer and is hooked. She'll love this fun fall pumpkin project. Thanks for the great step by step tutorial. :)K

Ragtimelil on 08/29/2012

Thanks. Yes it is. Just watch your fingers.

TiaMariaMartini on 08/28/2012

Great craft idea, something useful to do while I watch t.v.

Ragtimelil on 08/28/2012

I know what you mean. I had/have some felted handbags on etsy but I'm letting my stock dwindle. I don't have a studio now to do much. I can still make pumpkins though.

BrendaReeves on 08/28/2012

That is so cute. There's a lady on Etsy that makes felted handbags. They are gorgeous. I'm so tempted to learn how to do it, but I have to curb my habit of trying to do everthing.

JoHarrington on 08/28/2012

Indeed I do. :) Thank you.

Ragtimelil on 08/28/2012

Well, now you do. Anytime you want to make one, you now know what to do.


You might also like

Detailed Clover Pom Pom Maker Instructions

Step by step how to photo tutorial for making yarn and wool pom poms with a p...

Runescape Fans! Make Yourself a Hat for Runefest

Have you wanted a really unique hat that you can wear any time? How about mak...


Disclosure: This page generates income for authors based on affiliate relationships with our partners, including Amazon, Google and others.
Loading ...
Error!