Weaving looms can cost from a few hundred to thousands of dollars. If you've wanted to try weaving but didn't want to invest a lot of money, you can make a simple frame loom that you can use to make anything from wall hangings, to accessories or even clothing. All you need are some basic supplies that you might already have around the house.

How to Make an Easy Weaving Loom
by Ragtimelil
Ever thought you might like to try weaving but didn't want to spend a fortune on a loom? Try making a simple frame loom.
A Few Terms to Know
Warp: The string or yarn wound on the loom that supports the weaving
Weft: What you weave through the warp to create your weaving
To remember the difference think of this saying: Warp goes up and down, Weft goes weft and wright.
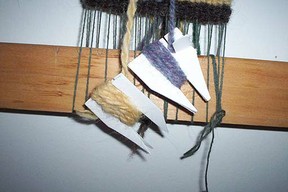
Shuttle: a stick used to wind the weft on.
Bobbin: a tool or way of wrapping the weft to keep it from tangling and to make it easy to pass through the warp.
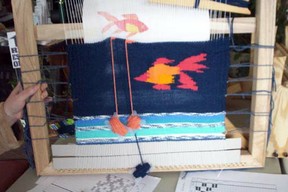
Tapestry: a style of weaving where the weft generally does not go from side to side but involves color changes. This is the technique used to make pictures or free form designs.
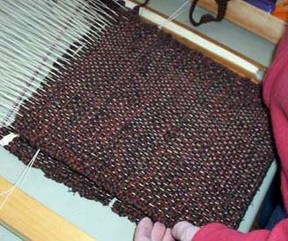
Plain weave: Weft goes over one warp thread and under the next from side to side.
Twining: A technique of finger weaving where the weft is crossed under and over each warp thread.
Selvages: The side edges of the weaving.
Shed: The opening made in the warp for the shuttle or bobbin to pass through.
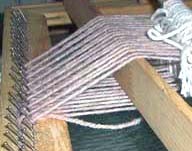 Stick holding open a shed
Loom #1
Basic Loom
You will need
Small finish nails about 3/4 to 1 inch long
String for your warp
Yarn for weft
A frame - you can use a picture frame, a canvas stretcher (from an art supply store) or make a simple frame out of scrap wood.
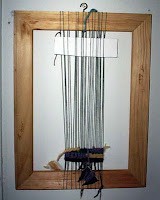
You can wind the warp snugly around the frame as in this photo, but it can make it harder to keep the warps even. It works fine if you are weaving tapestry with your fingers especially if you are using techniques such as twining or soumak.
An easier way to warp the frame loom is to put a row of nails across the top and bottom ends about 1/2 inches apart. Then make another row, also 1/2 inches apart but offset 1/4 inches from the row below.
Tie the warp onto the end of one row and wind around the pegs top and bottom. Hold your thumb on the warp after each nail to keep a good tension on the warp.The warp should be fairly snug to keep from stretching and sagging.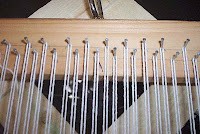
Ready to Weave
I use strips of cardboard so I will have room to tie off or have a fringe when the weaving is done.
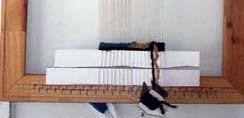
I do a row or two of twining or some other method to secure the warp when I cut it off. ( I know this is a really bad drawing, but my scanner isn't working at the moment.)
Now we're ready to weave.
Beginning to Weave
Tapestry Technique
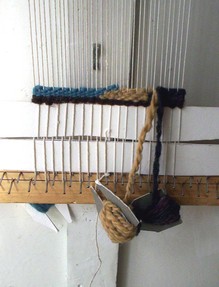
With your fingers, pick up every other warp for about 3-5 threads. Lift up and put your bobbin through between the upper and lower warps (a shed). You can leave the tail hanging, but not on the selvages. You can start over a few inches. If you are doing a wall hanging, it can just stay there. If you are doing another project, you can weave it in later. Release the warps and push the weft down with your fingers. Continue as far as you want with that color. Change color or reverse direction when you get to the edge.
Variation
String Heddles and Stick
Another way to create a shed for weaving is to make string heddles. A heddle is any device that separates the warp. In this case, every other warp has a string looped around it. The string loops can be grouped in bundles of 5 with an overhand knot.
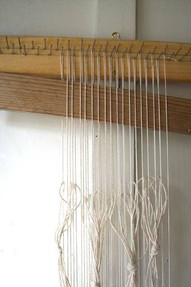
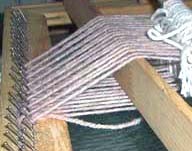
The stick goes under every warp that is not looped with a string. When you need to make one shed, pull up the string bundle and hook you finger under the warps. Pass your bobbin or shuttle through the shed. Continue across the weaving.
For the next shed, flip the stick on end.
About Weaving
Weaving is an activity that goes back to the dawn of time. There are many styles, techniques, and methods of weaving. One way is not necessarily better than another. This is just one way that I do things but if you find a way that is better for you, by all means, do it that way. I've changed my own methods over time as I've discovered new ways of doing things. You'll never run out of things to learn about this craft.
More About Tapestry Weaving
 | Weaving Tapestry in Rural Ireland: Taipeis Gael, Donegal The readers of this book will embark upon an engaging journey into the background and development of the tapestry weaving cooperative called Taipeis Gael, formed in 1993 in Glen... |
 | Tapestry Weaving I Tapestry is a pictorial weaving technique that can be woven on any type of a loom-even a simple self-constructed frame. This course includes technical considerations as well as ... Only $12.41 |
 | Kliot Tapestry Loom 20" Hard Wood- LACIS-Kliot: Tapestry Table Loom. Made of solid oak yet still lightweight; this weaving loom is easily assembled and disassembled without tools and sturdy enough for everything ... Only $55.37 |
You might also like
Detailed Clover Pom Pom Maker InstructionsStep by step how to photo tutorial for making yarn and wool pom poms with a p...
Runescape Fans! Make Yourself a Hat for RunefestHave you wanted a really unique hat that you can wear any time? How about mak...


 How I Found My Free Family History Programon 09/05/2013
 Finding a Graveon 09/01/2013
 Do Border Collies Make Good Pets?on 08/11/2013
 Hubert Patey - an Indentured Servanton 08/02/2013


Questions about this loom?
Do you mean of weavings or of the looms? I had some on facebook under Cardigan Mountain Art Association where I used to teach.
Do you mean of weavings or of the looms? I had some on facebook under Cardigan Mountain Art Association where I used to teach.
Thank you for the compliment. Yes, I taught a class in making these and weaving. We progressed up to 4 shaft looms and one student inherited her grandmother's floor loom. I like Shetland too. I used to have shetland-merino cross sheep. I still have some fleeces I'm working on.