One of the most beautiful scenes in the world is a misty waterfall and many artists have been inspired to paint them. Frederick Church was made famous for his waterfall paintings of Niagara Falls. In this lesson, I will show you how to paint a simple but pretty waterfall scene. I will also show how to paint a transparent rainbow. As usual I will be emphasizing traditional painting techniques as well as digital.

How to Paint a Waterfall Using the Android App LayerPaint HD
In this lesson I will show how to paint a misty waterfall and rainbow using the android app LayerPaint HD.
LayerPaint HD Interface
 LayerPaint HD Ellie Taylor Screenshot |
Explaining the LayerPaint Interface
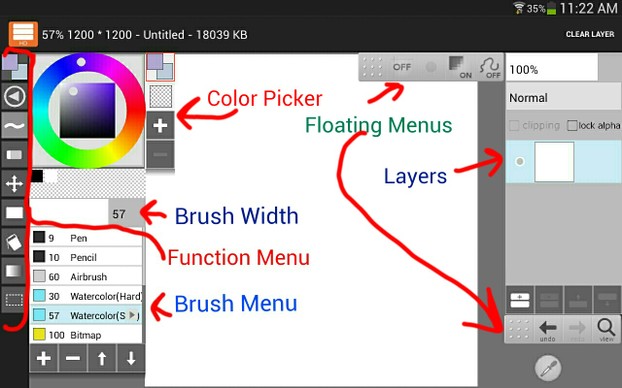
For this lesson I am using the android app LayerPaint HD. It has quite a few higher functions on it including layers, watercolor blending, and floating menus. You can arrange your interface by moving the floating menus around. The top floating menu has guides, a smooth edge option, and smooth line options. The bottom floating menu has the zoom function, undo and redo, and the eyedropper function. The brushes menu consists of pen, pencil, airbrush,hard and soft watercolor, bitmap brushes, a stamp brush with the android logo, and several scatter brushes.
The function menu has buttons to toggle the color picker on and off, the brushes menu, the erasers, a button to move the current layer, the layer button, paint bucket, gradient, and select area. Another feature of this app is pressure sensitivity which works nicely with my Samsung Galaxy Note 8 tablet. I used the Galaxy Note 8 tablet for this demonstration, but the app also works great with my Galaxy Note 10.1 tablet too. You can buy and download this app from the Google Play Store. There are two versions of it, LayerPaint and LayerPaint HD. The first version is simpler and doesn't have all the functions that this HD version has.
Samsung Galaxy Note 8 Tablet
 | Samsung Galaxy Note 8.0 (16GB, White) This is a very nice tablet and because of its smaller size, it is very convenient to carry with you everywhere. It only has 16 GBs of internal memory, but you can get an SD card and expand it by 32 or 64 GBs and it has app to SD function. |
1st Step
Canvas Size
 Canvas Size Ellie Taylor Screenshot |
Canvas Size
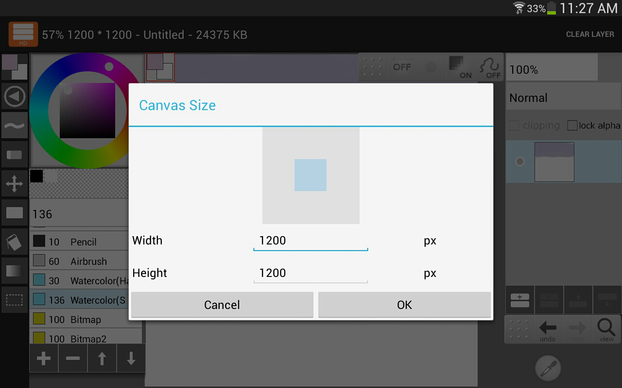
For the first step, I set the canvas size by choosing the canvas option in the main menu. The main menu can be found in the upper right-hand corner. I set the canvas at 1200 X 1200 pixels. You can set the size even higher than that.
Step 2
Brush Settings
 Brush Settings Ellie Taylor Screenshot |
Brush Settings
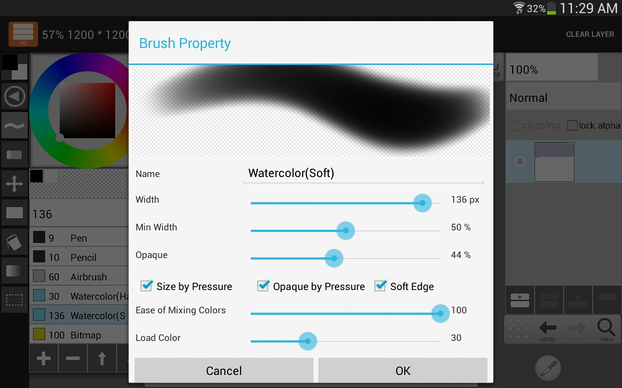
In this step, I chose the Soft Watercolor brush for the sky. On each brush, you can adjust the settings by tapping on the little arrow at the end of the brush selection. You can set the brush width, opacity, and blending.
Step 3
Painting the Sky.
 Painting the Sky Ellie Taylor Screenshot |
Painting the Sky.
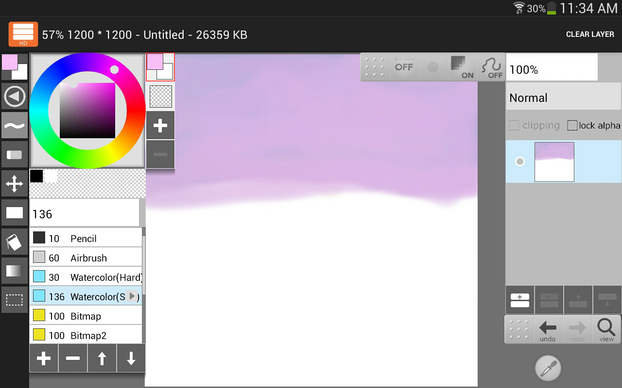
In this step I used the Soft Watercolor brush to paint the sky. I painted a bluish grey sky at first and then lowered the opacity and painted a rose color over the grey. This gave color to the clouds and gave it a misty look. When using traditional acrylic paint, I paint the first layer and allow it to dry. Then I use a dry brush technique to paint the rose color over the grey.
Step 4
Adding Mountains
 Adding Mountains Ellie Taylor Screenshot |
Adding Mountains
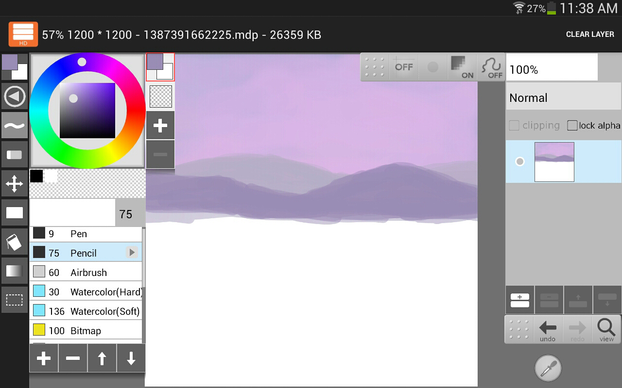
In this step I painted in the distant mountains with the pencil. I used a light grey for the most distant mountain and a darker purple for the closer mountain. I purposefully kept the mountains indistinct to keep the misty look.
Step 5
Painting the Distant Pine Trees
 Picking the Brush for the Trees Ellie Taylor Screenshot |
 Painting the Distant Pine Trees Ellie Taylor Screenshot |
Painting the Distant Pine Trees
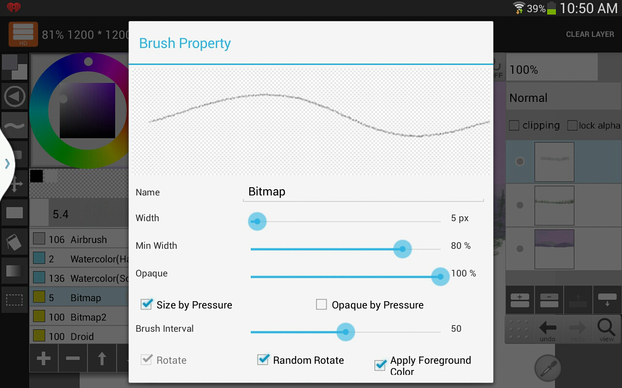
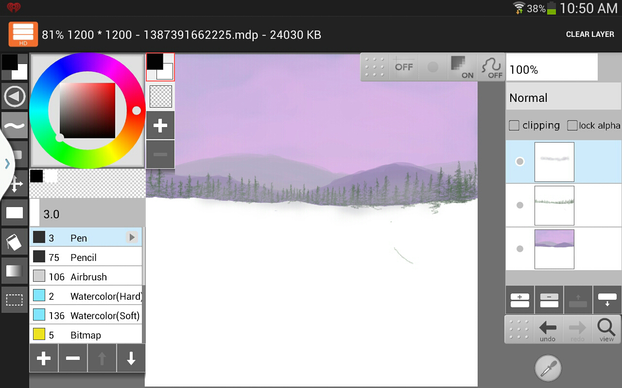
For the distant pine trees, I added a new layer and used the first bitmap brush and set it to a very small width. I picked a greyish green for the color. To make the trees, I first drew the trunk and then used a sort of scribbling stroke in a z shape. I started small at the top and expanded the tree branches at the bottom. When I paint with acrylic, I use a fan brush and follow the same z shape pattern.
After I painted in the trees, I added a new layer and added a light blue mist over the trees. To add the mist, I selected the airbrush and put it on low opacity. In traditional acrylic painting, I let the trees dry and then make a thin watered down light blue mixture and glaze it over the trees.
Step 6
Adding the Rocks
 Brush Settings for Rocks Ellie Taylor Screenshot |
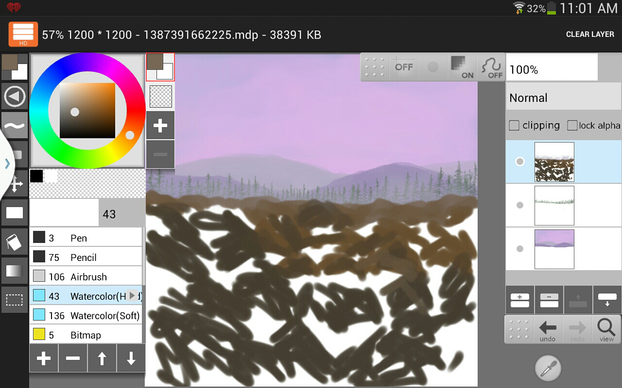 Underpainting the Rocks Ellie Taylor Screenshot |
Underpainting the Rocks.
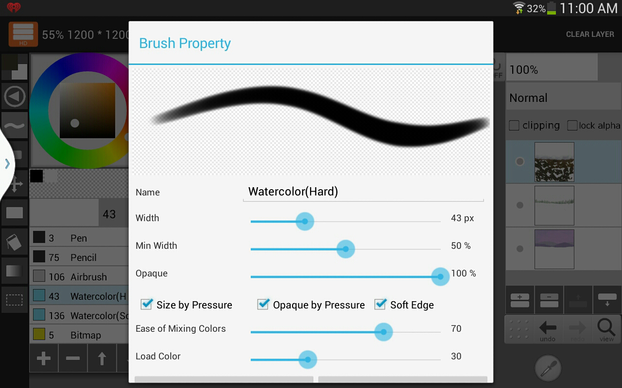
Traditional acrylic painting emphasizes underpainting and I like to work this way with digital painting too. In this step, I used the Hard Watercolor Brush to underpaint the rocks. I chose dark brown colors for this step. Since this is the underpainting the rocks don't need to look completed yet.
Step 7
Painting the Grass.
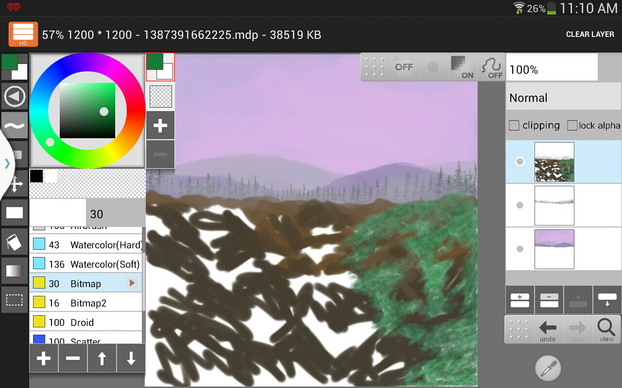 Beginning the Grass. Ellie Taylor Screenshot |
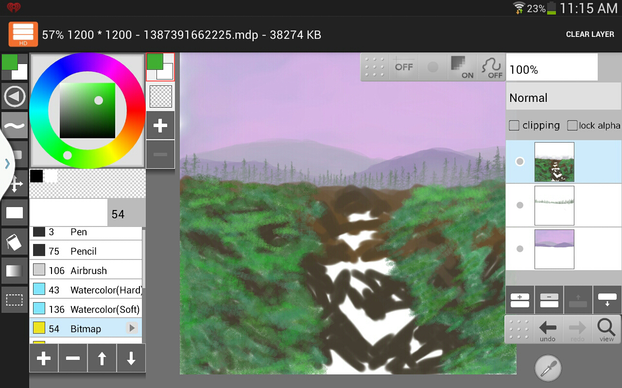 Painting the Grass Ellie Taylor Screenshot |
Painting the Grass
To paint the grass in between the rocks, I chose the bitmap brush again and set it to a wider width. Then I chose a Spring Green color and painted the grass in between the rocks. I made sure that I didn't cover up all the rocks. I also left the rocks in the middle uncovered because that is where the waterfall will be.
Step 8
Underpainting the Waterfall
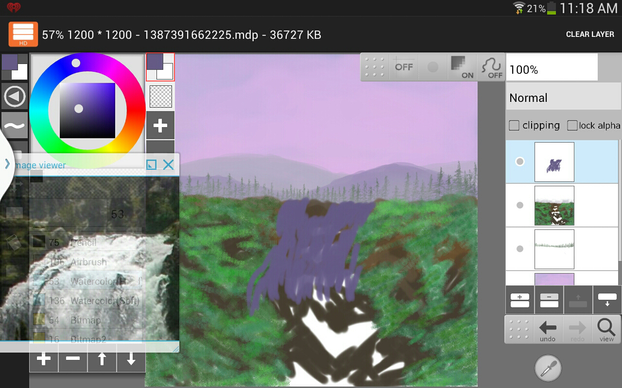 Underpainting the Waterfall Ellie Taylor Screenshot |
 Underpainting the Waterfall Ellie Taylor Screenshot |
Underpainting the Waterfall
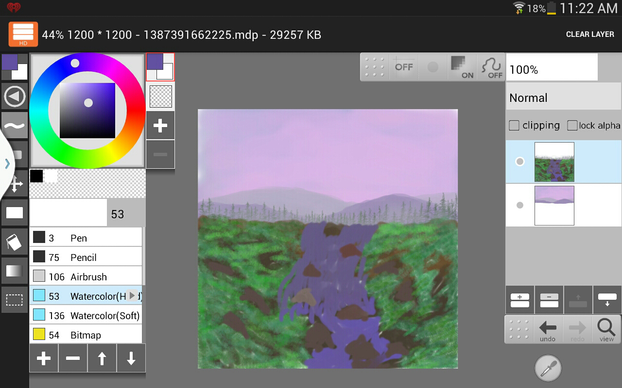
In this step, I underpainted the waterfall with the Hard Watercolor Brush. I used an Ultramarine Blue color for the waterfall. Again, I painted around the rocks to give the impression of water flowing around them. I used a reference photo that I downloaded from morguefile.com. Morguefile.com is a great place to find royalty free photos to use for references. I used an app called Floating Apps which is a windows type function and allows you to open the image viewer and see your photo reference. With this app you can see your photo reference while using your painting program.
Step 9
Highlighting the Waterfall
 Highlighting the Waterfall Ellie Taylor Screenshot |
 Highlighting the Waterfall Ellie Taylor Screenshot |
Highlighting the Waterfall
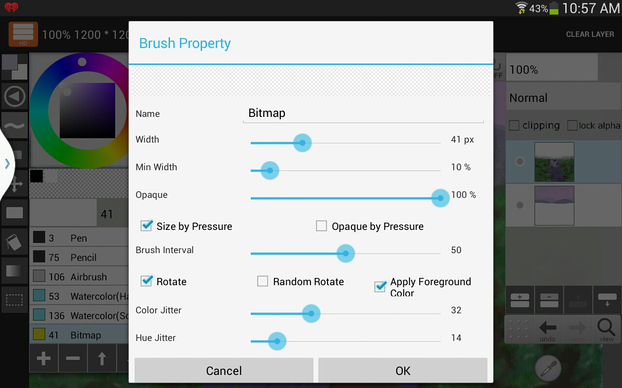
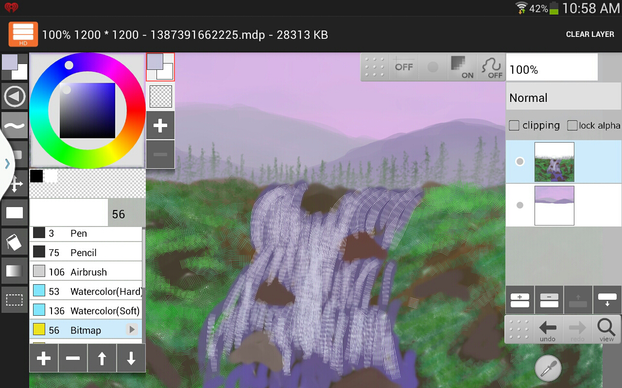
In this step I used the Bitmap brush again. I lowered the opacity and painted over the blue color with a very light almost white blue. I allowed some of the blue to show through. In traditional painting, I use a dry brush technique to paint the white highlights on the water.
Step 10
More Highlights on the Waterfall
 Blending the Water Ellie Taylor Screenshot |
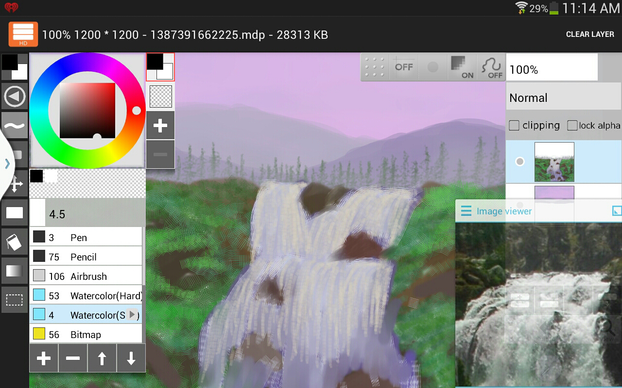 Adding More Highlights Ellie Taylor Screenshot |
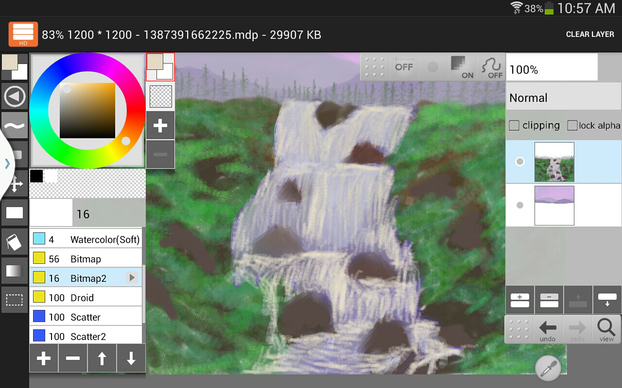 More Highlights Ellie Taylor Screenshot |
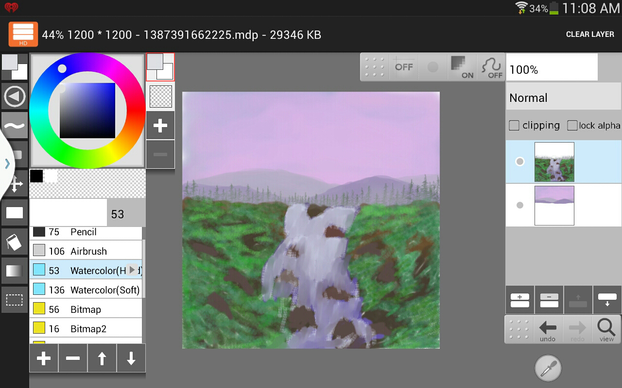
In this step, I blended the white highlights on the waterfall with the Hard Watercolor Brush. I set the Watercolor Brush on low opacity and it makes a good blending brush. Then I highlighted the water again with the Bitmap Brush. I used strokes that look like water flowing around the rocks. I also made a sort of stairstep look to show the water cascading off of different levels.
Step 11
Working on the Rocks
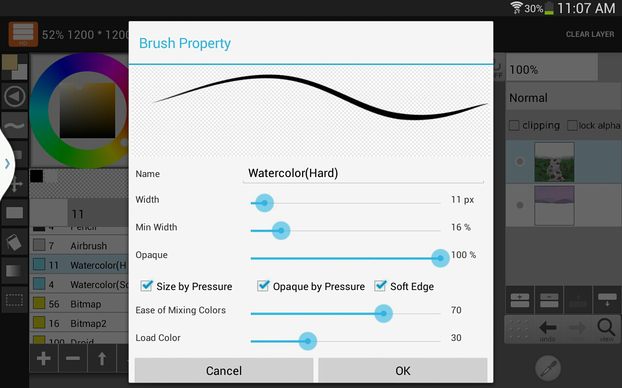 Setting the Watercolor Brush Ellie Taylor Screenshot |
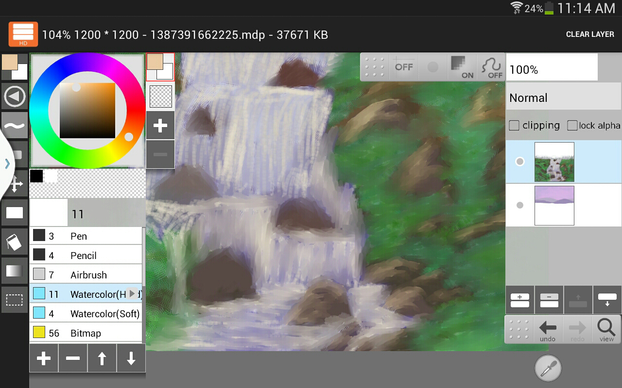 Highlighting and Blending the Rocks Ellie Taylor Screenshot |
 Final Rock Highlights Ellie Taylor Screenshot |
Working on the Rocks
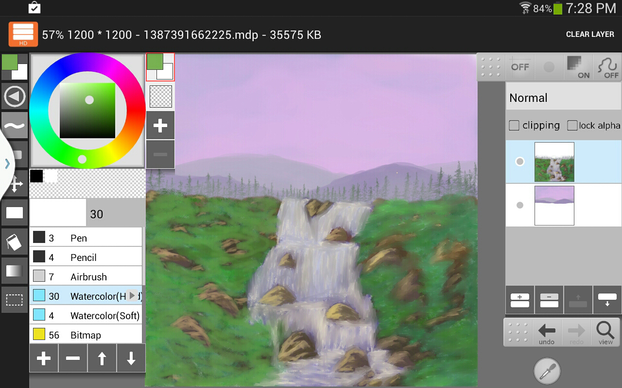
For these steps, I put highlights on the rocks, blended the water, and the grass. I set the Hard Watercolor Brush on low opacity and high ease of mixing colors. I chose a light orange for the highlights on the rocks. When I highlighted the rocks, I also shaped the rocks with that color. One thing to remember, when painting rocks is try not to make them look all alike. Things in nature are usually not very uniform. Using the Hard Watercolor Brush, I also blended the water with a very light blue and the grass with the Spring Green color. Also to make the water look like it was pooling at the bottom of the waterfall, I made white zig zag strokes across the top of the water and blended them.
Step 12
Additional Details
 Adding the Spray Ellie Taylor Screenshot |
 Adding the Fallen Tree Ellie Taylor Screenshot |
Additional Details
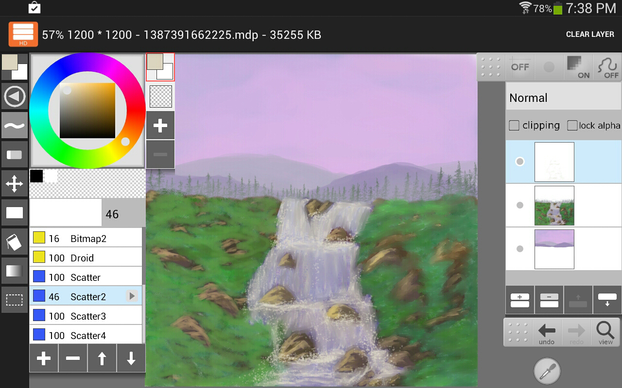
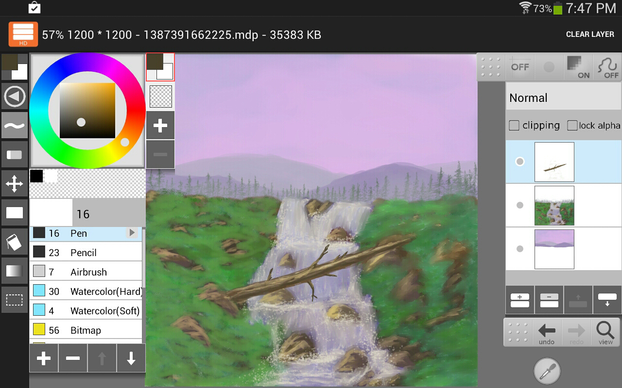
To finish off the waterfall, I added another layer and used the Scatter 2 Brush to make the spray on the waterfall. This made a nice addition to the waterfall and made it look more realistic. I also used the Pencil and painted in a fallen tree across the waterfall to add more detail to the painting. I used the Hard Watercolor Brush to highlight the tree.
Step 13
Adding the Mist and the Rainbow
 Adding the Mist Ellie Taylor Screenshot |
 Painting the Rainbow Ellie Taylor Screenshot |
Adding the Mist and Rainbow
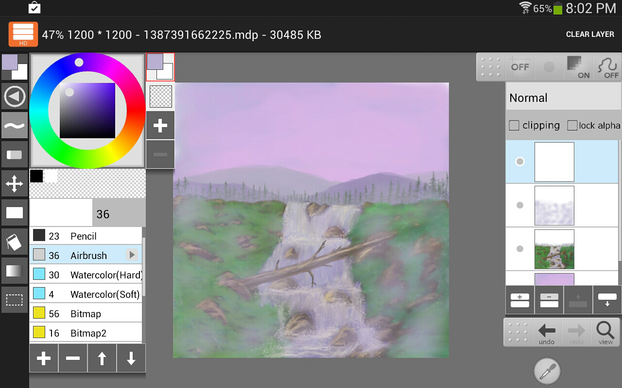
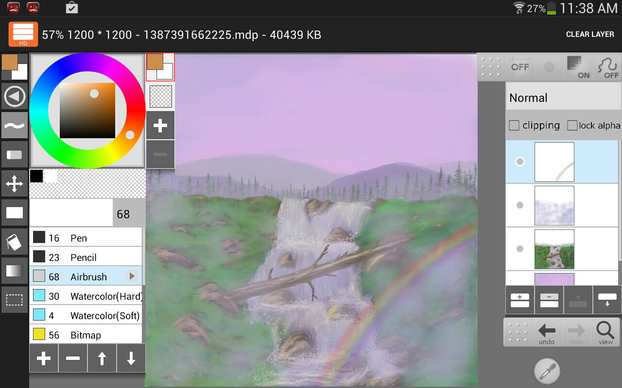
For the final steps, I added the mist and the rainbow. I added a separate layer and chose the Airbrush set on low opacity to paint the mist. I used a very light blue instead of a pure white because a pure white would make the painting too chalky looking. Then I added another layer for the rainbow. It is important to put the rainbow on a separate layer because if you mess up you can delete the layer and try again. To paint the rainbow, I used the Airbrush on low opacity. I made an arc with each rainbow color and overlapped them. To finish off the rainbow I added a little more mist over it.
For a traditional acrylic painting, I use a thin wash of light blue over all the rocks, grass, waterfall, and fallen tree. To paint the rainbow, I use thin washes of overlapping color. On actual canvas there are no layer functions so I try to not mess up on the rainbow.
Step 14
Finishing Up
 Merge Layers Ellie Taylor Screenshot |
 Final Picture Ellie Taylor Screenshot |
Finishing Up
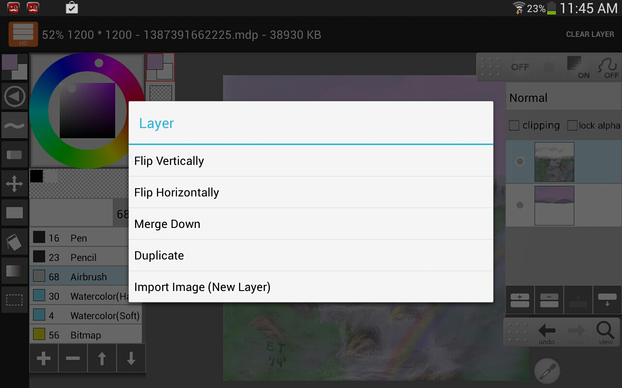
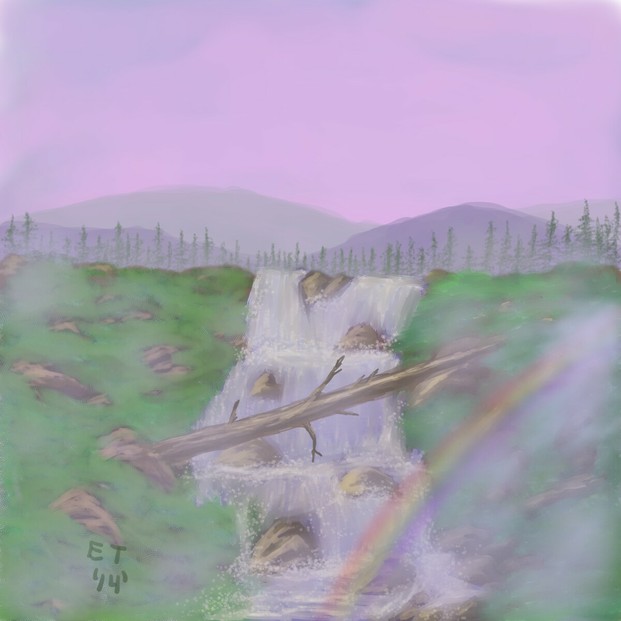
For the final step, I merged all the layers. I opened the main menu tab, selected the layers option, and selected the merge down option for each layer until all layers were merged. Then I signed my name on the painting.
So there you have it, a simple little misty waterfall picture. Layerpaint HD may not have a lot of brush choices, but it has some very nice features like the Watercolor and Scatter Brushes.
Good Books on Painting Waterfalls.
 | Secrets of Acrylic - Landscapes Start to Finish (Essential Artist Techniques) This book has instructions on how to paint waterfalls and rainbows and other landscape features. Jerry Yarnell is my main painting influence and I think he is one of the best instructors that you can find. |
 | The Complete Guide To Painting Water This is a good book on painting different kinds of water including waterfalls. |
An Artist to Study
 | Frederic Edwin Church: 75+ Hudson River School Paintings He was one of the best waterfall painters of all time. This is a Kindle artbook and they are a very nice and inexpensive way to see the collected works of many famous artists. You can download the Kindle app on your android tablet or ipad. Only $3.95 |
Android Kindle App
 | Kindle for AndroidOnly $0.0 |
You might also like
OpenAI and WatermarksPlay a little, work a little, be inspired a little, and all the while use the...
Gorjuss Girls Merchandise from Santoro LondonBy Mira at Wizzley. Gorjuss journals, notepads, zip purses, dolls, mugs, and ...


 Painting a Cat in Infinite Painteron 03/23/2016
 Painting Light and Shadows with Serious Painton 10/14/2014
 How to Paint a Snow Scene Using the Android Painting App, ArtFlowon 09/30/2013
 How to Paint a Fall Scene Using Sketchbook Pro for Android Tabletson 09/04/2013



Comments