Basic But Devine Yeast Bread Recipe - My Mother's Pride And Joy

by Jerrico_Usher

If you love the smell of delicious bread cooking, that Hostess bakery smell you can smell from your car, like fresh dounuts baking, then this will knock your socks off!

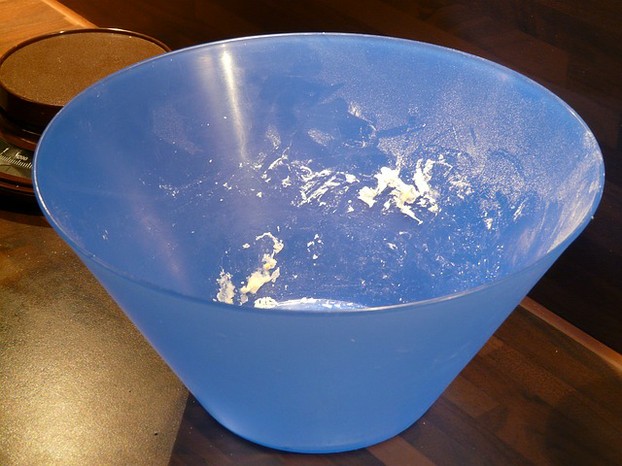
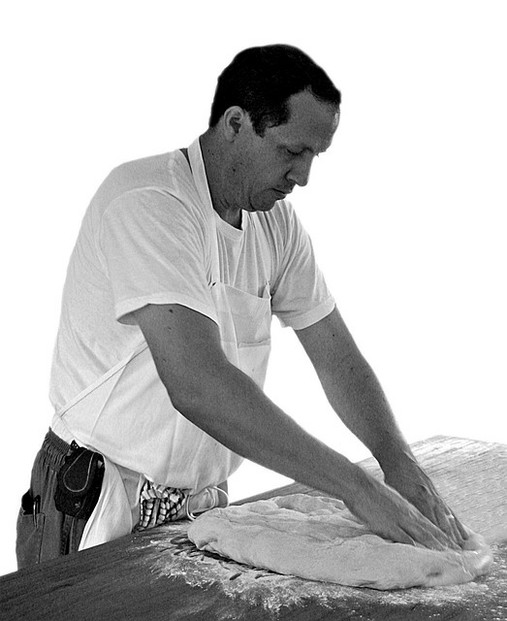
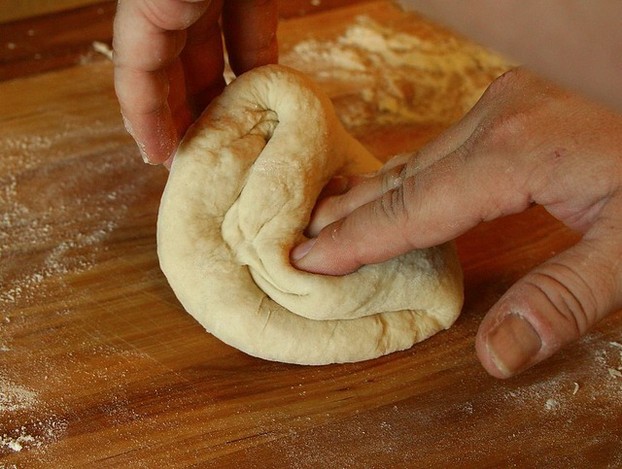
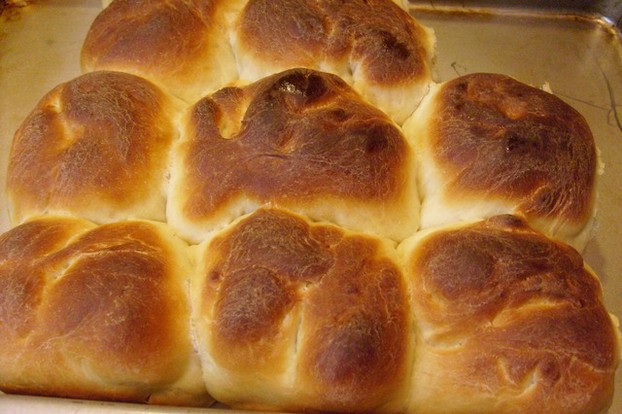
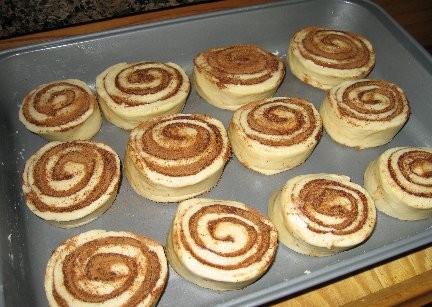
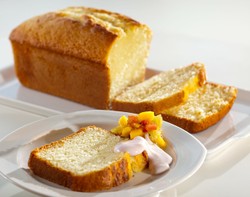
Growing up my mom cooked a lot of great dishes but there was one that stood out every time. Her basic bread- we just called it "the shizzle ma nizzle"...

This bread was made every holiday, and pretty much every weekend. When I grew up and moved out then came to visit the first thing I'd often smell was that bread. That smell is so penetrating and delicious- like a basic instinct, like baby powder brings your memories of being a baby, even if just the "feelings" you had not visual memory- this bread takes me way back.

Do You Smell That? Oh Wow, Yes, Why Yes I do... That's Amazing, What Is it?

That's Home Town Bakery Fresh Bread Cookin'
It Tastes Twice As Great As It Looks!

Introduction Continued...

If my mom even thought we (me or my two brothers) were coming by, she'd get to work baking that bread- she knew also that just mentioning that she was making it would trump any excuses we had not to come by.

I think she got this out of a Betty Crocker recipe book and tweaked it, rather not her but her mother as it's been passed down from mother to daughter, to grand daughter for 4 generations (I heard).

Although she has no grand kids (yet, but I have a "bun in the oven now we hope is a girl") she would often pass the recipe to mine and my brothers girlfriends as a gesture and a way to tell the girl, "just bake the bread hunny, just bake the bread; if he's upset, has a long day at work, or needs a hug, just bake the bread... don't forget the cinnamon and raisins"...

Are You More Of A Cook From TV Person?

Here You Go... (my personal recipe below, this is a lot like mine so it should help you visualize the steps)
Save Your Bread's Freshness!
FoodSaver V3020 Vertical Vacuum Sealing System With Starter Kit

The FoodSaver V3020 Vacuum Sealing System keeps food fresh up to 5x longer based on buying on bulk, on sale and preventing waste. The convenient vertical design saves ...

Ad
Basic Yeast Bread (and a few twists)

Basic Yeast Bread (and a few twists)


Prep time 20 min  -  Total time 80 min
Ingredients for 10 servings
5 3/4 to 6 1/4 Cups of Flour  • 2 Pkgs of Active Dry Yeast  • 2 Cups of Milk  • 1/3 Cup of Sugar  • 1.3 Cup of Shortening/Lard (Crisco etc...)  • 2 Teaspoons of Table Salt  • 2 Eggs (leave out until they are at room  • Temperature- NOT COLD)

Step 1:  Prepare The First Bowl (Preheat oven t...

Step 1: Prepare The First Bowl (Preheat oven to 375 Degrees)

Combine:

Milk, Sugar, Salt & Shortening in a large bowl.

Heat in the Microwave on High for 21/2 to 3 Minutes.

The Liquid Should Be Very Warm (between 115 - 120 degrees) But Not Hot Enough To Burn Your Finger. Keep An Eye On It Checking Every 30 seconds.

While that's nuking, go to the next step (flour/yeast)


Step 2: Flour and Yeast Marriage

Mix the yeast with 2 Cups of Flour (sift mixture well with a fork)

Set Aside


Step 3:  Blend The Two

Step 3: Blend The Two

Mix the flour/yeast mixture with the liquid mixture but do so slowly, adding a little (of the flour) at a time to assure everything mixes well and doesn't cause lumps (some lumps ok).

Blend for 2 minutes on high.

Add in the eggs and blend for another 2 minutes on high.

Add remaining flour and mix with a wooden spoon until semi-solid.

Knead the dough into a ball. Add flour to the mixture and coat your hands as needed to avoid stickiness. Do this until the mixture can be removed and put on a cutting board and continue kneeding until dough is pliable.

In a spacious (compared to the size of the dough ball) bowl grease the sides with shortening and put the dough ball inside it.

Cover with a towel and let rise for 1 hour.

After an hour or so, punch a hole into the middle (to remove excess air).

Flour up the cutting board and put the dough on it.


Formatting Bread: Loafs

Formatting Bread: Loafs

We usually pinch off about 1/4 of the dough and roll it into a ball then shape that into a small "loaf". Place this inside a bread pan that's been greased up (shortening) and cover with a towel- let rise for another hour or until it breaches the parameter of the pan (loafs out to look like bread).


Formatting Bread: Dinner Rolls

Formatting Bread: Dinner Rolls

Pinch off a small chunk of the dough, about the size of a golf ball and roll into a perfect ball.

Place on a greased cookie sheet about 2 inches apart in all directions. Your going to cover this with a towel and let rise for another hour (or until desired size), 2 hours max.


Formatting Bread: Cinnabuns

Formatting Bread: Cinnabuns

If you'd like to make some sweeter, more yummy cinnamon rolls there's a few cool ways to do this.

Take a good chunk of the dough and roll it out like your making pizza dough. Using a knife, cut off the edges until you have a perfect rectangle (horozontal).

Recycle edge pieces back into the rest of the dough and kneed it in.

Spread your favorite butter over the top of the square dough in a semi thick layer (not too much).

In another bowl mix together 1 to 2 ratios of cinnamon and sugar (you can alternatively use brown sugar as well- experiment, that's the fun of it!).

On the butter sprinkle the cinnamon/sugar mixture. Don't be stingy, when your done the top should look a nice golden brown but you should still see the dough shine through.

Roll the dough into a log and pinch the long edge to seal the log into a solid log.

Next, cut the log every two inches into "buns"

Lay the buns on a greased cookie sheet and cover with a towel to let rise for 1-2 hours.


Formatting Bread: Cinnamon Rasin Long Loaf Braided

Formatting Bread: Cinnamon Rasin Long Loaf Braided

If you want to make a fancy delicious braided loaf, roll a good amount of dough into 3 thick ropes. Lay side by side vertically. Pinch the bottom of all three together to create an end seal. Braid the "strands" like you'd braid hair- layer the last one over the next one, then the other side do the same and keep going until you have a braid- pinch the top like you did the bottom and put this in a long bread pan. Let rise for 1-2 hours then bake.


Tips: Spice It Up!

Tips: Spice It Up!

You can make all three with one batch although if your planning loafs I'd double, maybe triple the recipe (either all at once or just repeat it 3 different times (make the first batch, let rise, start second, and so on).

The smell this will permeate in the house while it's cooking is to die for. You wouldn't think so with such a basic recipe but just wait- especially the cinnamon rolls!

We often add raisins to the cinnamon buns to create raisin cinnamon buns. You can also add raisins to just the basic bread (after it's in dough form you roll it out and push in raisins then fold, fold, fold until it's a nice loaf or pinch off into rolls.

You can experiment with other flavors and spices to make any kind of bread you want. The beauty of this recipe is that it starts off VERY Basic, (but even basic is delicious and an amazing aroma therapy for the home- trust me people will want some just smelling it.

Goes wonderful with beef stew and just about any dish.

My mom makes this every holiday (I suspect she invites us early so we can indulge in the "baking" smell it leaves- it's pretty potent, like a bakery!


Baking:

Baking:

Once you have all your rolls, loafs, braided loafs, cinnamon buns, raised for the second time, your ready to bake and start the air freshener stage.

Space permitting, you can bake everything at the same time. If you don't have room, just bake them in segments- the remaining pieces will continue to rise.

You don't want to rise your bread too much because at some point they will get so big that just walking across the room or putting a cup on the counter will cause it to fall. So be careful :)

Bake at 375 (adjust for mountain elevations) for about 45 minutes to an hour. You'll know it's getting close to done when you start to daydream about sugar plums and fairies, and your guests are salivating wondering where the wonderful smell is. Some have asked us if there was a bakery near by because it smells the same way!

Check on it when this happens, you want it to bake to a golden (dark but not too dark) brown.


Post Baking Prep

Post Baking Prep

Once this is done, take it out of the oven but before you remove anything from the pans, take a stick of butter and start buttering the tops of the buns, loafs, etc...

The butter will soften the tops and infuse a delicious buttery taste into the bread that will last even after it cools (but it won't be wet or sticky).

Pour the buns out of their pans and the loaf and cover with a towel to cool off slow enough to remain extra soft when cooled. If they cool down too fast they may get hard.

We usually cut the buns in half and butter them inside before they cool.

They taste amazing hot/warm! When they cool make sure to store them in ziploc bags or they'll get hard after a day. You want to keep these babies soft.

My favorite thing to do when they are a day or more old is to butter them (same with bread slices) and put them in the microwave for about 20 seconds- this reinvigorates them making them soft, moist, and delicious again (although they are good too cold, but that's my preference (hot).

Recipe  4.5/5 Stars (2 Votes)

Did You Try This Recipe?

Would You Reccommend it?
  Display results
Thank You For Voting, You So Rock!

Heres Some Of My Other Articles

Have you ever wondered why milk makes you tired? How about why the milk has to be warm? There is more than meets the eye here...
Do you need a new way to cool your drinks without diluting them? Try this...
Don't like the taste of Alcohol, lemons, sour vegitables, sour fruits? Take this berry and they will all taste sweet as rasins!
In the not so distant future, you may be shopping online for a new type of "food recipe", one that comes like an eBook right to your food printer.

You can make this bread in a bread maker too!

Just about any bread recipe can be done in a bread maker.

This isn't the most fun way to go (because part of the fun is the mixing, kneading, waiting etc...) but if time is a factor you can pour all the ingredients into these machines and let it do all the work.

When it's done you smell all that delicious aroma.

I'd make this bread JUST to smell up the house actually...

It's one of my favorite parts of making fresh bread at home!

I hope you enjoy this recipe.

Take a look at my other articles if you want to read some fascinating facts on various things I couldn't help but research and share!

Jerrico

Updated: 02/06/2013, Jerrico_Usher
 
Thank you! Would you like to post a comment now?
8

Comments

Only logged-in users are allowed to comment. Login
Jerrico_Usher on 02/26/2013

I think my mom got this from her mom and she probably got it from a cook book somewhere- but it's been a traditional bread in our family for many decades (long before I was born). This bread smells so wonderful I'd cook it as an air freshener!

Jerrico_Usher on 07/13/2012

Thanks Jshea :) this bread is basic but smells/tastes amazing!

JSheaForrest on 07/13/2012

There's a phantom scent of bread floating around me as I read this article, lol. :D There's nothing quite like the smell of baking bread. Mmm, heavenly. I'm going to give my mom this recipe and subtly hint that she should make me some in her bread machine. ;)

Donna_Cosmato on 04/17/2012

Oh, wow! Just reading this made me crave some homemade bread! Recipe sounds great and fortunately my mom, the baker in the family, is coming to visit soon. Can't wait to try this one!

Jerrico_Usher on 04/16/2012

(I'm eating mine as I write this next to a big bowl of my fiance's mothers delicious an unique spaghetti :)

LadyGuinevere on 04/16/2012

I love homemade bread.

Jerrico_Usher on 04/14/2012

Very true 2uesday! Especially food that just smells grand as it cooks right!? :)

whitemoss on 04/10/2012

I feel your enthusiasm! I can smell the bread!

Jerrico_Usher on 03/30/2012

Thank you Brenda! We're going over there this easter and I've already told her I want that bread momma! can't wait!

BrendaReeves on 03/30/2012

You were very lucky to have a mother that cooked such good bread and memories. I haven't baked bread in years. It's time to give it another try.


You might also like

Focaccia Bread Recipe - The Real Thing!

Step-by-step video instructions of a focaccia bread recipe that will make you...

Types of Bread Making

This article will explore the quirky do's and don'ts of making quick breads.

Cornbread Recipe for Anyone Who is Afraid of Heights!

Cornbread can be as daunting a prospect as mountain climbing. Here is a cornb...


Disclosure: This page generates income for authors based on affiliate relationships with our partners, including Amazon, Google and others.
Loading ...
Error!